Lot Management
Lot Definition
A lot can be defined, in Ascent, as a way to identify a quantity of a specific item, purchased or manufactured, in a way that makes it different from another quantity of that same specific item. Each lot of material would be for a specific item number, have a created date, and an expiration date. A lot could be split up to reside in different locations. A lot can also be received into inventory multiple times, as a supplier could manufacture the lot and ship it over several days to your company.
In Ascent, you can choose to have lots or not to have lots. Once lots are turned on, they exist for ALL items. You cannot have some items with lot tracking and some others without lot tracking. Some companies turn lots on even though only a small percentage of their items require lot tracking. In this case, they would always accept the default lot that the system created when first creating the item on the item master file.
Admin Settings is the place where you state whether lots will be turned on or not.
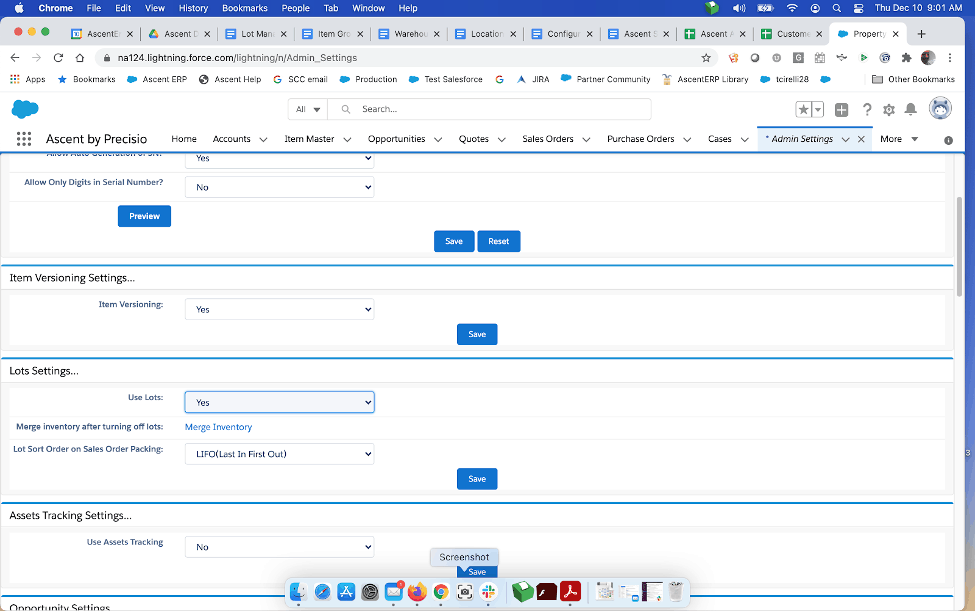
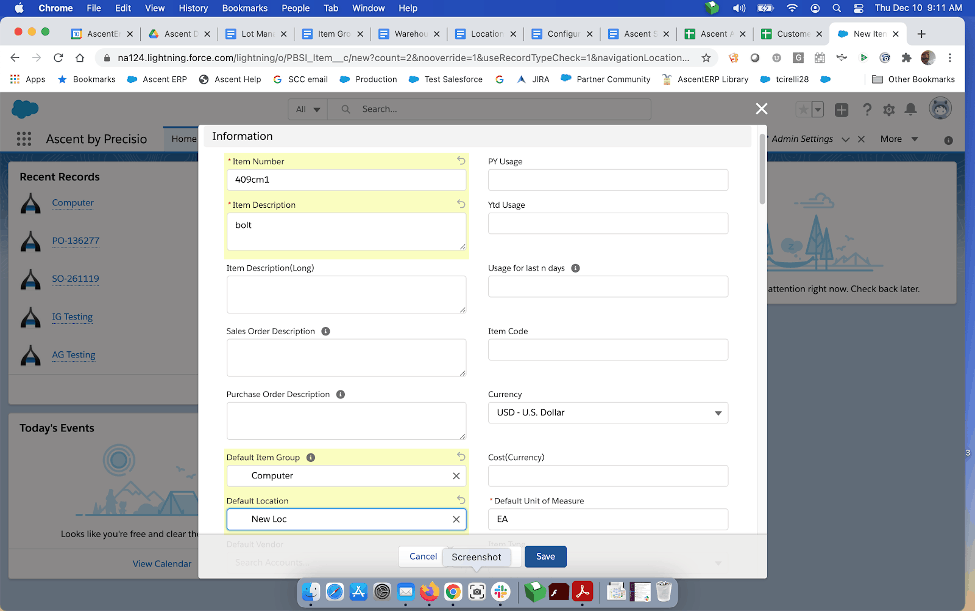
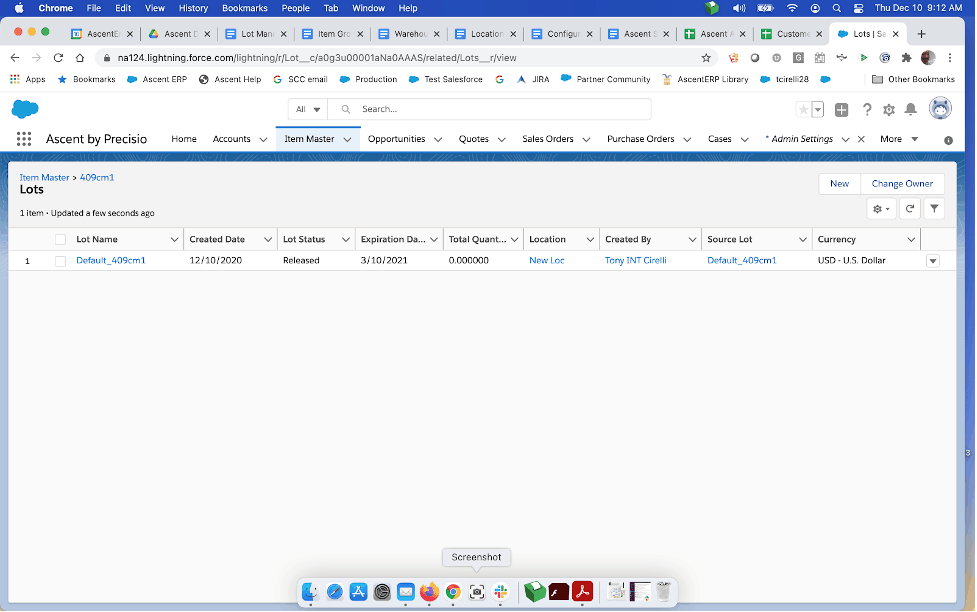
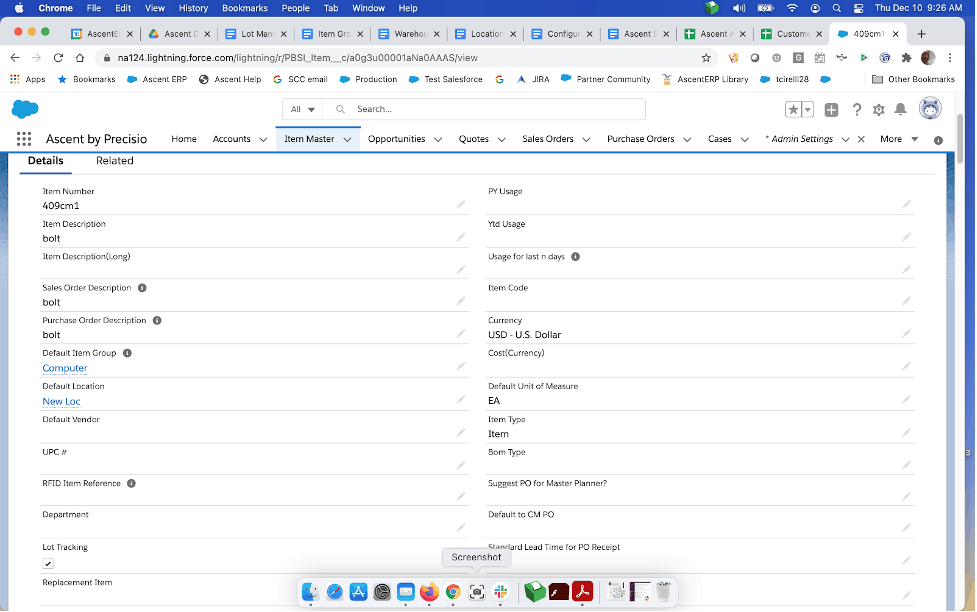
If it is set to “Yes”, then when a new item is created, a default lot record is also created for that item, using the item name as a component of the new lot’s “key”. For example, if the new item is named “409cm1”, then when you create the new item the lot name will be the word “Default” followed by an underscore, followed by the item name.
If lots are turned on in Admin Settings, there is a way, when creating a NEW item, that a lot will only be created for that item when there is some inventory activity. On the item master, there is a field called “Lot Tracking”. If when initially creating this item, this field is set to blank, then no lot record will be created for this item.
Turning off Lots and Merging Inventory
If your company has been using lots, and then determines that tracking inventory at the lot level is no longer required, then there are settings you have to address in the Admin Settings screen in order to be able to turn lots off.
First you would change the Use Lots: from Yes to No, and then hit Save. Second, you would click on the option for “Merge Inventory after turning off lots” and select “Merge Inventory”, which will take every quantity of the item on every lot, sum all of them up and put the total quantity of this item into one new lot. After you click the “Merge Inventory” link, it will show you only one lot for one location. The new lot name is the same as the location name.
You will receive an email when the merging operation is completed. “The batch Apex job processed 1 batch with 0 failure.”
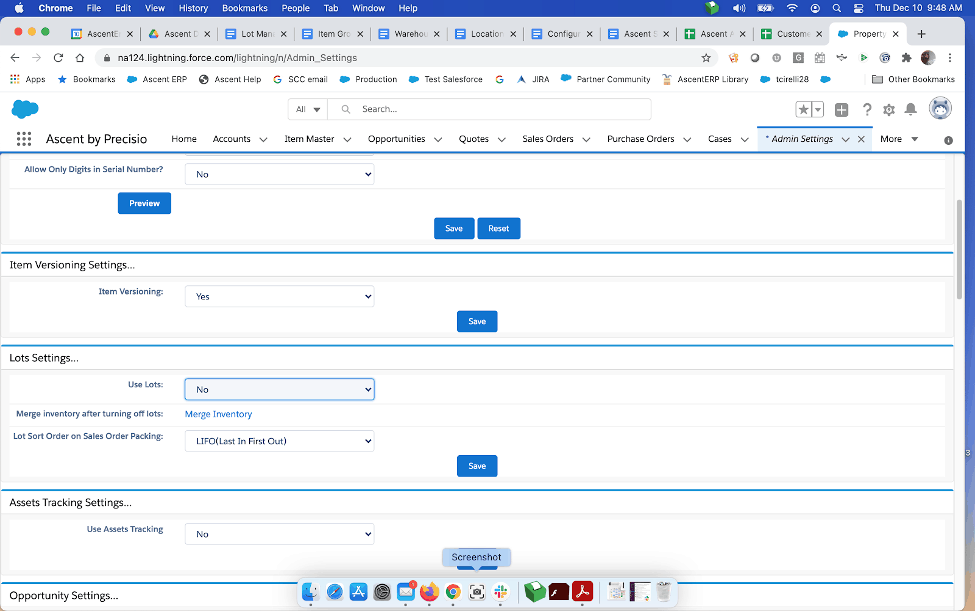
Warning: If there are multiple lot records in the system, after you merge inventory, all the existing lot records will change to be the same new (default) lot. It happens to all existing transaction records: Shipped Sales Order Lines, Received Purchase Order Lines, Completed Production Order Lines, Invoice Lines, Movement Lines, Count Journals, etc. For example, you have Movement lines with Lot name “AAA-001” and “AAA-002” for the item A in location AAA in your system before merging inventory. Now, after merging inventory, the Movement lines record will only show you Lot “AAA” for all existing movement lines.
Adding a New Lot
There are several ways to add a new lot into Ascent.
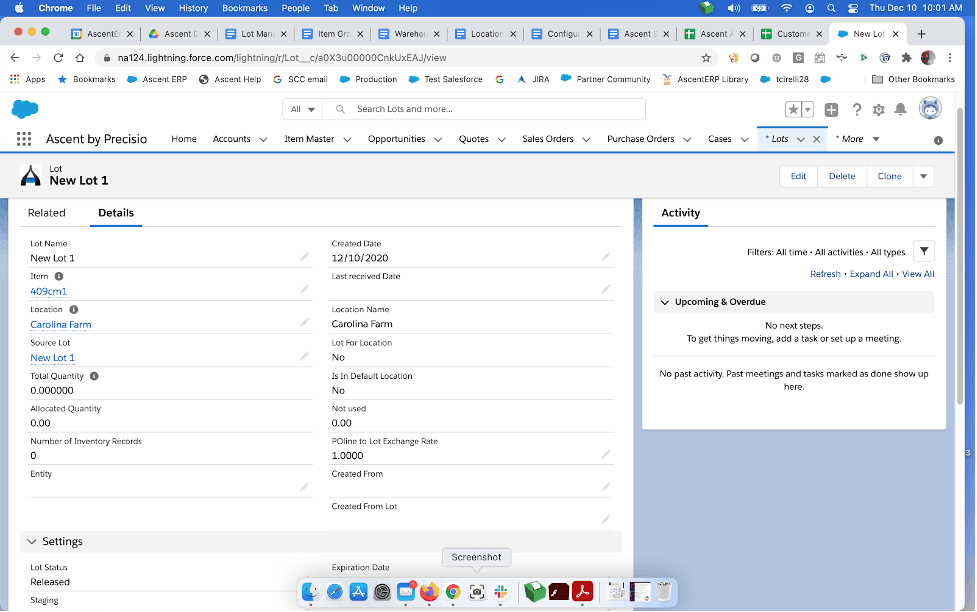
- One way is to go to the Lots tab, and select “New”. You’ll then be shown the following screen, of which only Lot Name, Item and Location are required
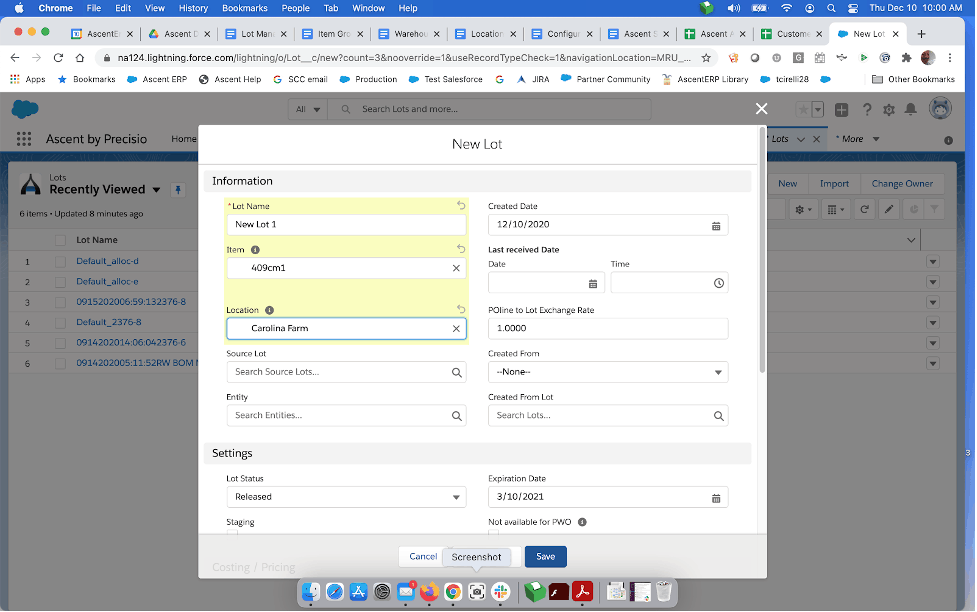
After hitting “Save”, the results are as follows. The Expiration Date will default to 90 days after the date it was created, unless the item itself has “No Lot Expiration” checked or Default Expiration Days equal to something other than 90 days.
- Another way would be to manually add the new lot while in the Item Master tab. You would scroll down to the Inventory Adjustments section, and click “Create Lot”
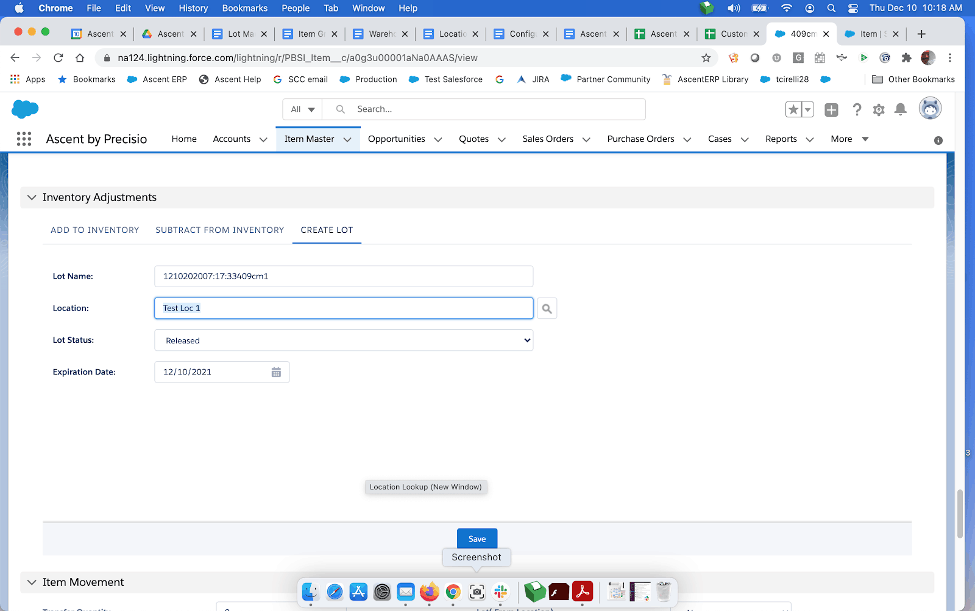
Ascent will derive a lot name for you, based on the month, day, year, hour, minute, second and the item number – mmddyyyyhh:mm:ssitem name. Or you can manually key in a lot name of your choice. You can change the Lot Status: from “Released” to “Quarantined”, based on your needs. The expiration date can also be overridden.
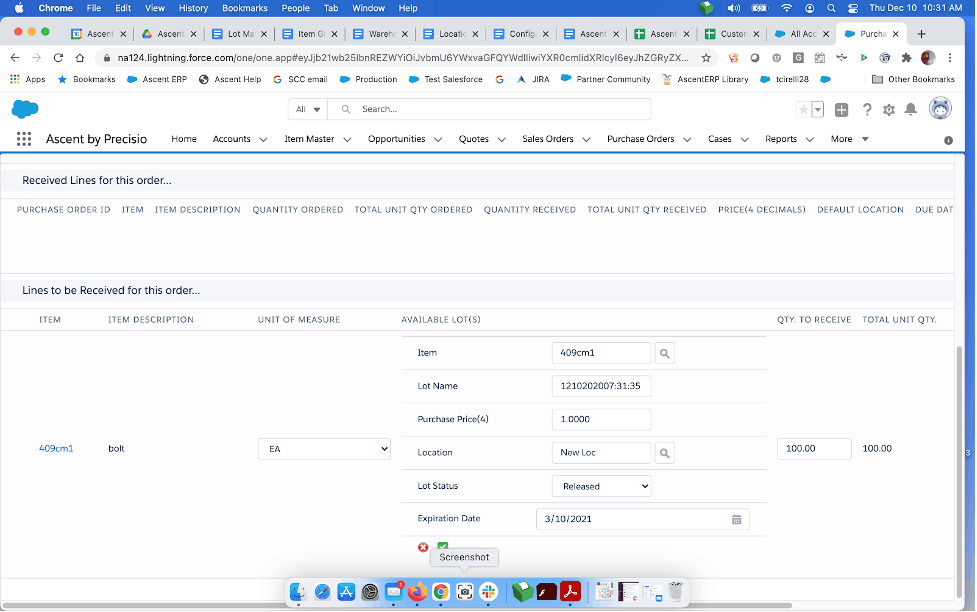
- You can also create a new lot when receiving a purchase order.
After creating and receiving the purchase order, you can click the green plus sign (+) under Available Lot(s), and the following screen will appear. You can override the Lot Name, if you wish, change the Location (which would come from the Default Location on the item master), Lot Status (the default would come from the item master, but you can override it), and finally, the Expiration Date, which would be derived based on the item mater rules for this item. When done, select the green checkmark, which acts as a “Save”.
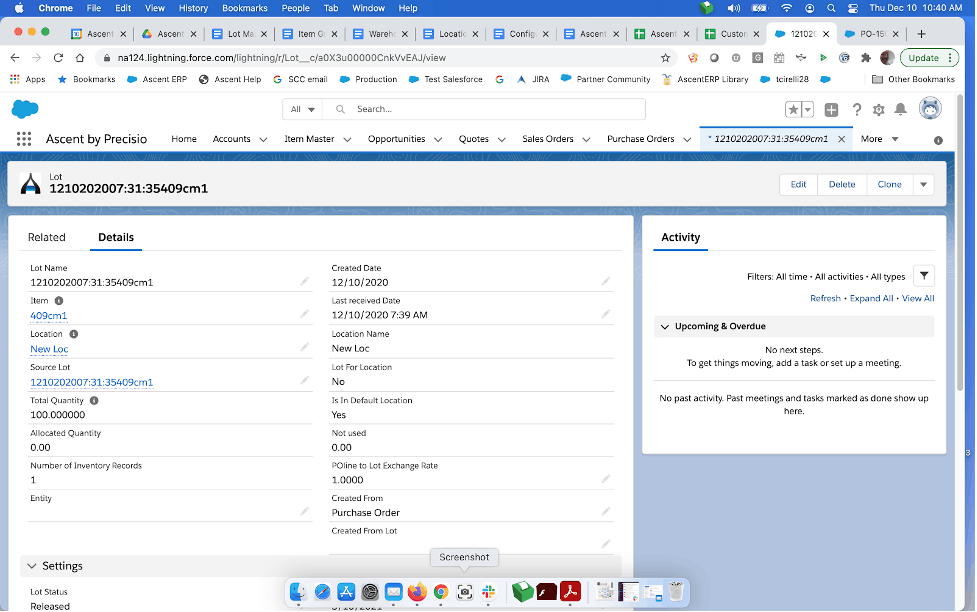
The received lot would look like this:
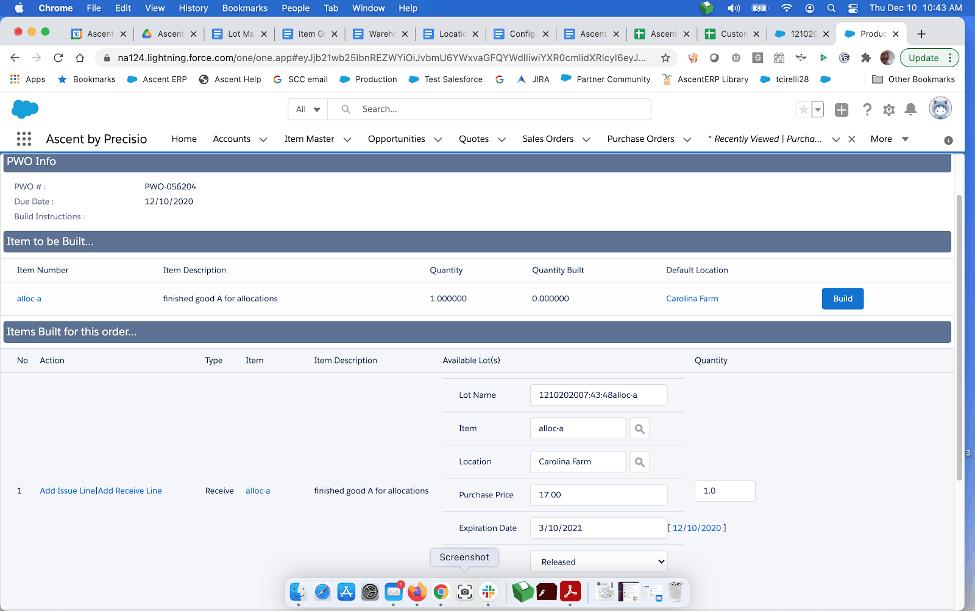
- Additionally, you can create a lot via the Complete Production Work Order process:
Lot Tracking Up the Chain
Often, a vendor will notify you that there is a problem with a particular lot that they’ve shipped to you. They will provide you with a lot number, and at that point, you can trace what products were produced as a result of this lot, and which customers received goods containing that lot, or what customers you may have directly shipped this purchased lot.
A new lot was received for an item. It was then used on a Production Work Order completion, and a new lot was created also for the completed item:
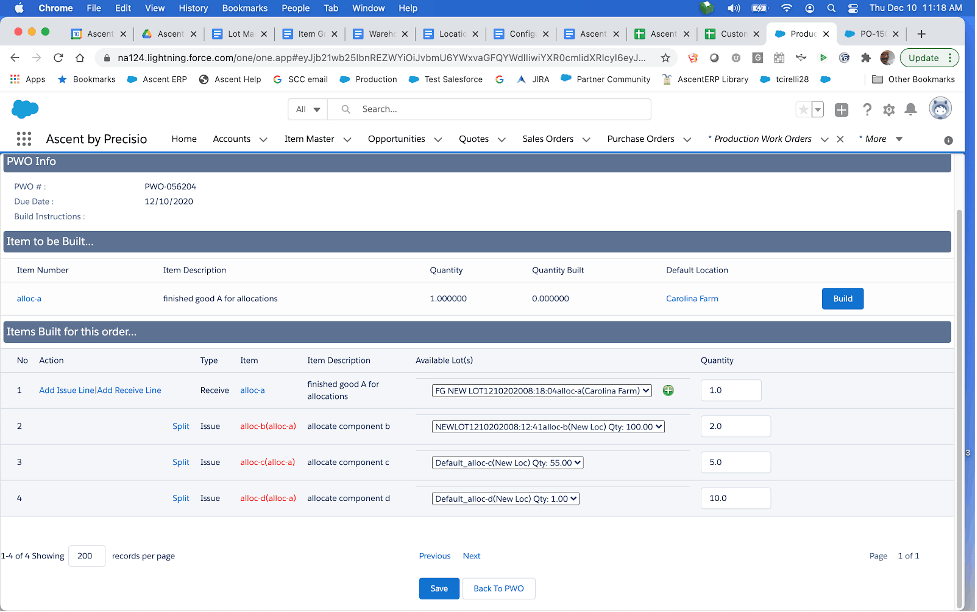
As we saw before, you can create a lot via the Complete Production Work Order process:

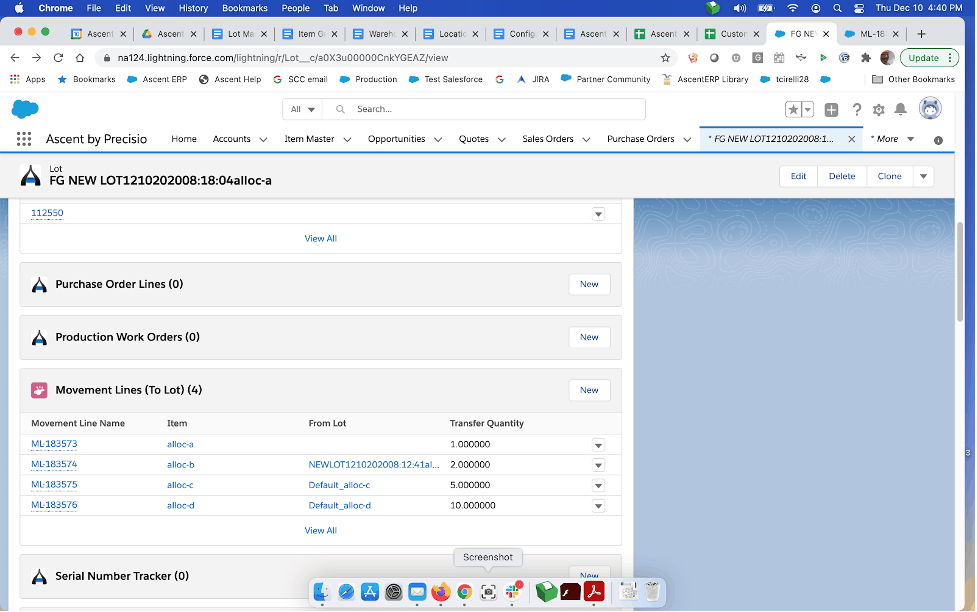
Once you complete the PWO, you can then track the component lot to the finished goods lot.
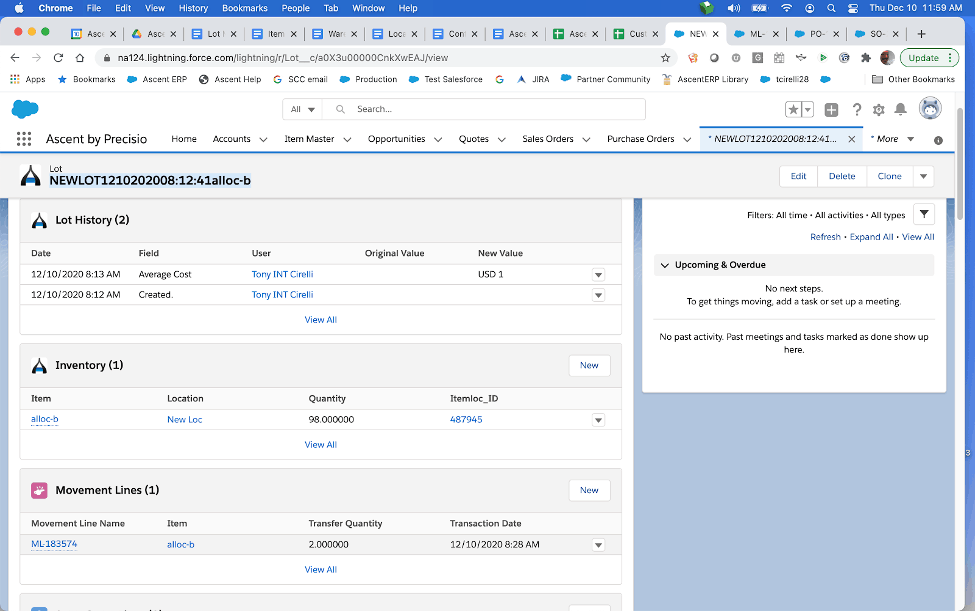
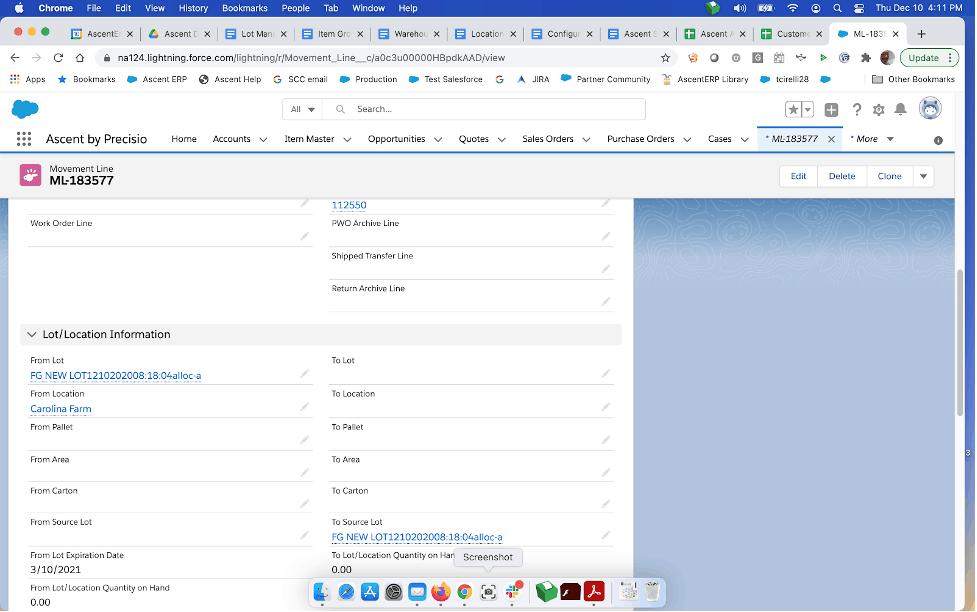
Example: Lot NEWLOT1210202008:12:41alloc-b was purchased from a vendor. That vendor notified you that it was bad, and was being recalled. So, go to the item, alloc-b, and look up the lot:
After selecting the lot, review the movement lines, and select a movement line that looks like it might correspond to the consumption of material on a PWO:
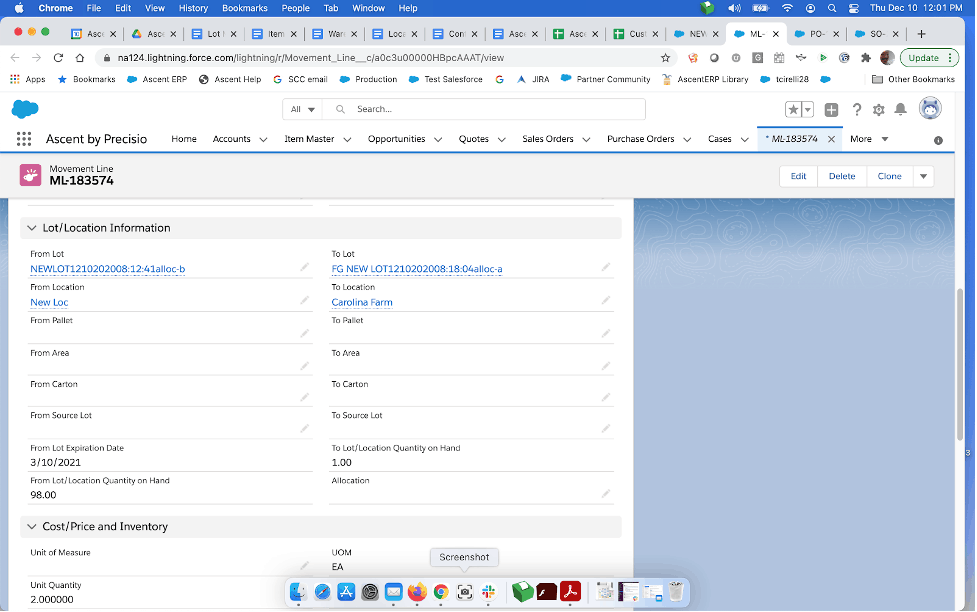
You will see the To Lot, which would be the manufacturing lot that this purchased lot was consumed by. If you click the To Lot, you’ll see after clicking on related lists and looking for Sales Order Lines, you can then click that:
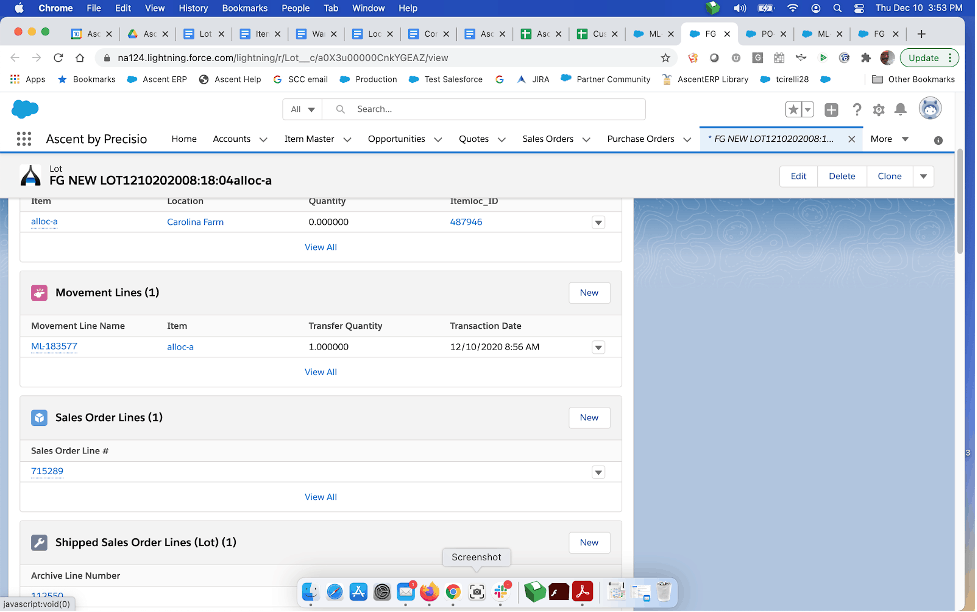
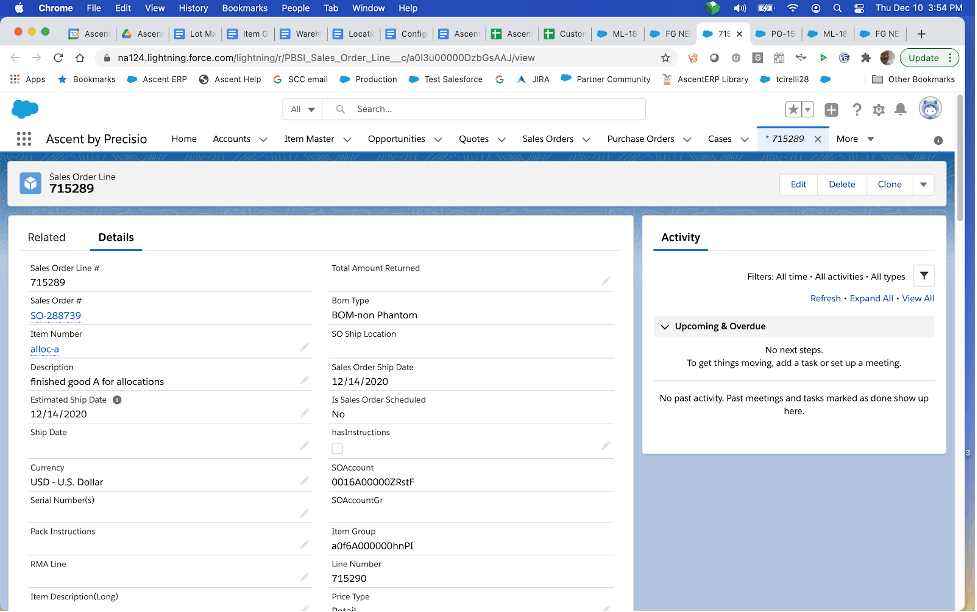
Now, after clicking on the Sales Order Line #, you’ll see be shown that line along with the Sales Order #:
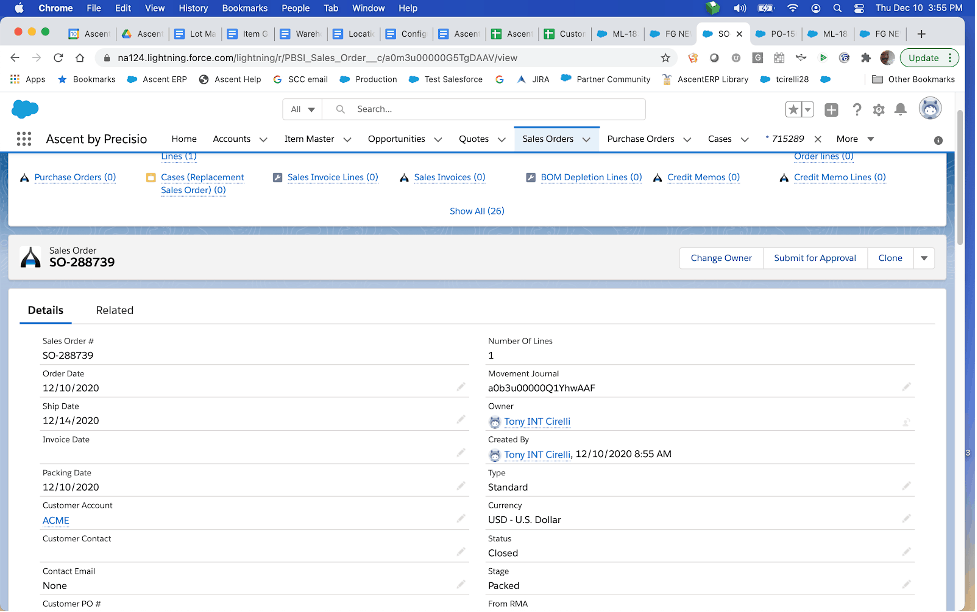
Lastly, click on the sales order #, and you’ll be able to see who the account is, and then contact them:
Lot Tracking Down the Chain
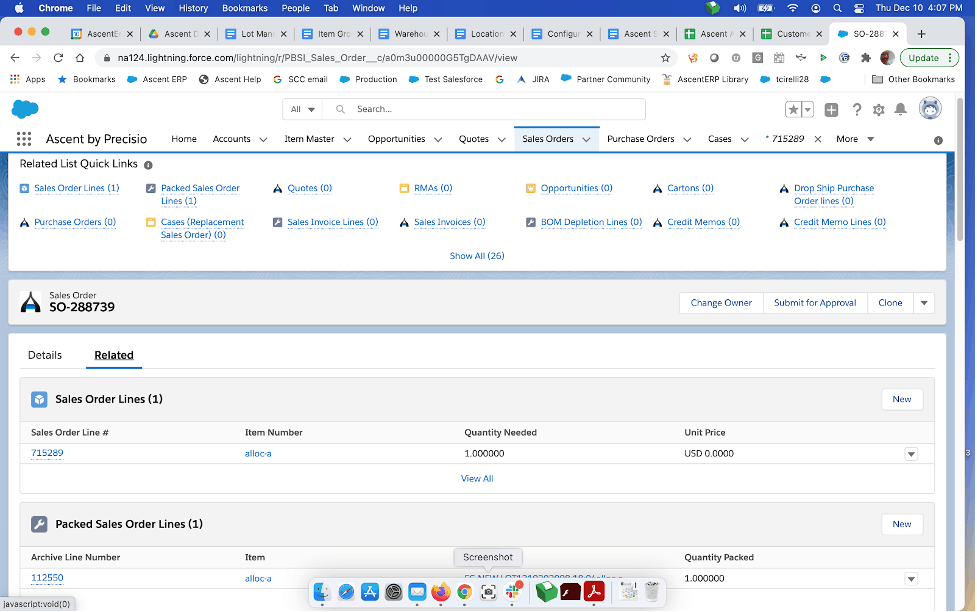
A customer could call you and tell you that there is an issue with a product purchased from you, and you decide to trace that material down to the original lot. First, you would start with the sales order in question. Look at the related list for Packes Sales Order Line and click the Archive Line Number and go to the Related List:
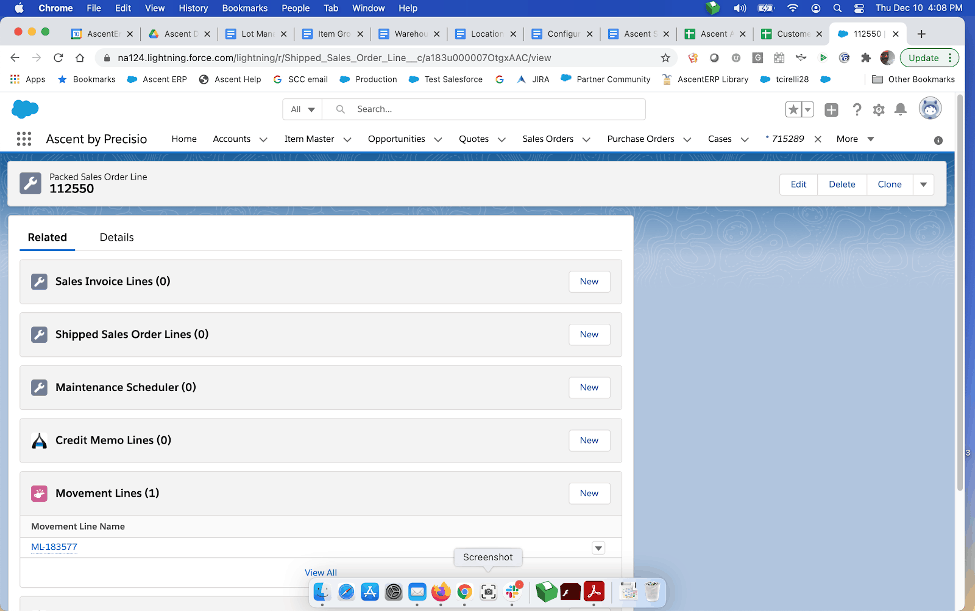
Now, click on the Movement Line. Scroll down, and that will show you the lot it was shipped from.
Then, click on the From Lot. Once there, go to Related Lists and scroll down to the Movement Line (To Lot):
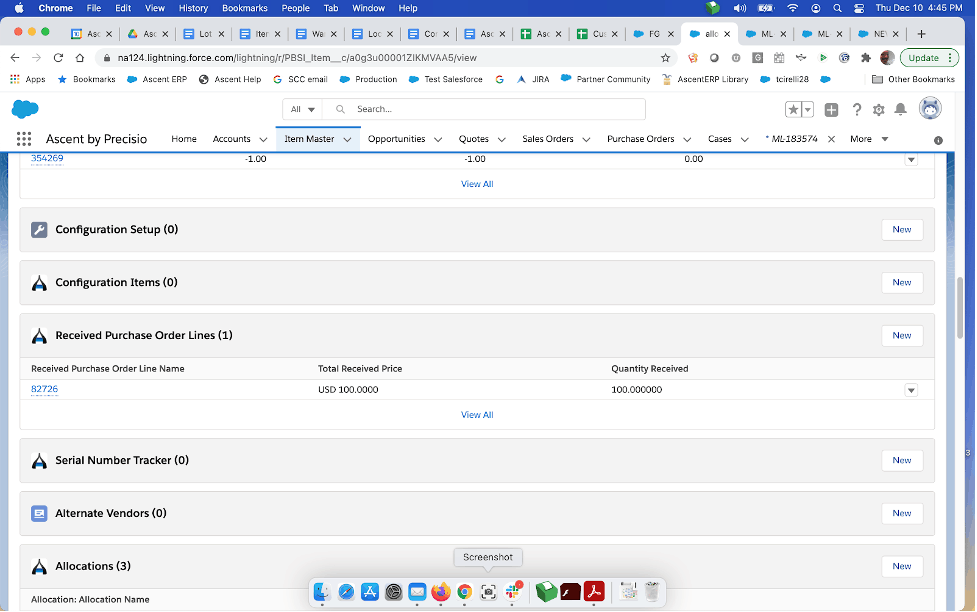
The movement lines here show the BOM (alloc-a) and it’s components from the Production Work Order. You can click any of the movement line items to find out what supplier that material was purchased from, to assist in your investigation of what components might be bad.
To do that scroll down in the related list area to Received Purchase Order Lines.
Click on the Receive Purchase Order Line Name and you’ll see the purchase order number:
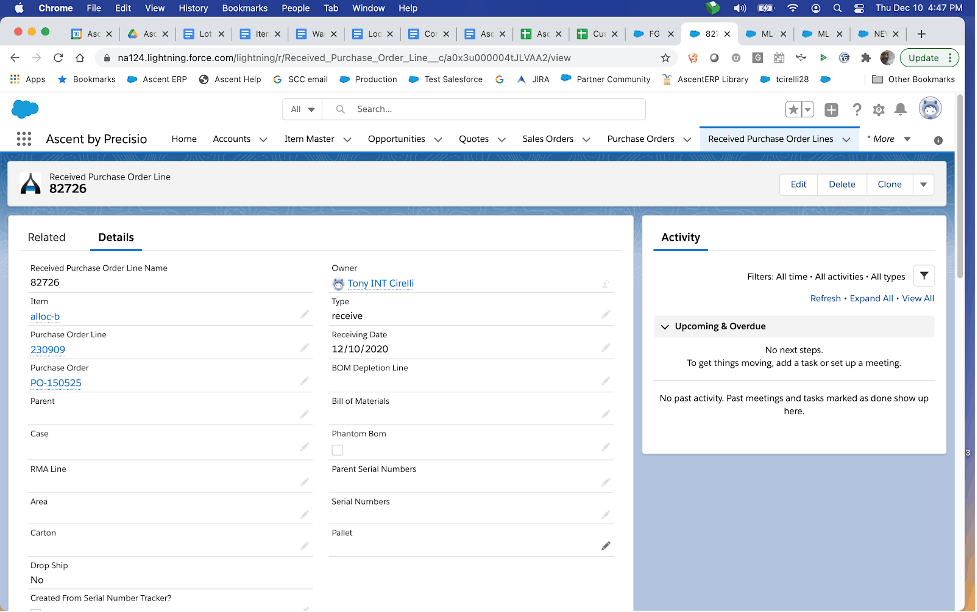
Click on the Purchase Order Number and you’ll be able to see the vendor you purchased the material from: