Transfer Order – Creation
Overview
This document will serve as an overview of the functionality available via Transfer Orders (TO) to create a transfer order.
Definition: Transfer Orders are objects in Ascent that serve as a framework for shipping and receiving material that is in inventory from one location to another location, with the benefit of generating documentation for the transfer, as well as providing an audit trail for the movement of that material.
Transfer Orders consist of:
- Transfer Order – this is the record that houses the from location, in-transit location, and receiving location. It also contains the order date, due date, status, total quantity left to receive, total quantity received, total quantity shipped, and total transfer quantity.
- Transfer Order Line – this record is created for each item that is to be transferred. IT contains the item, quantity left to receive, quantity left to ship, quantity left to stage, quantity shipped, stage date, stage quantity, transfer quantity, and unit of measure.
- Shipped Transfer Line – once a line on the TO is shipped, this record is created. It contains the expected arrival date, from location, from ot, is printed, item, movement line, not received serial numbers, pallet, parent lot, quantity, quantity left to receive, quantity received, reversed received qty, shipped serial numbers, transfer order, transfer order line, transit location ID, transit lot, and transit time.
- Staged Order Lines – if you choose to stage the transfer order line(s), this record will be created. It was initially created to stage sales order lines, but it is now used for transfer orders. Information pertinent to TOs include from location, from lot, from pallet, is printed, item, item weight, serial numbers, stage quantity, to location, to lot, to pallet, transfer order, transfer order line, type, and unit of measure.
- Received Transfer Line – this record is created when the transfer line is received, and contains the following information – date received, from location ID, from lot, is printed, item, movement line, pallet, quantity, received serial numbers, shipped transfer line, lto location, to lot, transfer order, transfer order line.
Transfer orders can be created manually or through the Transfer Order Planner. This document will only cover the creation of transfer orders manually.
Custom Settings of Importance: There are a number of custom settings which can affect how a transfer order works. Some of them will be outlined here. A few are discussed later on in the body of this document. To see all possible custom settings, please review the Custom Settings document.
- From Location on Transfer Order Planner – this would be used only if you are using the transfer order planner capabilities.

- Use Quarantined Lots in Transfer Orders – if this setting is enabled, you can then see quarantined lots in transfer order shipping and receiving.

- Display Cost on Transfer Order Line – if this is checked, a field called Item Cost will be added to the transfer order line display. The value comes from the item master object.

- TO Due Date Offset Num Days – Ascent will add the value of this field to the Order Date to arrive at the Due Date for the transfer order.

Process
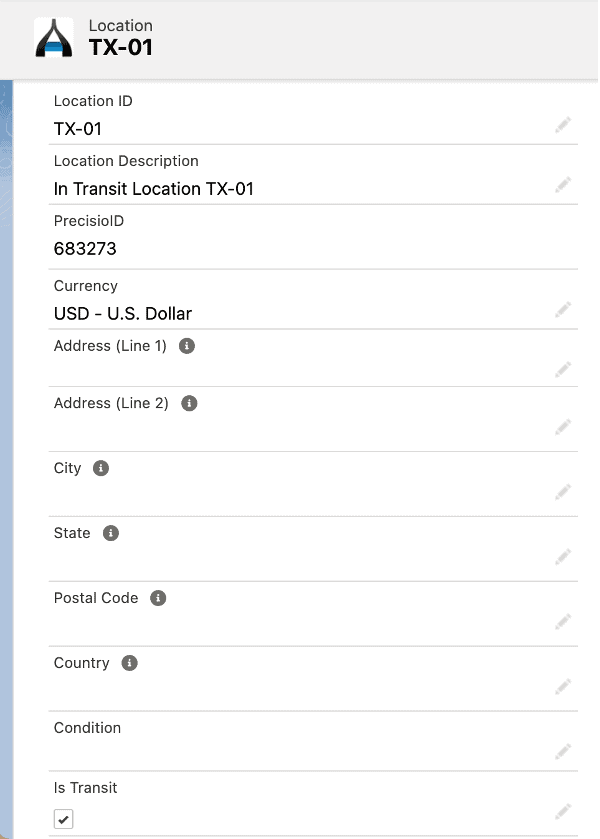
In order to use transfer orders, an in transit location must exist to serve as an interim location between the from location and the to location. Oftentimes, this is a company truck or a carrier (like UPS or FedEx). This is a screenshot of an in transit location. Notice the checkbox “Is Transit”. It must be selected in order to make this particular location eligible to be an in transit location for a transfer order.
To create a Transfer Order, go to the tab labeled “Transfer Orders” and click “New”. The following fields are available for entry, based on what your company has chosen to expose for use:
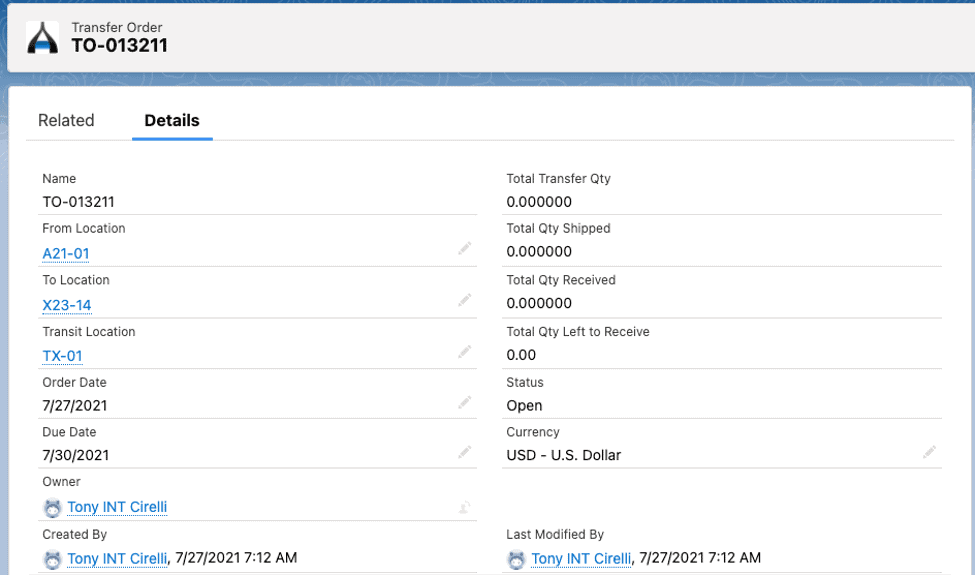
Transfer Order Header:
- Name, which is the Transfer Order #: This is assigned by Ascent. It has a prefix, TO-, followed by a 6 digit number. The number is an odometer, meaning that it has 1 added to it for each new TO created. This field is an autonumber field, managed by Salesforce.
- From Location – this is where the material is to be sourced from.
- To Location – this is where the material is to be transferred to.
- Transit Location – this location is where the material will reside after it has been shipped to the To Location.
- Order Date – The date this transfer order was created, by default. It can be manually added or overridden.
- Ship Date – The due date of this transfer order. This defaults to today’s date whatever value lies in the custom settingTO Due Date Offset Num Days. It can also be manually overridden.
- Owner – the person who created this transfer order, or, if changed, the new owner of this TO.
- Created By – the person who created this transfer order
- Total Transfer Qty – the sum of all the individual transfer order line quantities to be shipped.
- Total Qty Shipped – the sum of all of the individual transfer order line quantities that have been shipped.
- Total Qty Received – the sum of all of the individual transfer order line quantities that have been received.
- Total Qty Left to Receive – the sum of all of the individual transfer order line quantities that have yet to be received.
- Status – this field can have several values:
- Open – this TO is open and yet to be enacted upon
- In Transit – this TO has been active and has material shipped
- Closed – this TO is completed and has been closed.
- Currency – the currency of this TO
- Last Modified By – the last user to make a change or process this TO
Transfer Order Line Creation:
This is the function that allows you to add, delete, or reverse transfer order lines, which consist of items to be moved from one location to another:
- Save – once a TO line is added, edited, or deleted, you will hit the “Save” button to permanently save the activity that just took place.
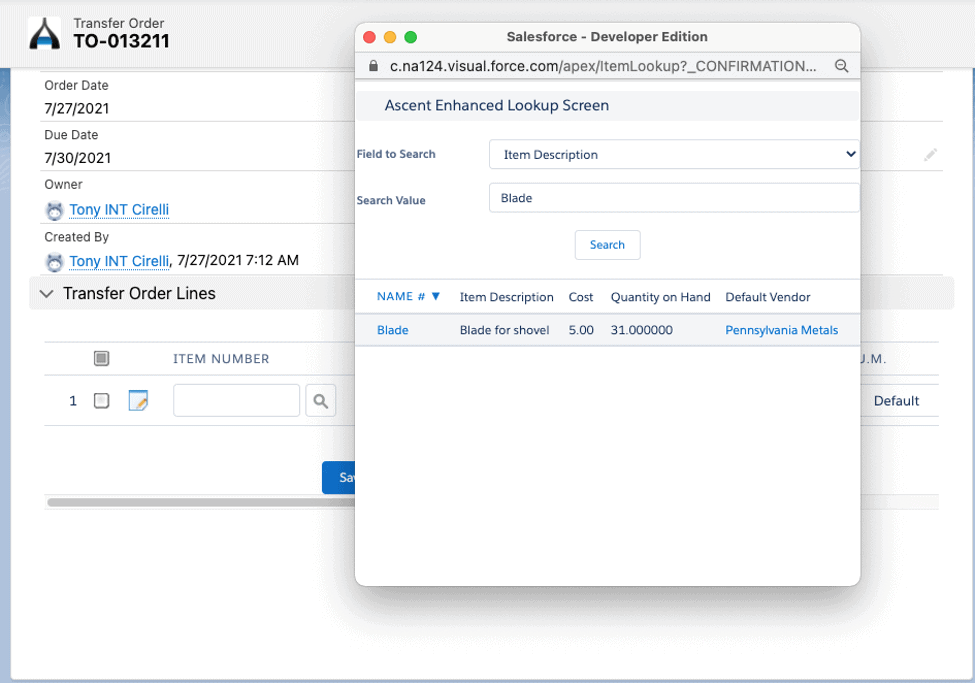
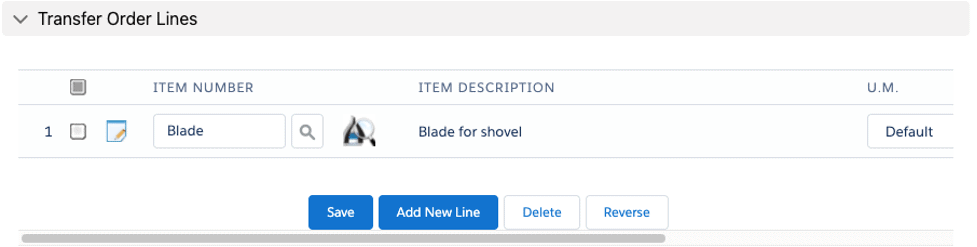
Add New Line – this will display fields for entry, to create a new transfer order line. If you click this, you will be prompted with a new TO line. You must select an item, so you can click on the standard Salesforce magnifying glass icon and get this display, which allows you to manually enter part/all of the item name (if the Name radial button is highlighted) OR if the All Fields radial button is highlighted, part/all of any other field on the item master.

Or, you can click on the Ascent search icon (looks like a fancy letter “A”), and enter some value in the search field, which would search by any part of the description:
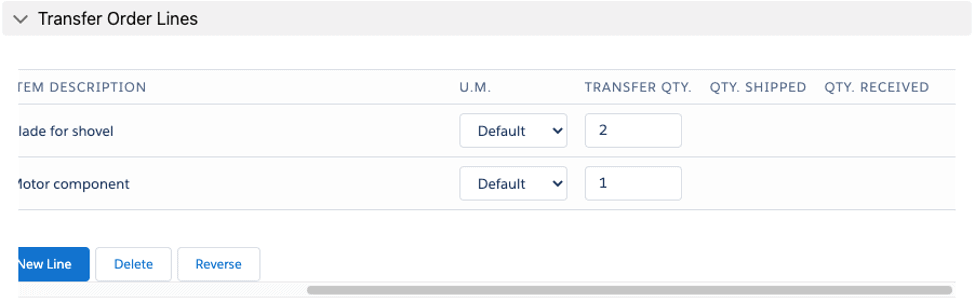
Here’s what the TO line looks like. Since there are many fields on it, this document displays all the columns in two screenshots:
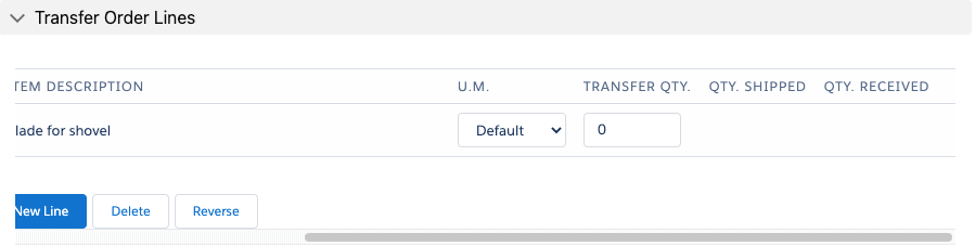
Transfer Qty field requires entry of the quantity of material for this item that needs to be moved from one location to another:
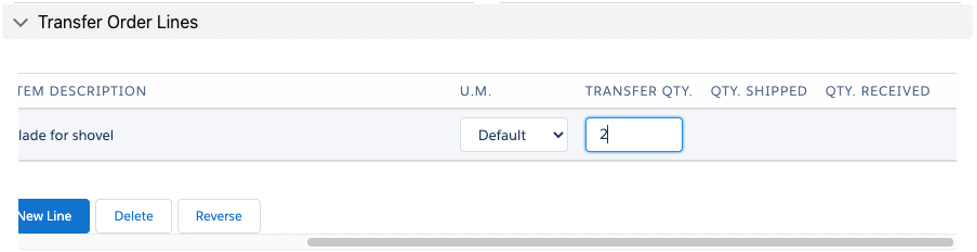
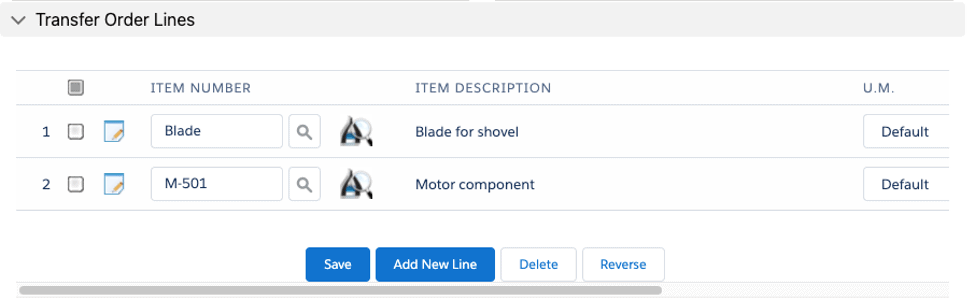
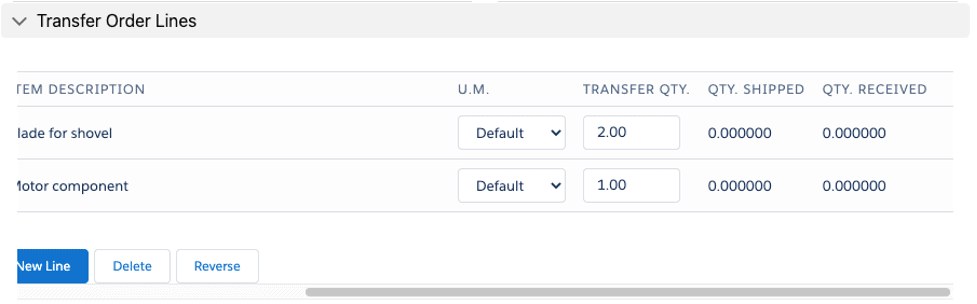
Then, you can hit Add New Line or Save to save the line just entered. We will select Add New Line and add another TO line:
Let’s enter a quantity of 1:
Now, let’s select Save:

By clicking on Related, you can see more details:
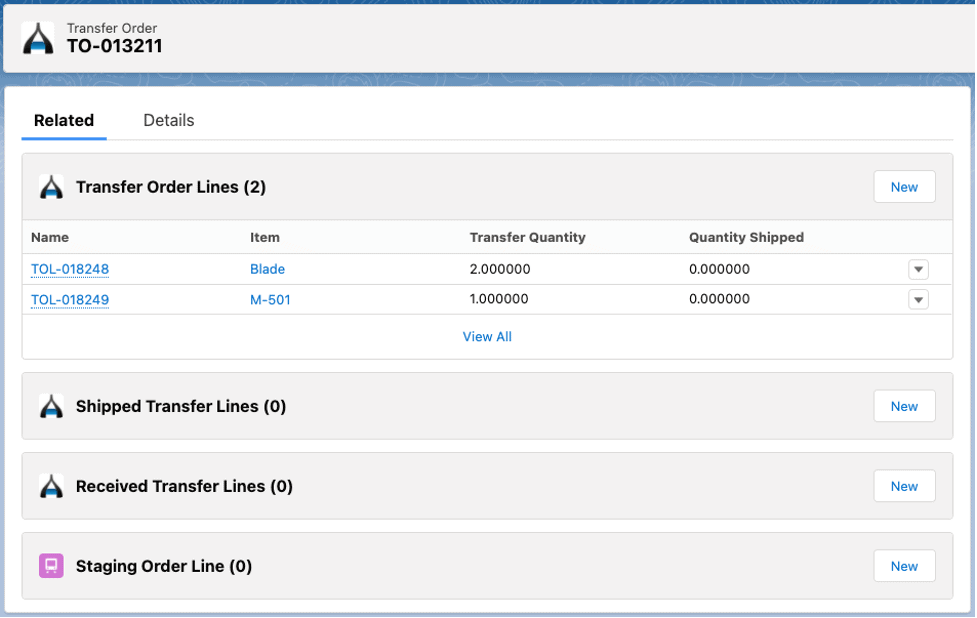
The transfer order has been created.
If you wish to delete a TO line, simply click the checkbox next to the line you wish to delete and click the Delete button.
If you wish to reverse the transfer line’s activities, click the checkbox net to the line in question and then click the button entitled “Reverse”.
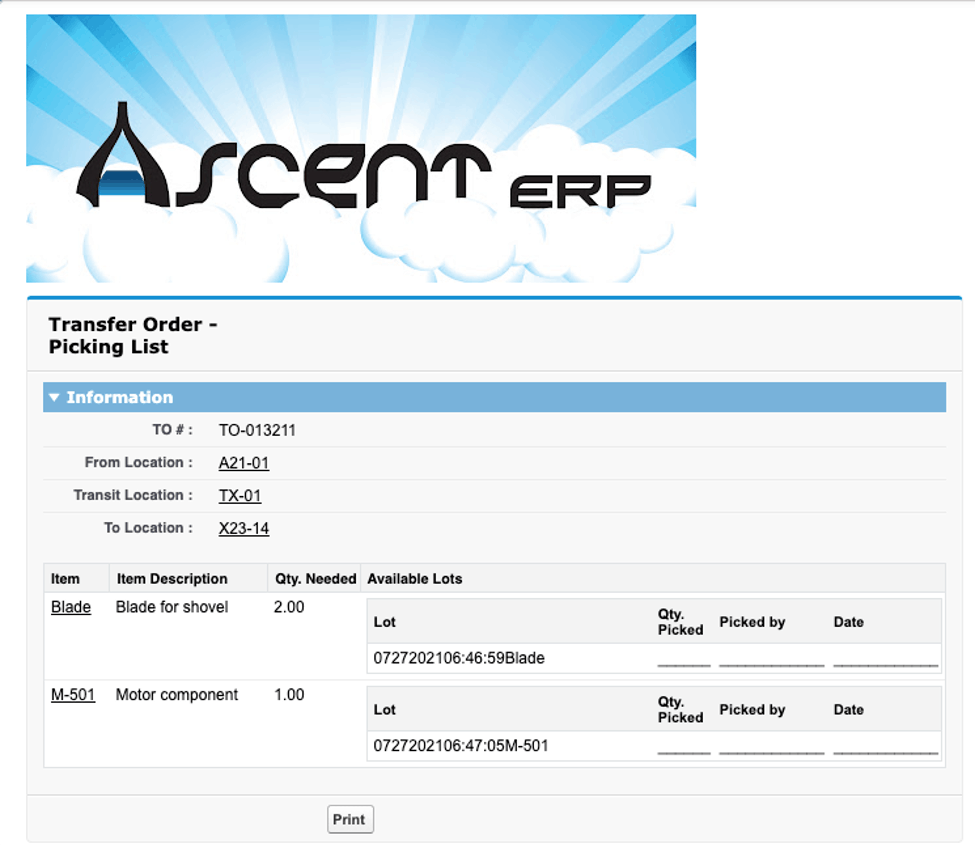
Picking List – a document can be created to show the warehouse people what items and what quantity to pick for the transfer order. Go to the down arrow next to the Clone button on the upper right hand side of the transfer order screen, and select Picking List:
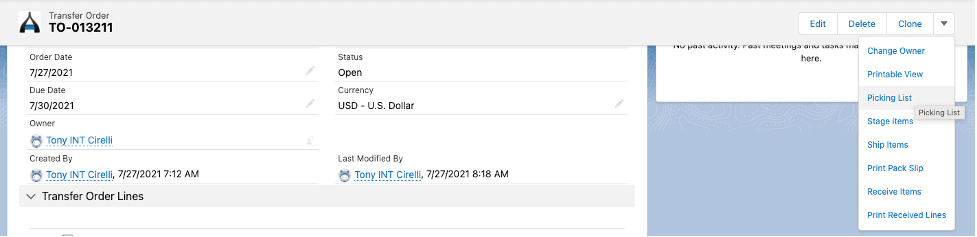
This will display. To print this document, click the Print button.