Returns – Customers
Overview
Inevitably, material purchased, if not of proper quality or if no longer required, will be returned, whether it is being returned by a customer or being sent back to a supplier. Ascent has three overall combinations of data objects that can be used to return material:
- Returns and Return Lines
- RMA (Cases) and RMA Lines
- RMA (Cases) and Return Lines
RMAs would be used if a company uses Salesforce Cases, and would like to continue to use them. That would also mean that the user would have to have a Salesforce Enterprise license.
Returns would be used if a company’s warehouse people don’t have or don’t require a Salesforce Enterprise license, and can use a Salesforce Platform license.
In the Custom Settings section of this document, we will discuss how the different options can be set.
NOTE: For this document, we will be discussing Returns and Return Lines.
Definition: A return, as stated before, is a way that material can be returned to a supplier or received back from a customer. It consists of a return header (called a return) and any number of return lines (called return lines).
Returns can be generated in the following ways:
- From Sales Orders by clicking the down arrow next to the Change Owner button on the Sales Order screen and clicking Create RMA.
- From Purchase Orders by clicking the down arrow next to the Change Owner button on the Sales Order screen and clicking Create RMA.
- Manually create a Return and a Return Line. This is useful when there exists no Sales Order to create the return nor is there a purchase order to do that, either.
On a return line, there are many different types of returns:
- Return – This type of return is used to record the return of material from a customer back into inventory. It will record the return and make that information known to the sales order line. It does NOT change the quantity ordered on a sales order. It does NOT create a new sales order. It does create a return line (a sales order line with a negative quantity for what has been returned). For sending material back to a vendor, Ascent does NOT change the quantity ordered on a purchase order. It does NOT create a new purchase order. It does create a return line (a purchase order line with a negative quantity for what has been sent back).
- Replace: This type is used to replace items that have already been returned to inventory via an RMA return type. You would create a NEW RMA and reference the sales order that you’ve already created an RMA Return for, and make the type “replace”. When this occurs, you create a NEW sales order line for the quantity to replace. The NEW sales order line will show that the quantity shipped has been updated and the status is “packed”. Replace is typically done as part of a two-step process (Return and then Replace) when inspection of the material the customer claims is damaged must be done before agreeing to replace it.
- Replacement: This type of RMA is used to do the return and replace in one step. When you use this type, the quantity is returned to inventory and the original sales order gets a credit line for the return and has a NEW line created. The NEW sales order line will show that the quantity shipped has been updated and the status is “packed”. However, there is a setting in “Custom Settings” which states: “Create New Order for Replacement RMA?”. If this is selected, then this type of return will create a NEW purchase order with a NEW purchase order line. Replacement from Order: This type of return operates exactly the same way a replacement type acts, EXCEPT that it creates a NEW sales order, unlike a replacement type which creates a new sales order line on the original sales order. For a return to supplier, it could create a NEW purchase order.
- Reverse: This type gets used only AFTER a return has been processed. The return would allow for the return of material from the customer and the addition of the material back into inventory.
Custom Settings: There are a number of custom settings which can affect how a sales order works. Some of them will be outlined here. A few are discussed later on in the body of this document. To see all possible custom settings, please review the Custom Settings document.
- Create New Order for Replacement RMA – When adding a line to an RMA/return, the RMA Line Status is “Replacement” or “Replace-from Order” and this custom setting is checked, that RMA line will create a new sales or purchase order. This becomes useful if a completely new set of shipping documents (picklist or packslip) are required.
- Show Print on RMA Lines view – This custom setting enables the Print button in the Action section at the line level in vf page Return Lines View and RMA Lines View. This permits printed documentation for the line being returned.
- Show RMA Line Id – This is for RMA Lines View and Return Lines View visualforce pages. When this setting is enabled , there will be a new column showing up in these pages that will show RMA or Return Line Id.
- Show Discount on SO Lines View VF Page – This would be useful to let the users know specifically what the discount on the sales price is.
- Show Unit Quantity – Enable this custom setting if you want to show total Unit Quantity column on interfaces such as PackSO (packing a sales order), Process RMA Lines / Process Return Lines, ReceivePO (receiving a purchase order), and almost all interfaces where quantity is involved.
- Use From Location on RMA Return – Use this setting if you want to make sure all the products that your customers will be returning will go into the same location you packed out from. Caution should be taken here if the material being returned is one that would need inspection first. Often times, the ship from location is a regular finished goods inventory location, and you may not want returned material defaulting to a finished goods inventory location.
- Use Item Condition – Item Condition is used when processing RMA lines and Returns. RMA/return line has a field called condition. depending on what value this field has, the processed item is received in a lot/location with the same condition as the line condition – as the Location has also a field called Condition.
- Use Serial Number Detail – If this custom setting is checked, then every time activity occurs for a serial#, a new record of the activity gets written out to the Serial Number Detail object. This becomes very useful when analyzing returns for an item.
- Use Returns And Cases for RMA – Creates a matching Case and Return record when trying to return items. 1 to 1 relationship between returns and cases.
- Use Returns – Allows users to use the Returns object in lieu of CASE. Does not need a full Salesforce license.
- Display Comment Field on View RMA Lines – Once enabled, a comment field will appear when adding/changing/deleting an RMA Line. This could be useful to specify why material is being returned.
- Don’t close return if it has Open Lines – If a return is linked to a CASE, and the CASE is closed, if this setting is enabled, the return will remain open and will not close until all lines are processed. Often times, a company will use a CASE as the initiation point for a return, and a return will be created and linked to the CASE. Once the disposition of the CASE is determined, the customer service rep may close the case, however, the material may not have been returned, hence, the need to keep the return open.
- Don’t make SO on Return Line insert – This setting is used to disable the sales order creation when a Return line with type Replace-From Order is added or updated. Important: for those ORGs that have the Ascent Rental extension installed and have the custom setting “Create new order for Replacement RMA” enabled, this setting must be enabled in order to create the correct sales order purpose.
Process
Since there are many ways to process a return, this document will have 4 “Process” sections:
- Returns with Return Lines – Customer Returns from Sales Order
- Returns with Return Lines – Blind Entry for customer return with no sales order
- RMA (Cases) with RMA Lines – Customer Returns from Sales Order
- RMA (Cases) with RMA Lines – Blind Entry for customer return with no sales order
We will not document RMA (Cases) with Return Lines, since very few customers use this hybrid mix, and they are really a function of the two main types.
Returns with Return Lines
Returns with Return Lines – simple return
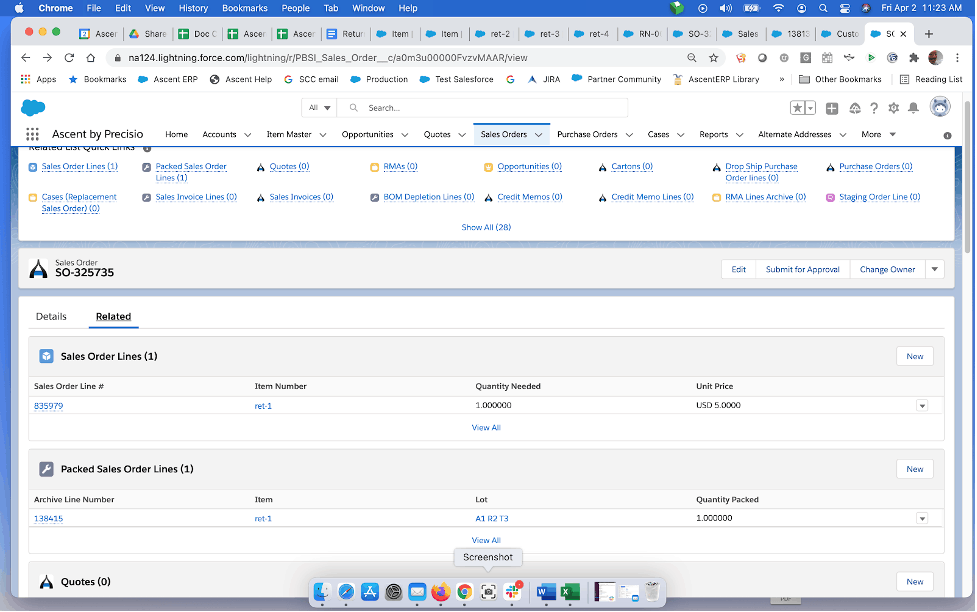
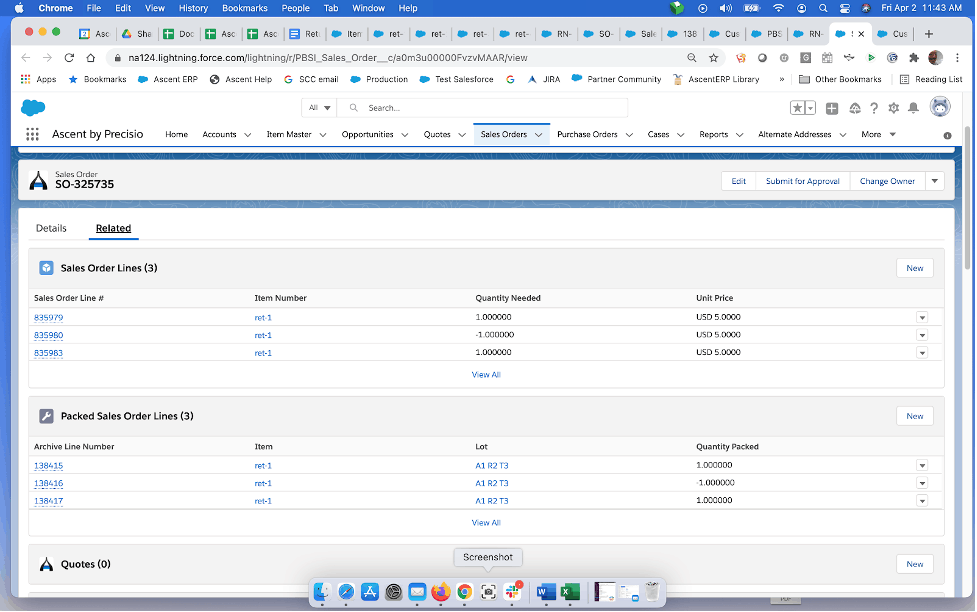
This is the simplest form of return. For this example, we will create a sales order, add a serialized item, pack it, generate the return, and illustrate the return process. First, the packed sales order line:
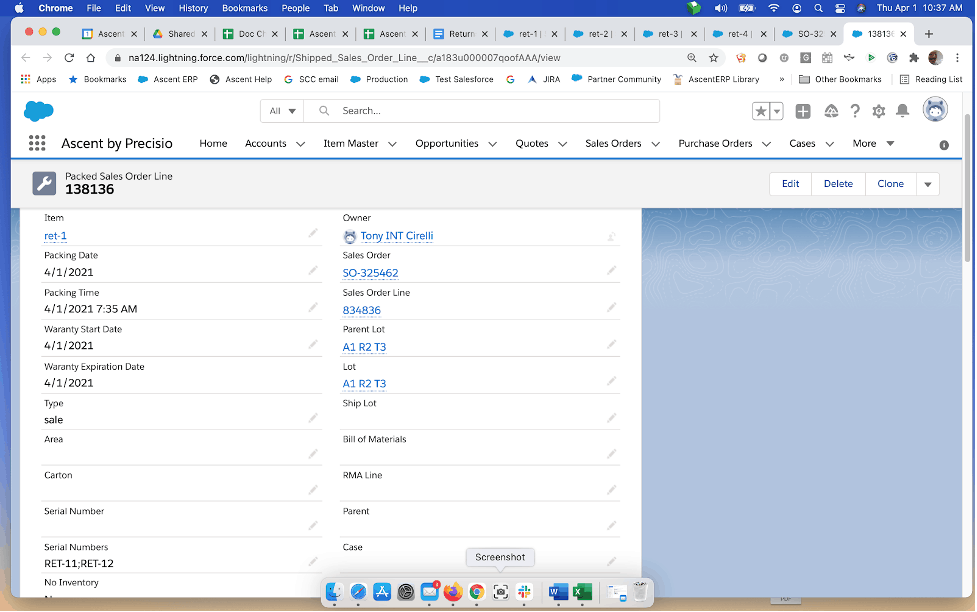
We have packed out SO-325462, line 1, item ret-1, qty=2, serial numbers RET-11 and RET-12.
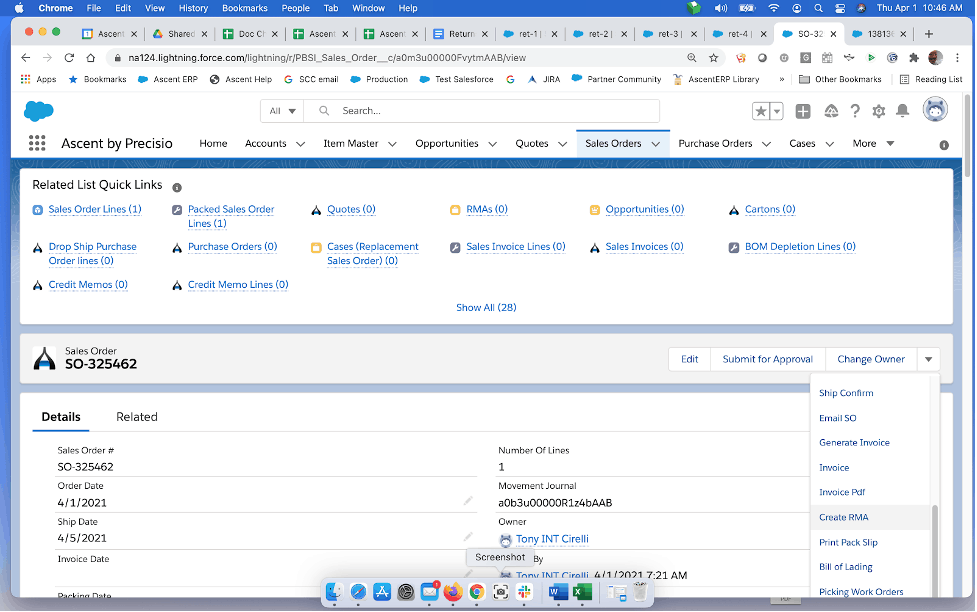
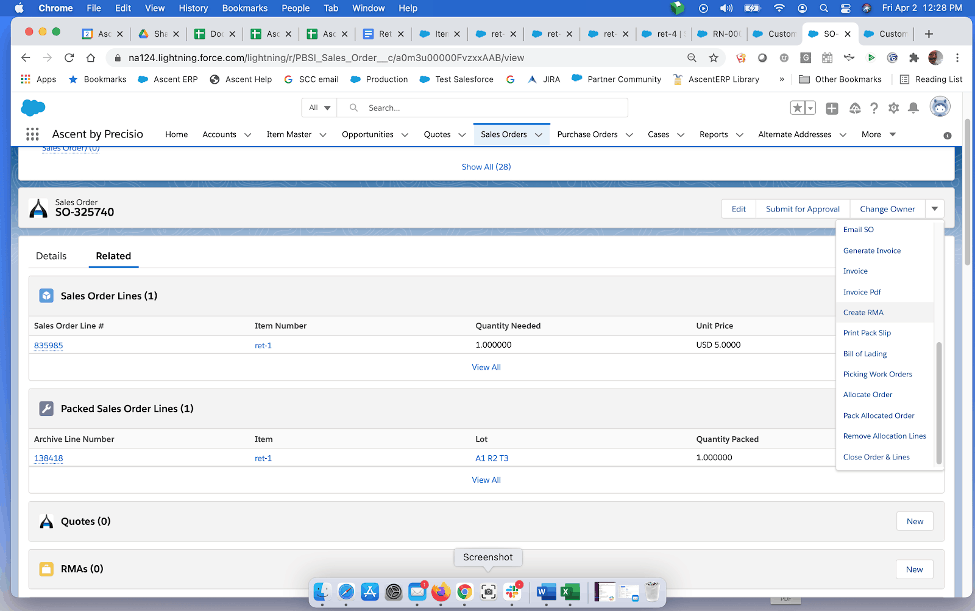
To create the return, go to the sales order and click on the down arrow next to the Change Owner button, and select Create RMA:
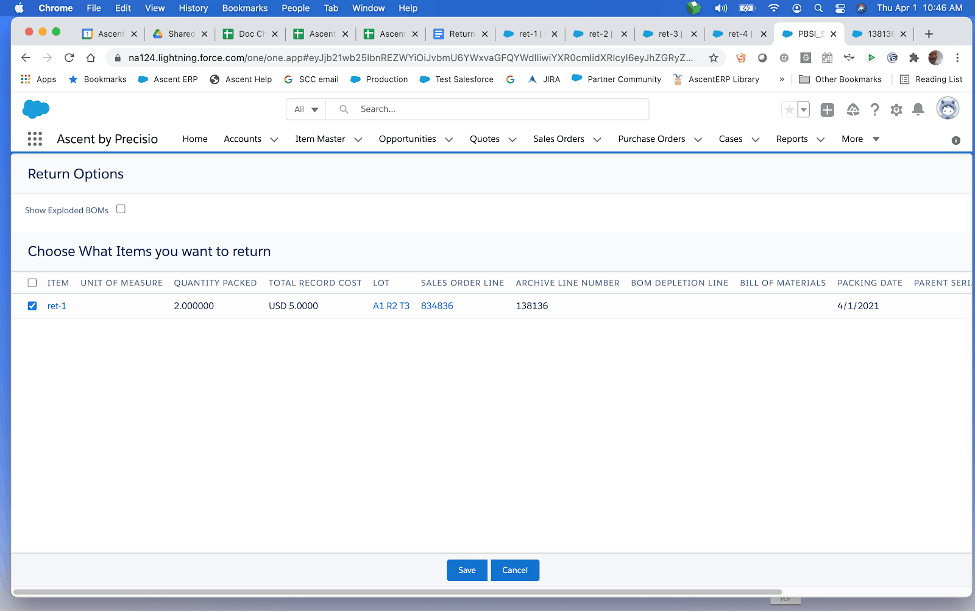
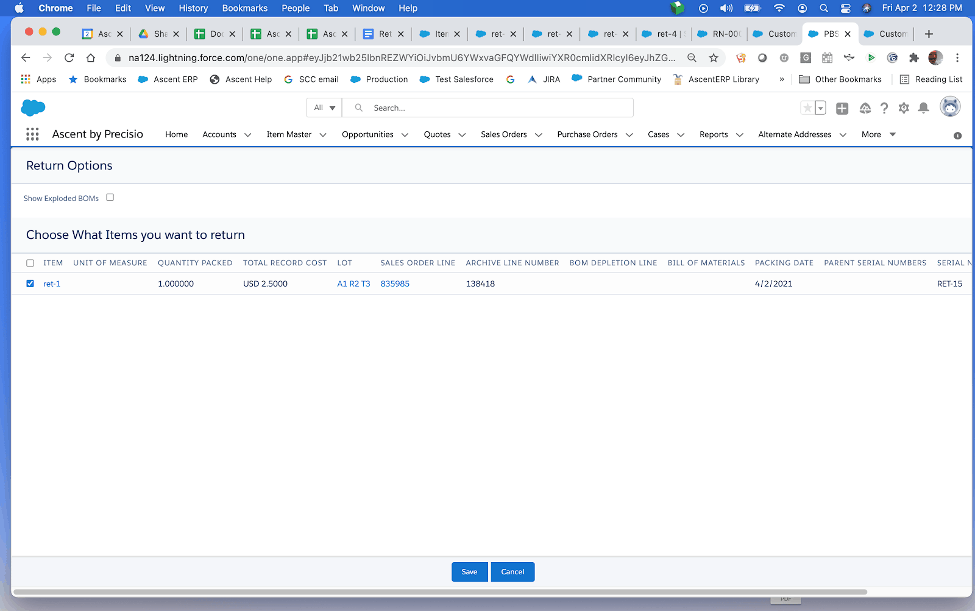
This screen will appear next, asking you to select those lines which you wish to have on the return:
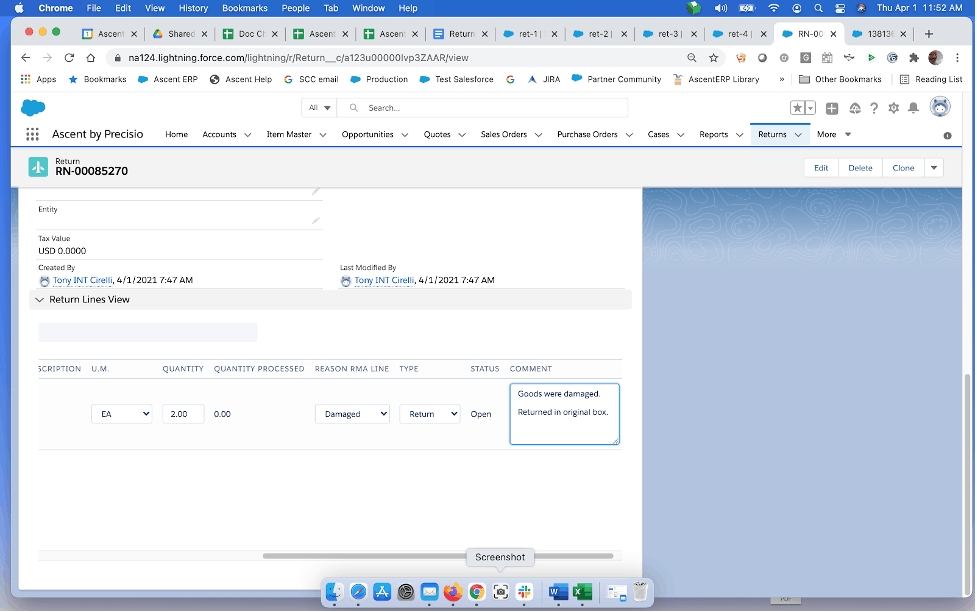
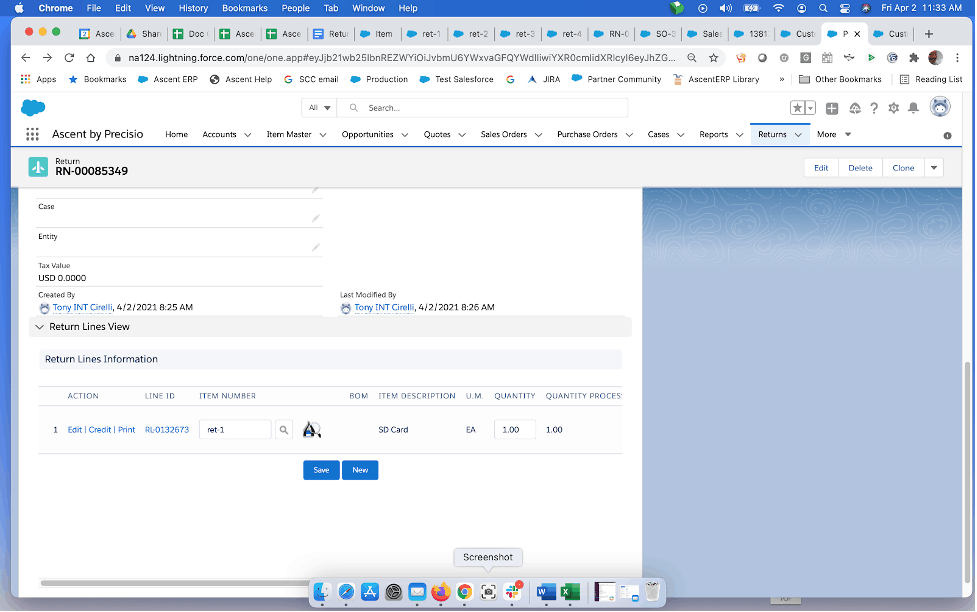
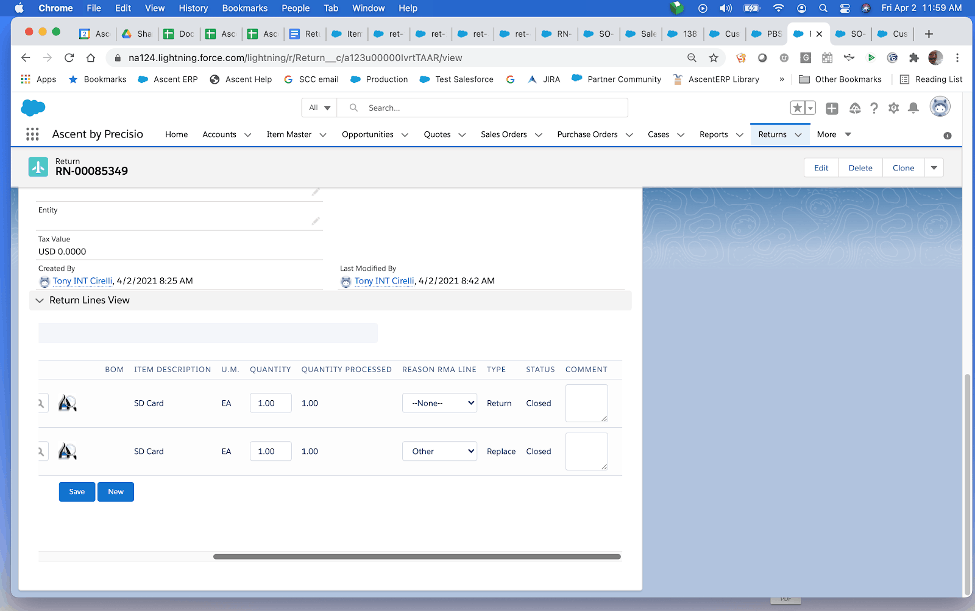
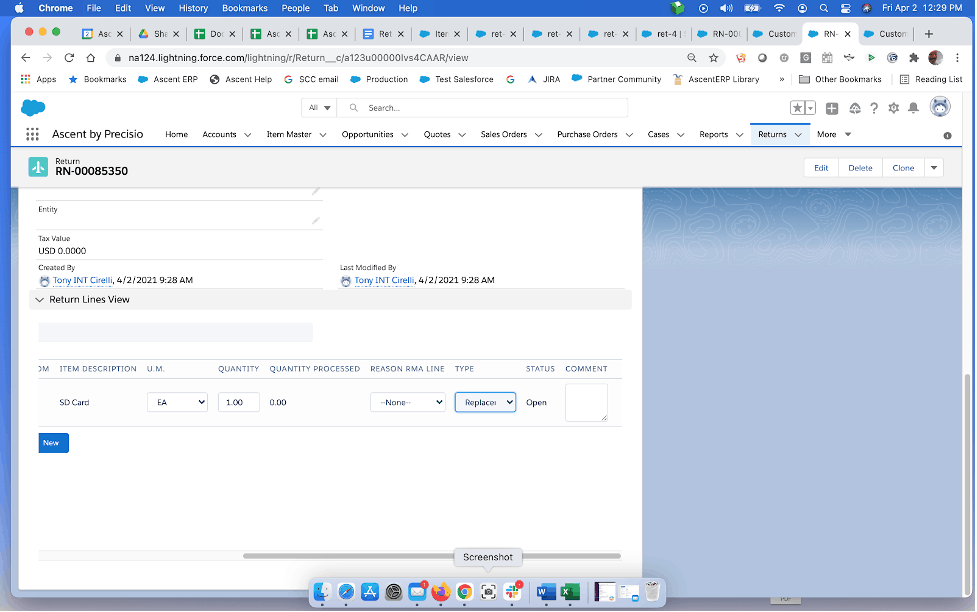
After hitting save, this screen will appear (the number of fields is quite long, so we’ve taken two screen shots to show them all:
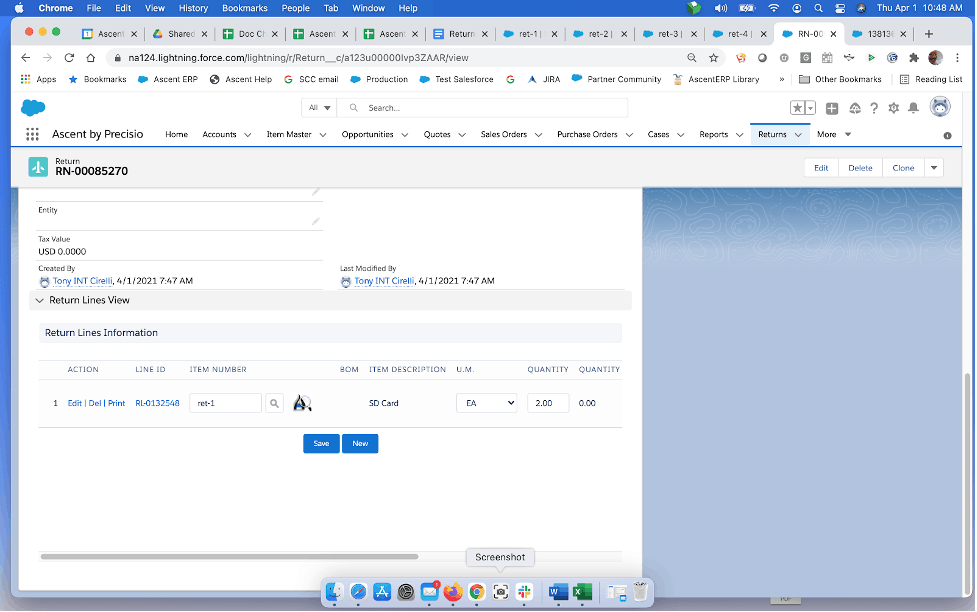
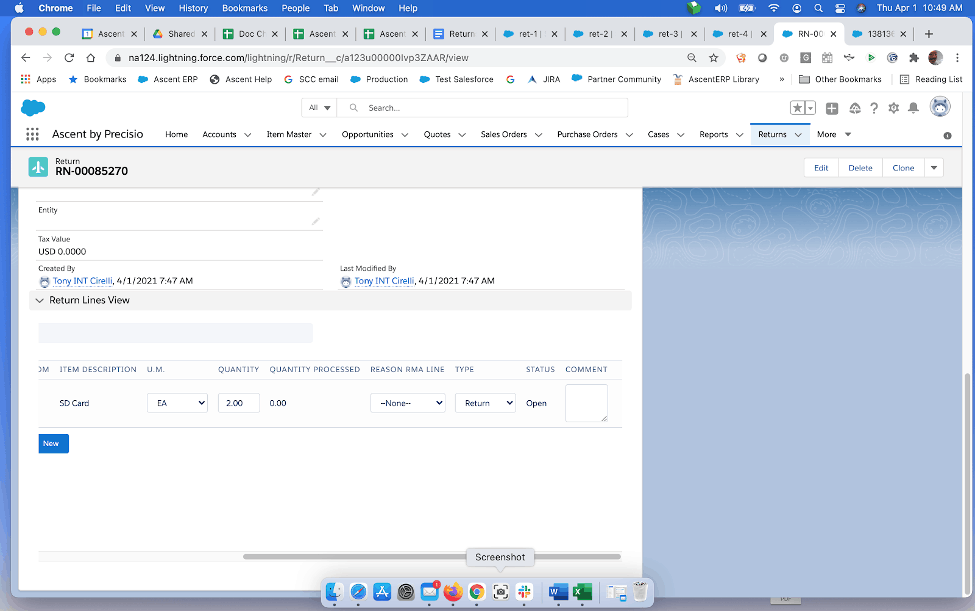
The system will default to Type = “Return”, which is what we want in this instance. The Reason RMA Line field is one that is a pick list, and can be customized by your system administrator You can also add comments to the return line. Once satisfied, hit Save.
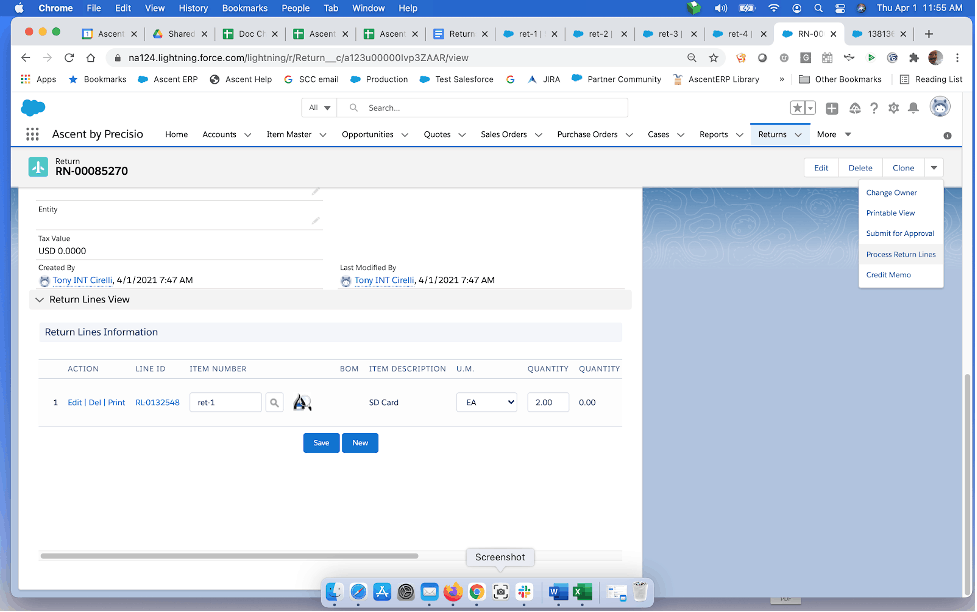
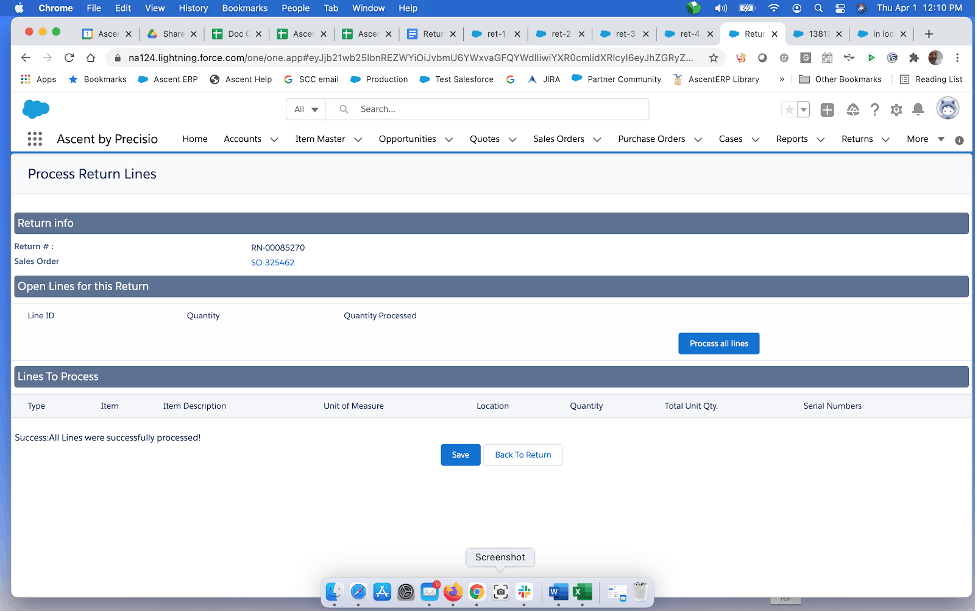
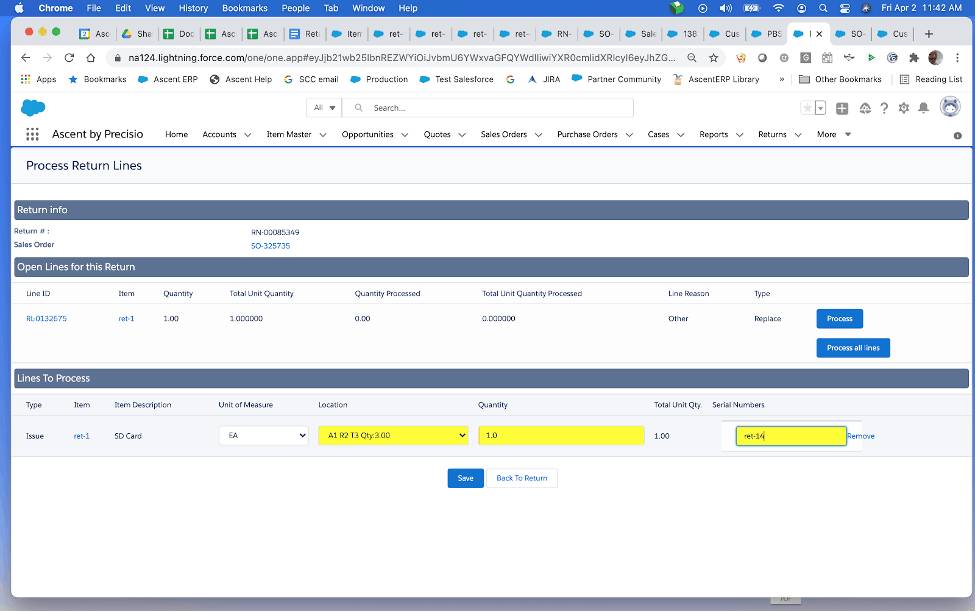
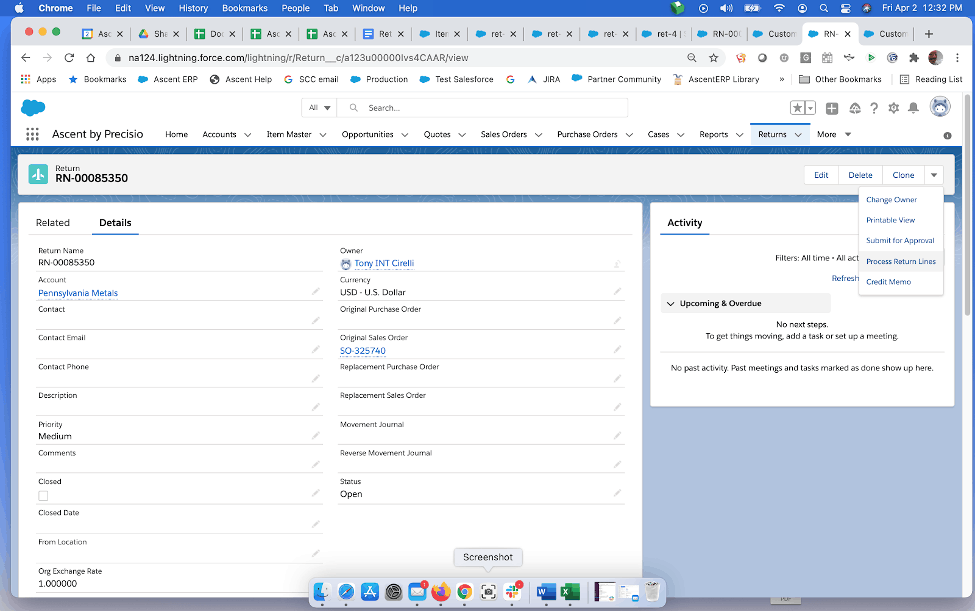
To process the return, go back to the return screen, and select the drop down arrow next to the Clone button, and then select “Process Return Lines”:
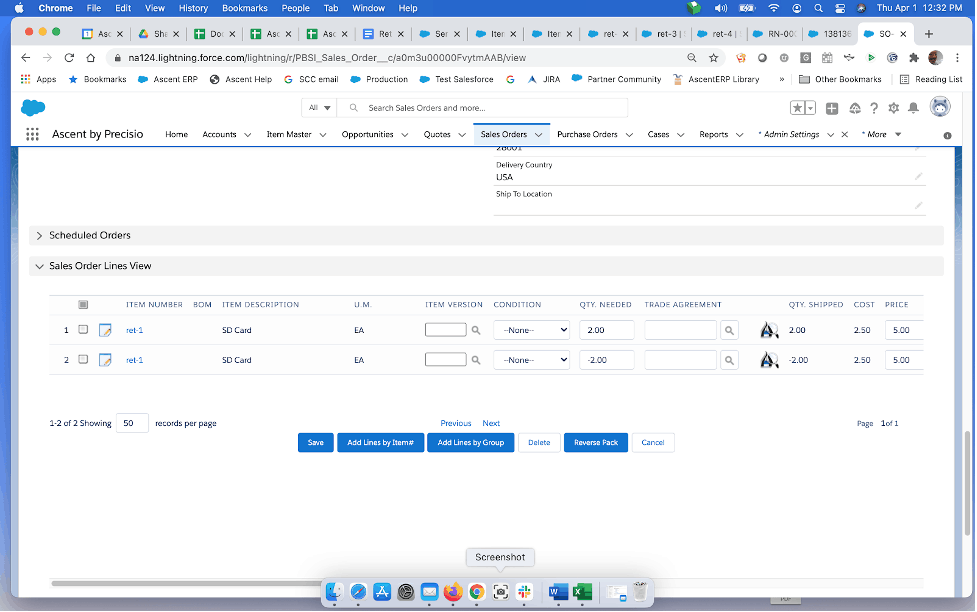
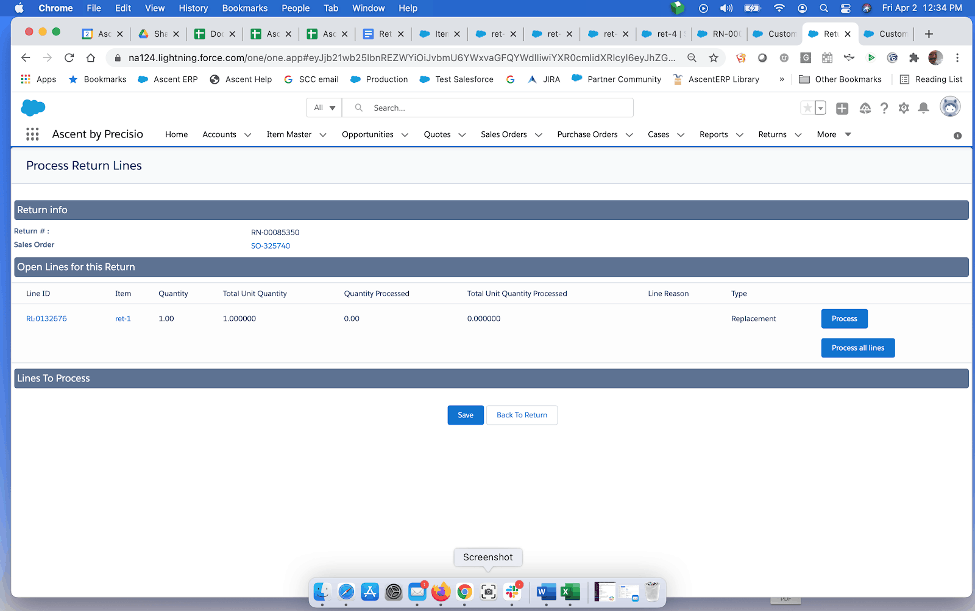
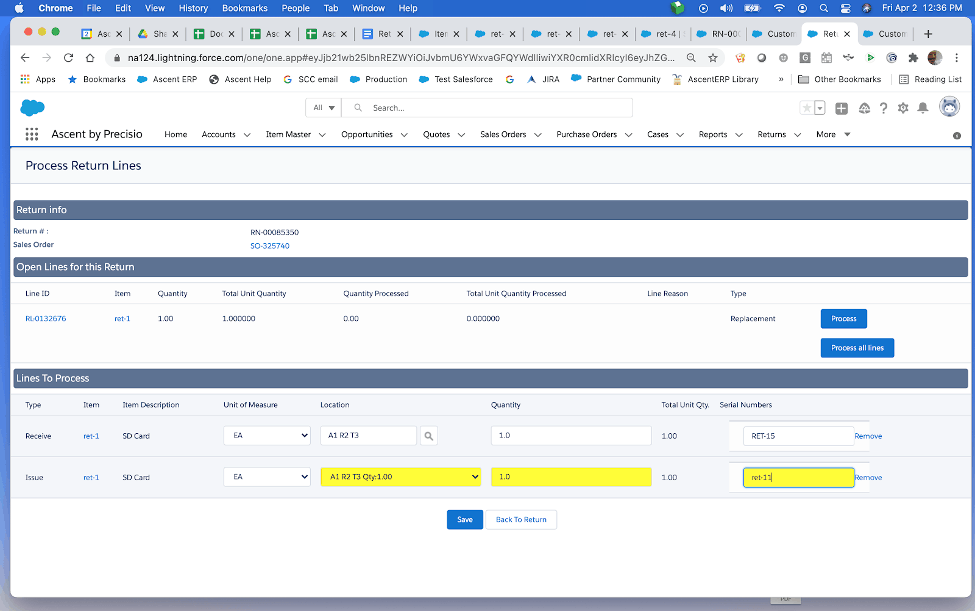
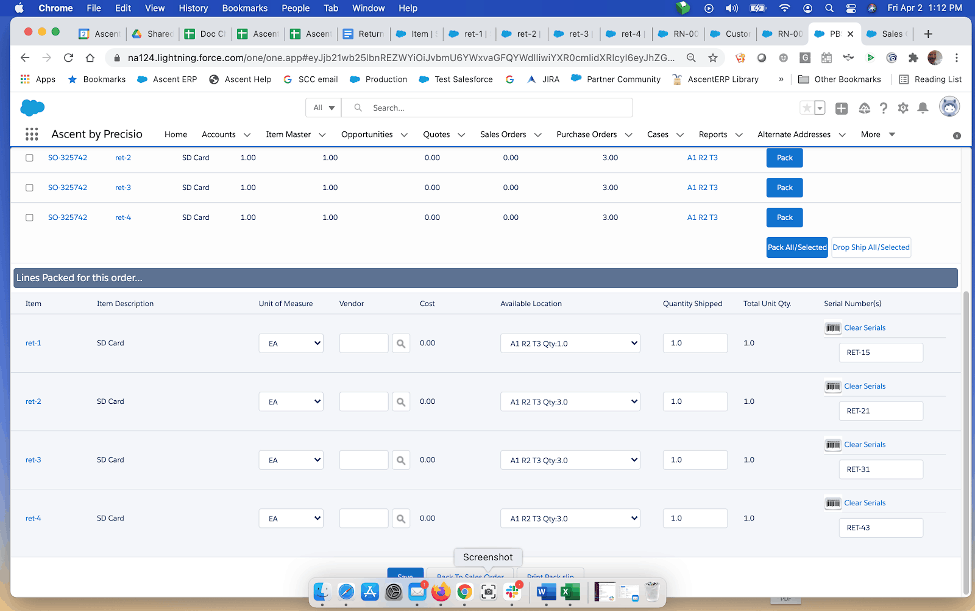
This screen shows the open lines, and Lines to Process, which appear after selecting Process:
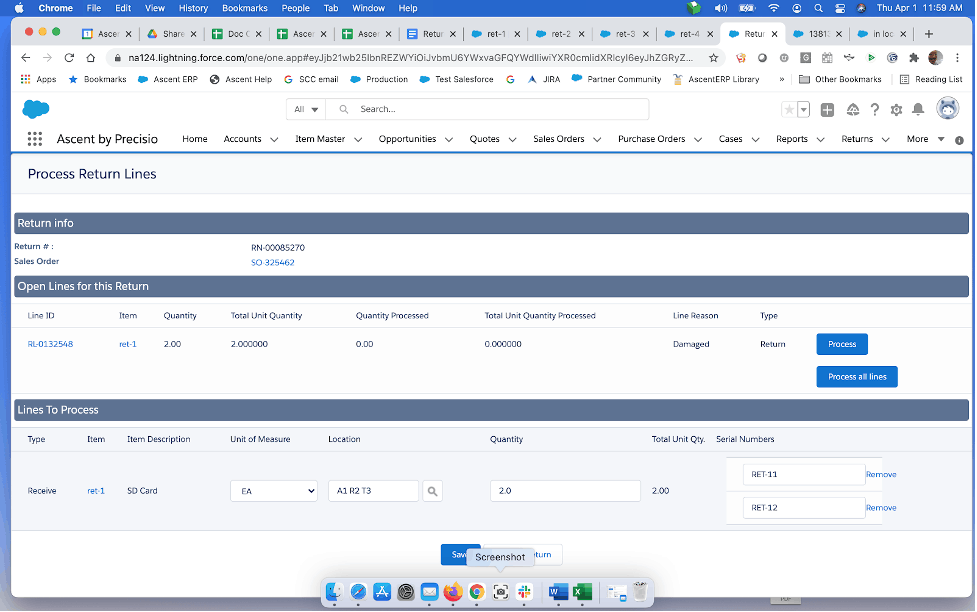
The location is the one that the material was originally deducted from on the Pack SO process. If your firm has a location to which all returns are moved to upon receipt, then that location would have the field “Is Default for RMA?” checked. This would have to be carefully discussed, since companies with many locations may not want a single location to be the recipient of all returned goods. The serial numbers are the ones that were packed on the sales order.

If you’ve only received one of the serial numbers to be returned, you can override the Quantity field to 1, hit TAB, and then enter the serial number being returned.
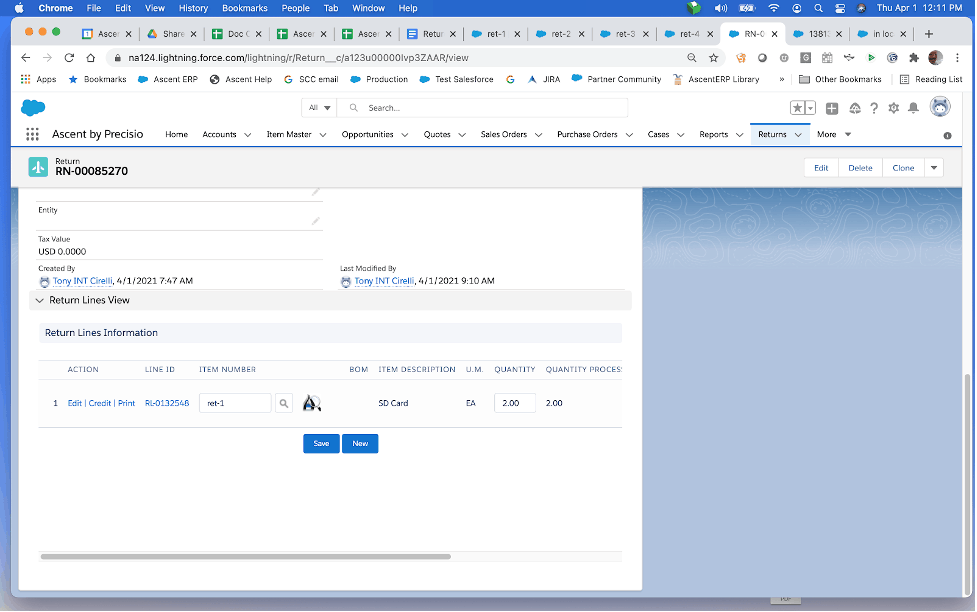
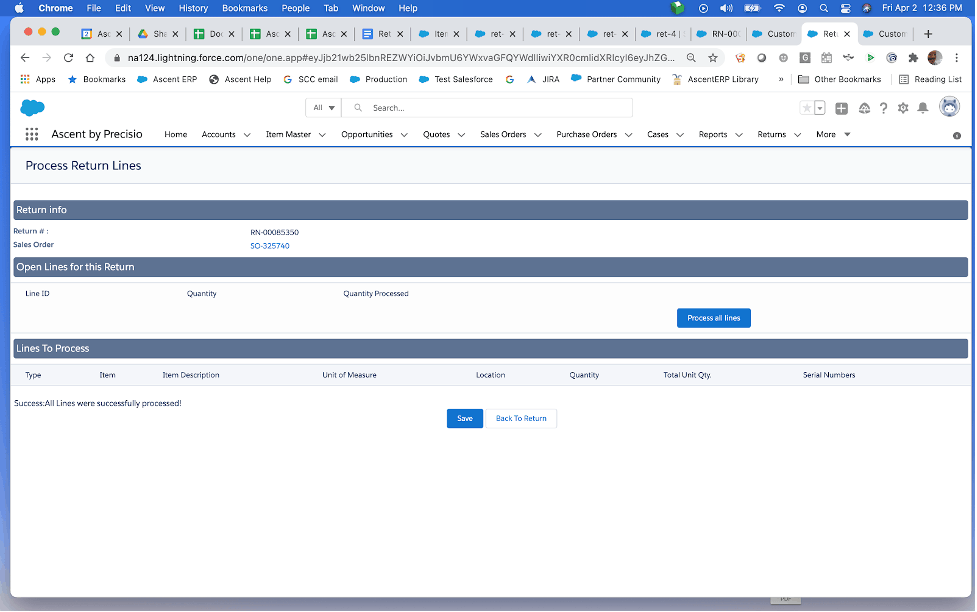
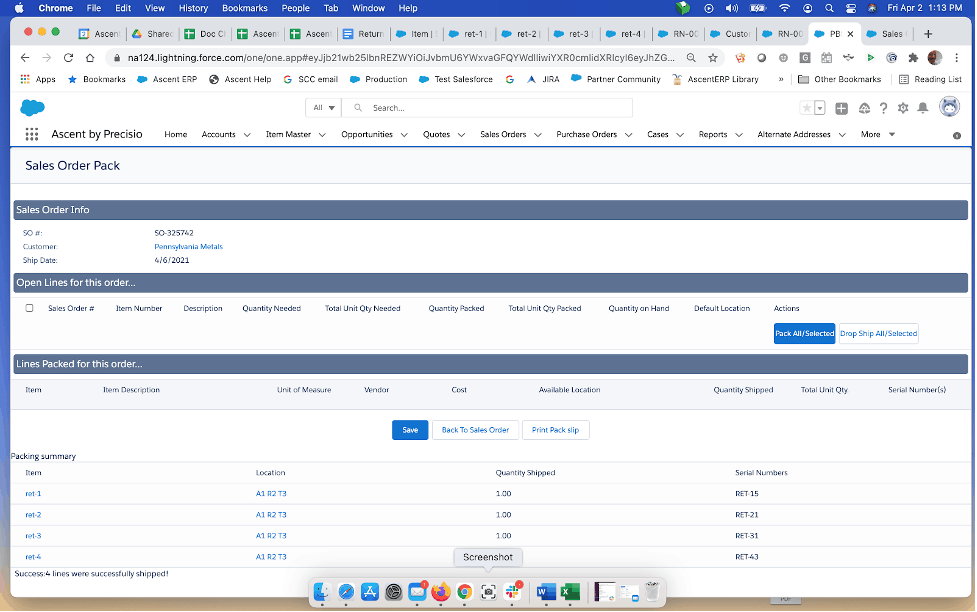
When you are satisfied, hit Save and you’ll see this as a result:
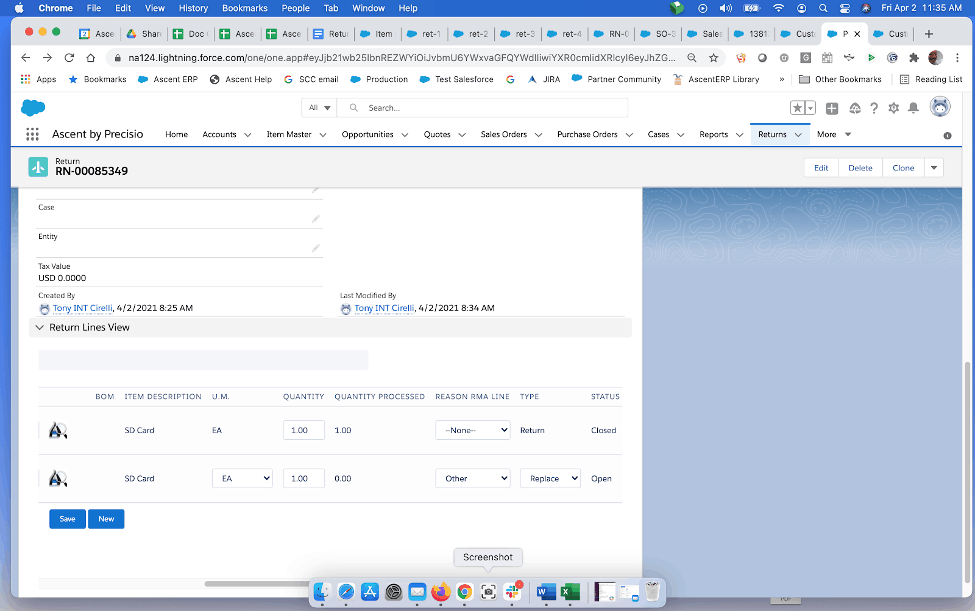
The return line will now show the Quantity Processed.
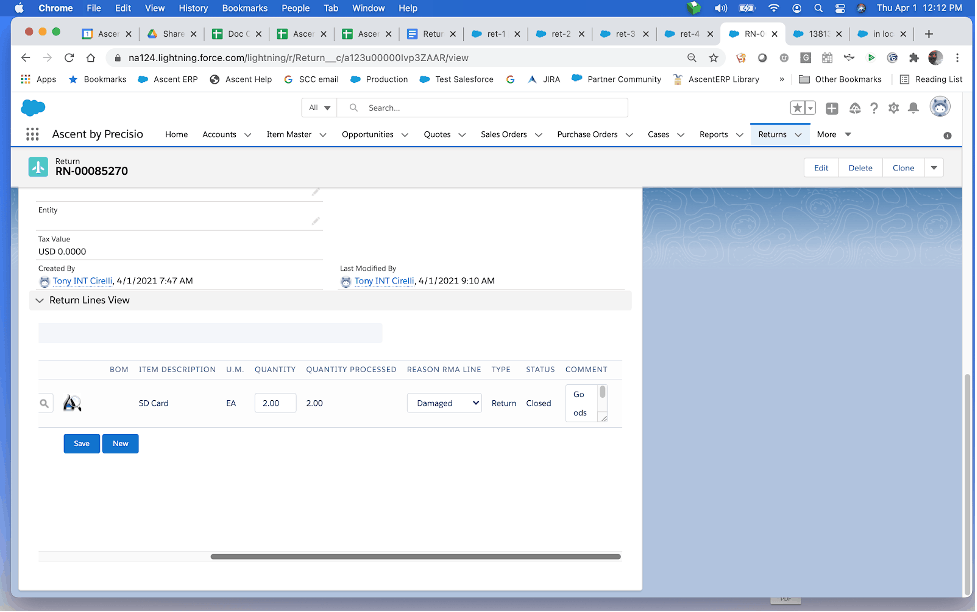
And if we scroll to the right, we’ll see the Status on the return line is now Closed:
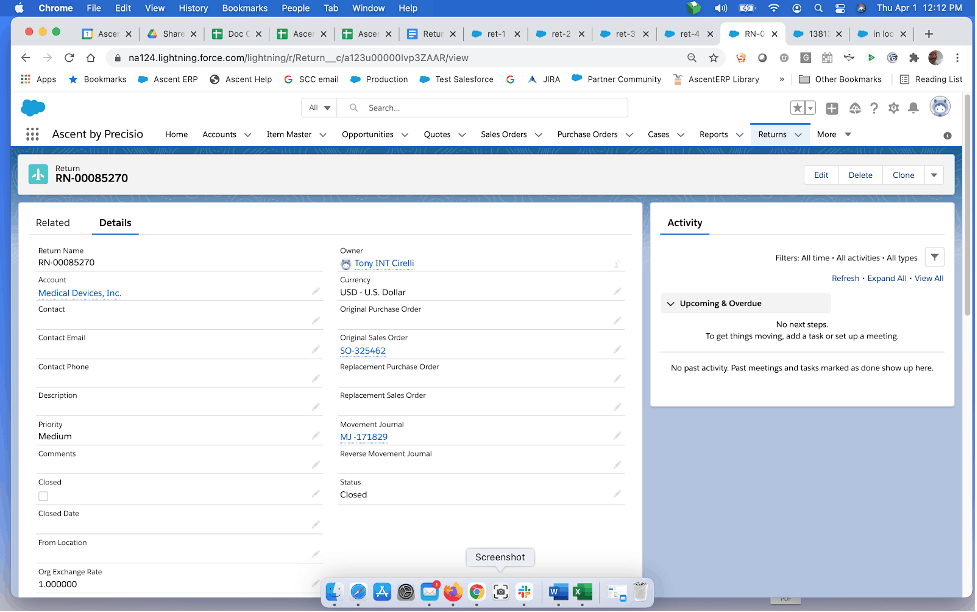
The Status of the Return itself is also Closed:
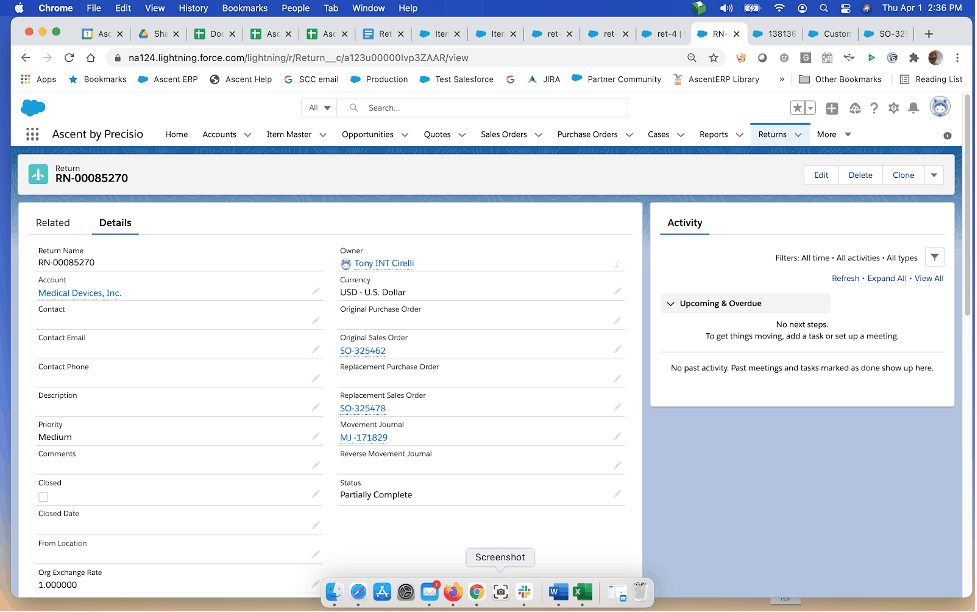
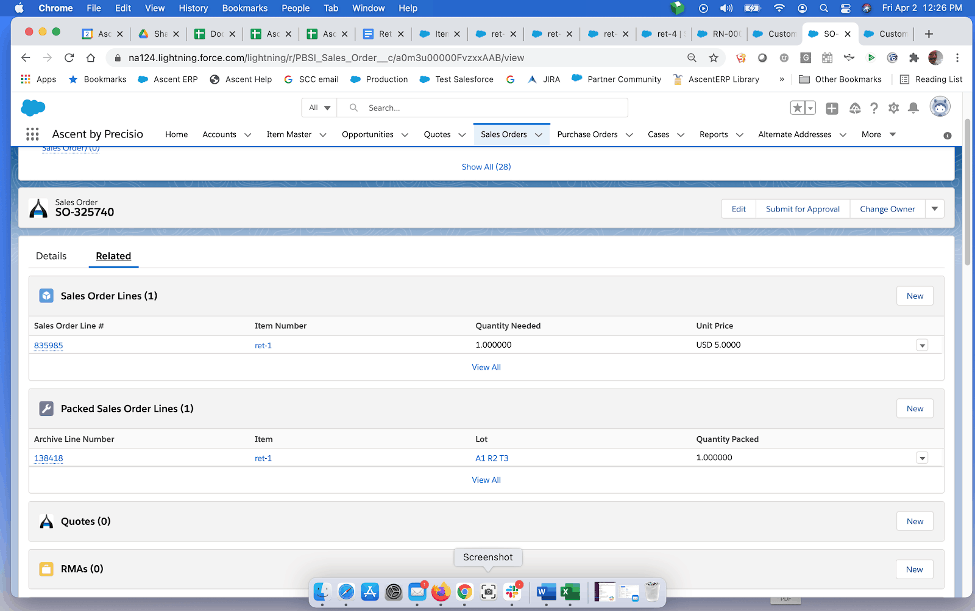
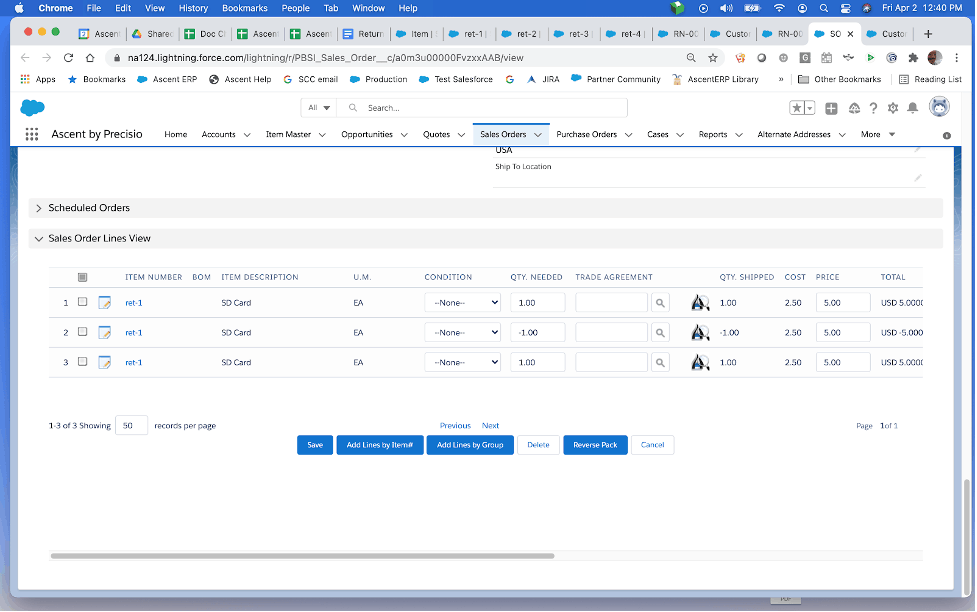
Returns with Return Lines – Replace-from Order: For this example, we are using the previous SO,
Do Not Add Credit Lines From RMA was not enabled, Ascent created a -2 quantity SO line.
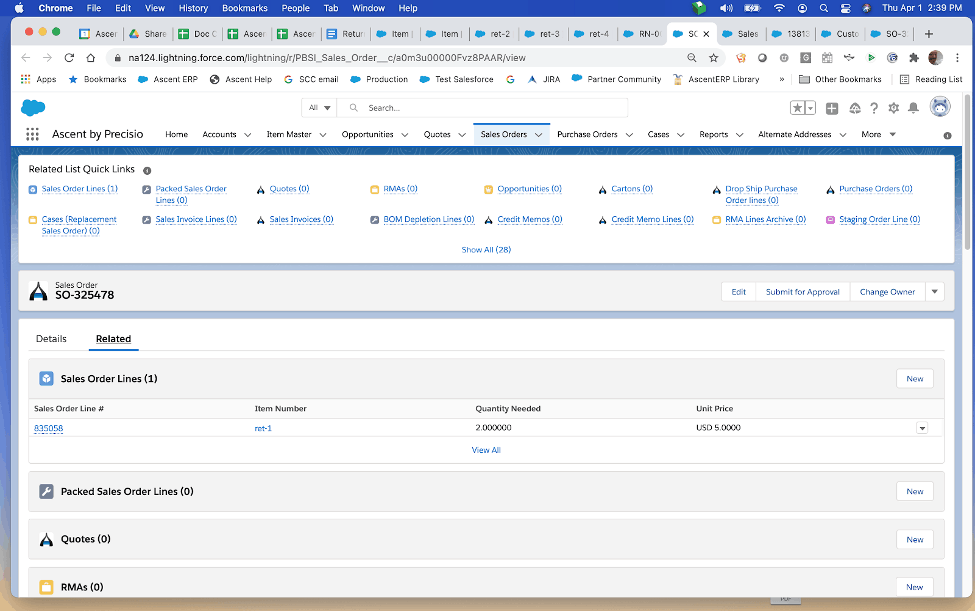
Create New Order for Replacement RMA is enabled and by adding a new return line, new SO is created.
Notice the Replacement Sales Order field on the return?
And the new SO and Line:
After performing Pack SO on the new sales order, Ascent will update the newly added Replace-from Order return line. The status is now closed.

Returns with Return Lines – Replace – How to replace an item that has already been returned:
This situation would be due to the fact that many companies will not automatically replace material that is sent back to them from a customer until the returned item is inspected. Therefore, the return and replace process occurs in two steps. This step will replace the returned material.
Important notes:
- Processing a “Replace” will add a new sales order line to your existing sales order and perform Pack SO on that new sales order line.
- Custom setting Create New Order for Replacement RMA must NOT be enabled. If it is, you will get a NEW sales order, not an additional line on the existing sales order.
First, here is the packed sales order line:
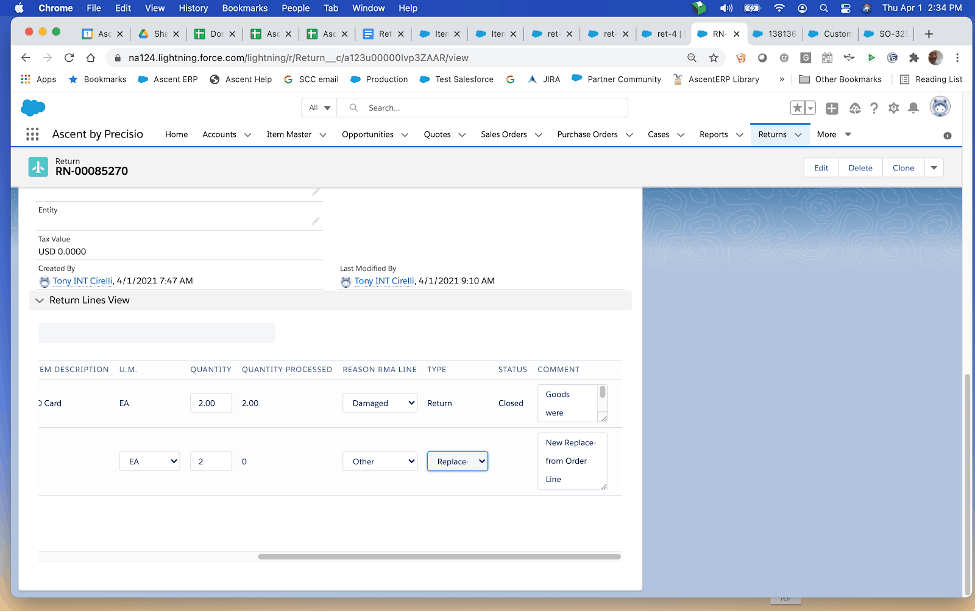
And here is the processed return:
Now, add the “Replace” line to this Return:
Now process the newly added “Replace” return line. Enter the serial number to be shipped and Save
Look at the originating sales order. A new SO Line has been added and packed:
Looking at the return “Replace” line, it now shows closed.
Replacement – Return and Replace in one step:
To make this work, custom setting Create New Order for Replacement RMA must NOT be enabled, or else you’ll create a new sales order. The intent here is to ask you for the item and serial number being returned as well as what it is being replaced with.
First, here’s a packed sales order:
Next, create an Return for it by selecting the down arrow next to the Change Owner button and hitting Create RMA:
Select the line to return:
Here is the Return line that was created. Change the Type to Replacement and hit Save:
Once saved, select the down arrow next to the Clone button and choose Process Return Line:
This screen will appear, and you can select Process:
You’ll see 2 lines, one for the return and one for the replacement. Enter the serial number which is the replacement and hit Save:
You will get a confirmation message:
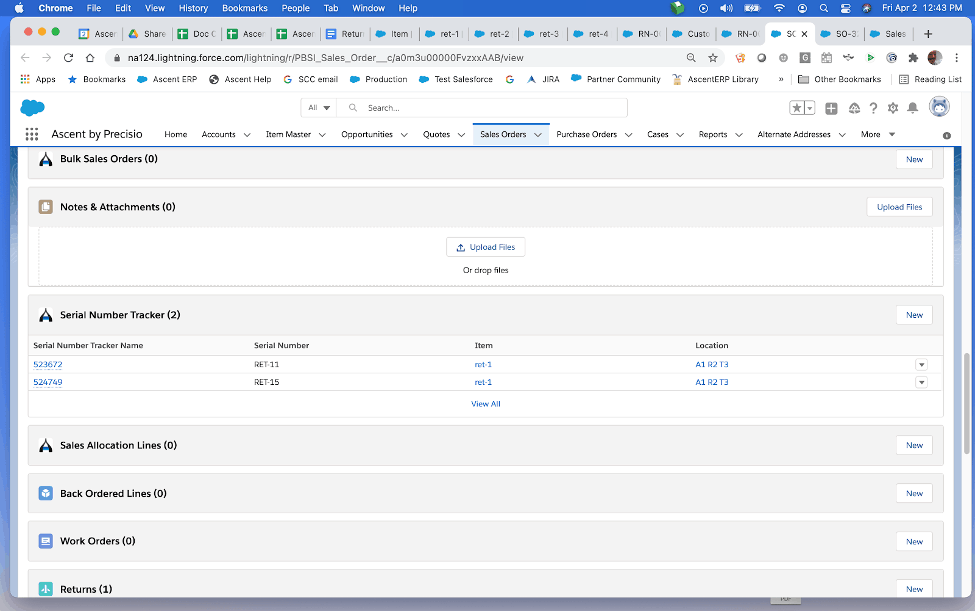
The originating sales order will show the SO line added to act as the replacement.
Also on the sales order you can see both serial numbers being referenced – the one being returned and the replacement.
Creating a Return for an individual sales order line:
The above examples had a single sales order line on each sales order. This was done to simplify the illustration. In reality, most companies will have more than one sales order line per sales order. Not every packed sales order line will need to be returned. Using the Create RMA button on the sales order will create a Return for ALL the packed sales order lines. By going directly to the sales order line containing the item the customer wishes to return, you will not have to address the successfully packed lines.
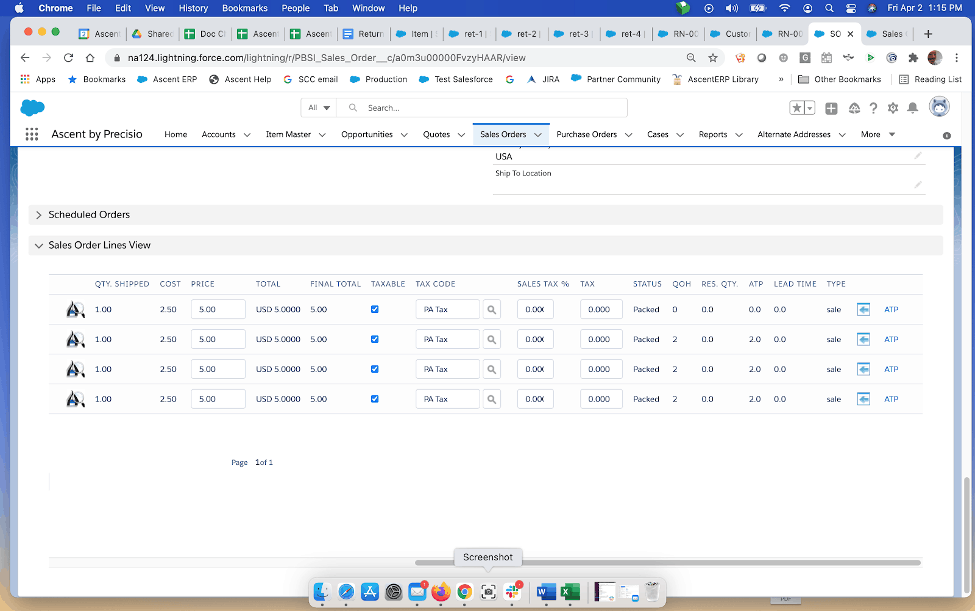
This example has 4 sales order lines and here is the packing process:
Here are the packed sales order lines:
In our example, we’ll return the first line. Go to the sales order line, scroll to the right, and view the box containing a blue arrow facing left:
Select that left facing arrow and a return will be created:
The originating sales order will show the above return. From this point on, you can process the return using any one of the processes documented above.
Returns with Return Lines – no reference to previously entered sales order:
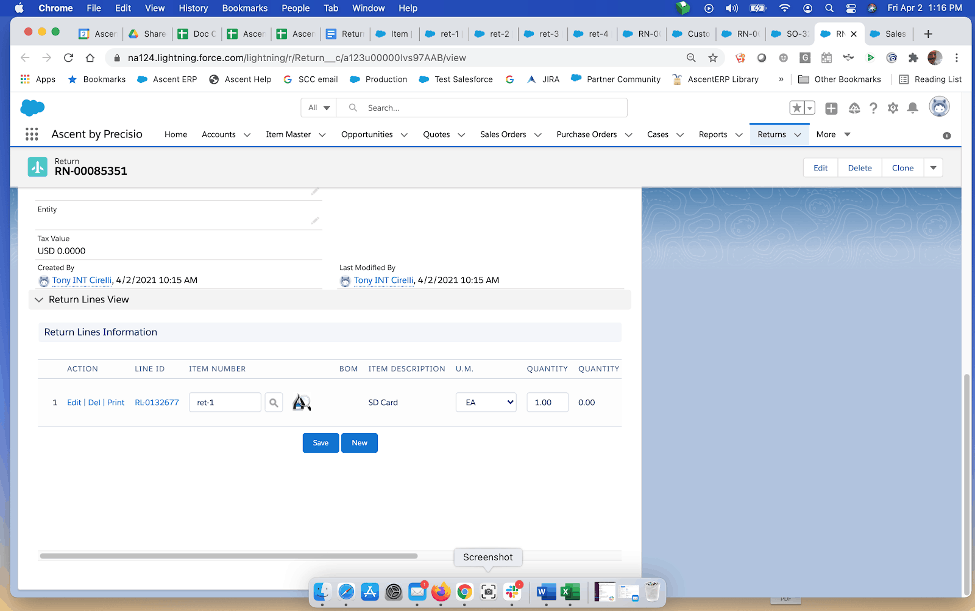
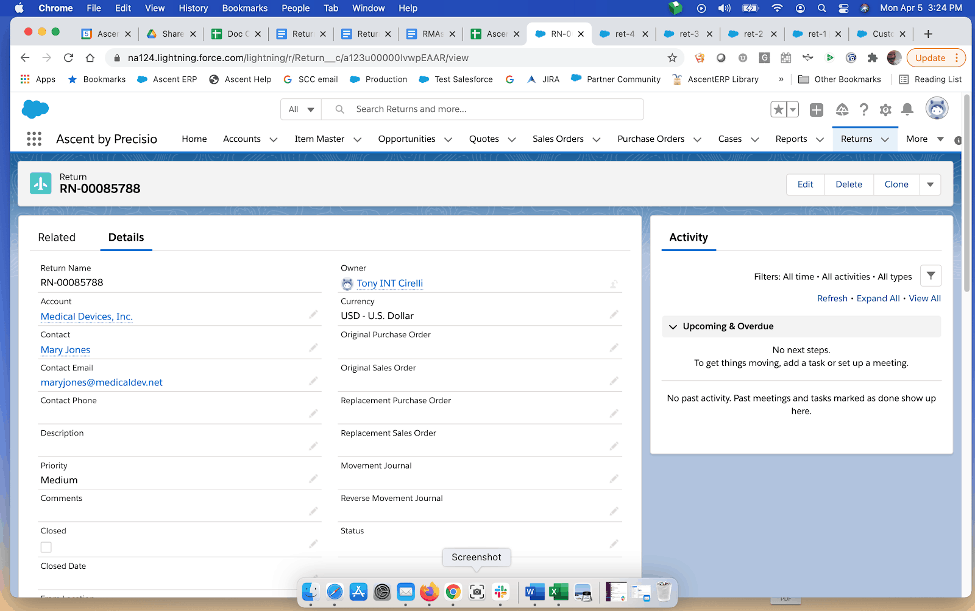
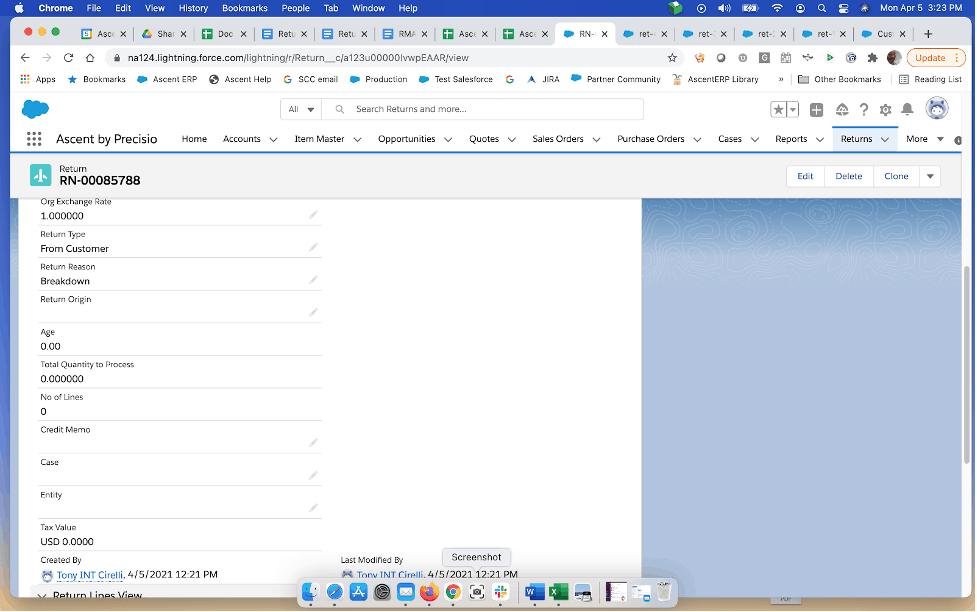
When a company first starts using Ascent, they don’t have any already packed sales orders or received purchase orders to be able to reference to create a return. So, one must manually create the return header and return lines. First, create the return header. You must select an Account and a Return type (From Customer). All other fields are optional, although entering a Return Reason would be good. To do this, select Returns and select New:
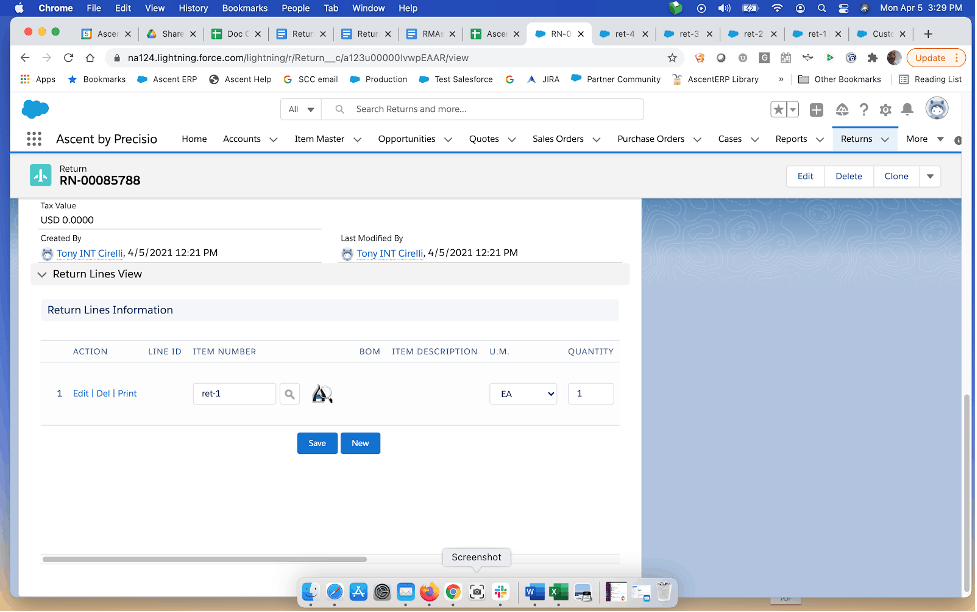
You must also add one or more return lines, by selecting New from Returns Line View:
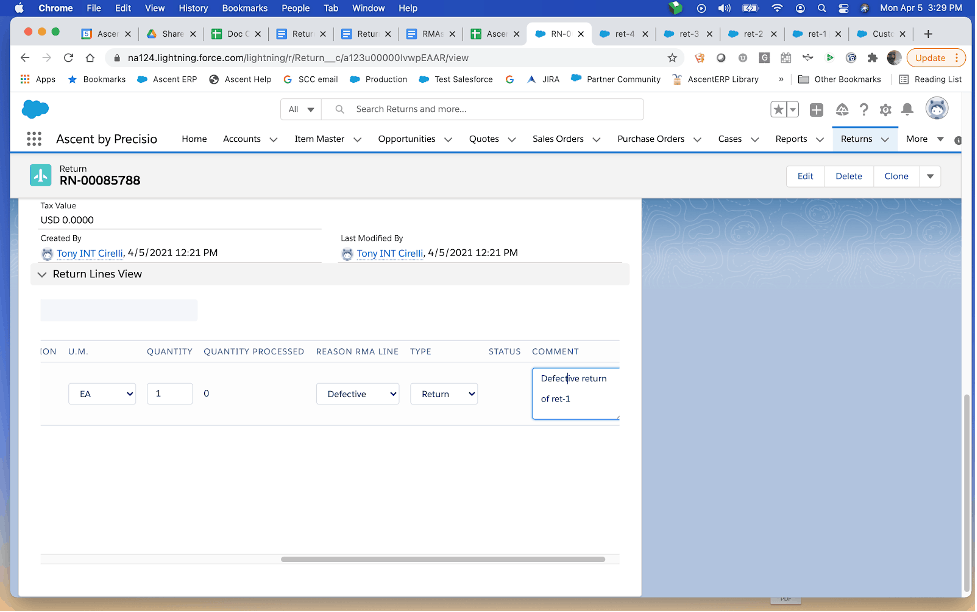
Scroll to the right to update the Reason RMA Line and add a Comment.
From this point on, you can process the return in the same manner as any other return. The difference would be that those functions which update an existing SO cannot be done, since you would not have an existing SO.
If you wish to created a SO to replace the material returned by the customer, you can follow the directions above for Returns with Return Lines – Replace-from Order