Configurable Items
Overview
Ascent allows the capability to put items into a configurable group, and then assign many of these groups to an item, to be referenced at sales order entry time.
Configure, price and quote “CPQ”, is a sales tool for company to quickly and accurately generate quote for configurable products.
The best way to illustrate Ascent’s capabilities in this area would be to develop an example and then show the screens that would be used to implement it.
Our example: we configure PCs. A user would have his choice of chassis, video cards, sound cards, and operating systems.
- Configurable PC
- Chassis Selection
- Chassis
- Chassis X
- Video Card Selection
- Video Card 1
- Video Card 2
- Sound Card Selection
- Sound Card
- Sound Card X
- Operating System Selection
- Windows 7 OS
- Windows XP OS
At sales order entry time, you can “configure” your PC by being given choices within each selection. Ascent doesn’t mandate that you select specific ones, nor does it mandate that you choose one within a group. That’s up to the user. Nor does it stop you from selecting multiple options within each selection. There are no rules.
Additionally, Ascent gives you the option to “Add Separate Lines”, which will take each of the selections and create a new sales order line. There is a custom setting “Add separate lines on Configure screen” that will set this as a default.
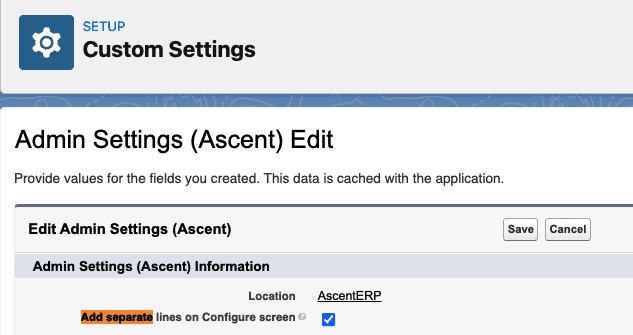
In this case, each selection will print on a pick list. If “Add Separate Lines” is not chosen, then only the Configurable PC item will appear on a picklist. In either case, the selections will appear on a picklist, allowing the picker to record the quantity packed for each selection.
For our example, let’s assume that all of the items that will go into the selections are already created. We’ll create the item master for the configurable PC as well as all the configuration groups and configuration group details.
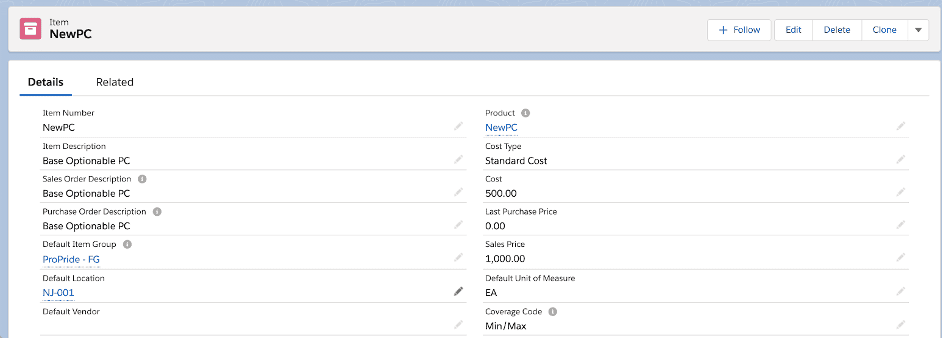
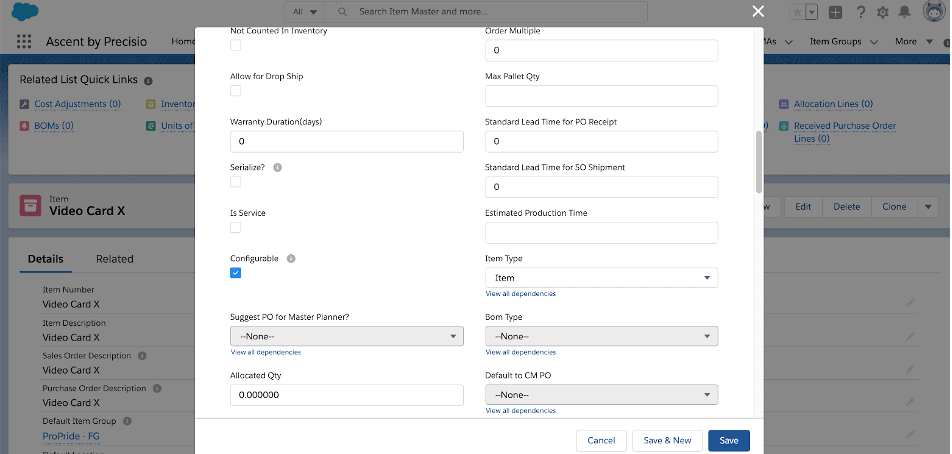
Item Master creation for configurable item – You can set up the item as a normal item, with one exception: there is a field called “Configurable. This field must be checked.
Create Configurable Groups – Select Configuration Group tab and select New
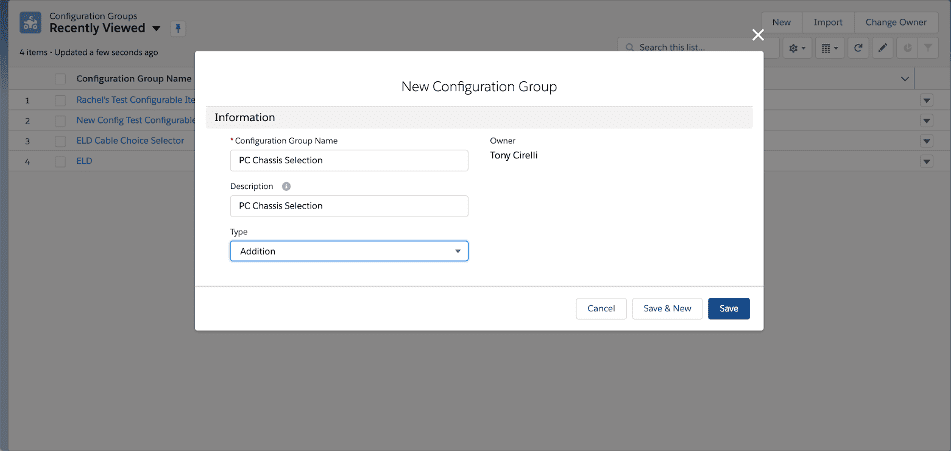
Enter the following data:
- Configuration Group Name
- Description – can be the same as Configuration Group Name
- Type – two allowable values:
- Addition – will add this item to the list of items to be picked for this configuration. Most people would use this option.
- Subtraction – will subtract this item from the list of items to be picked for this configuration. This is useful only if combined with another configuration group that might also have a similar selection of items as this group.
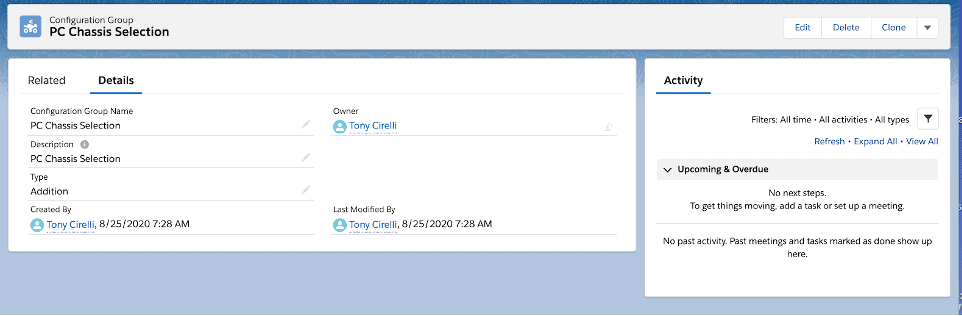
Click “Save”
After clicking “Save”, the following screen appears.
Change from “Details” to “Related”
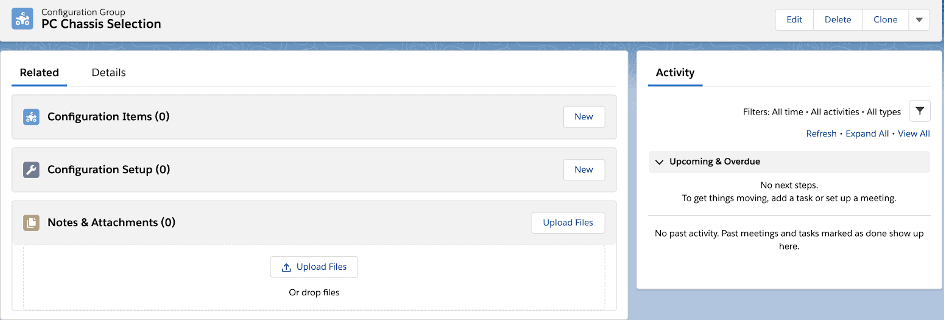
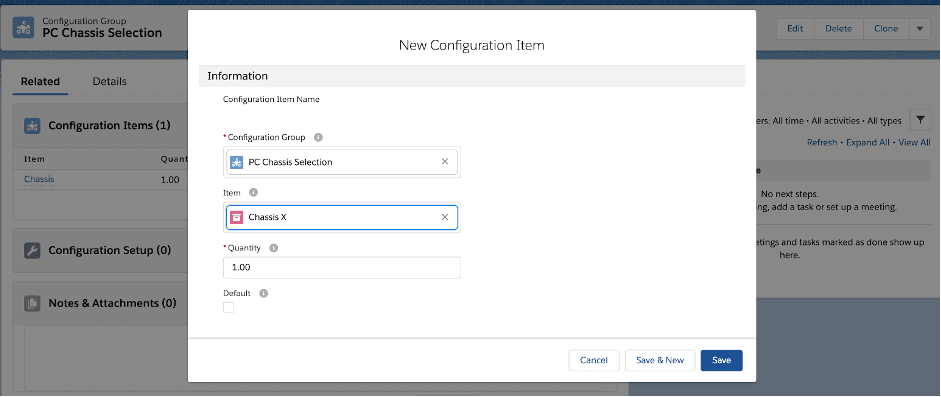
Click “Configuration Items – New”
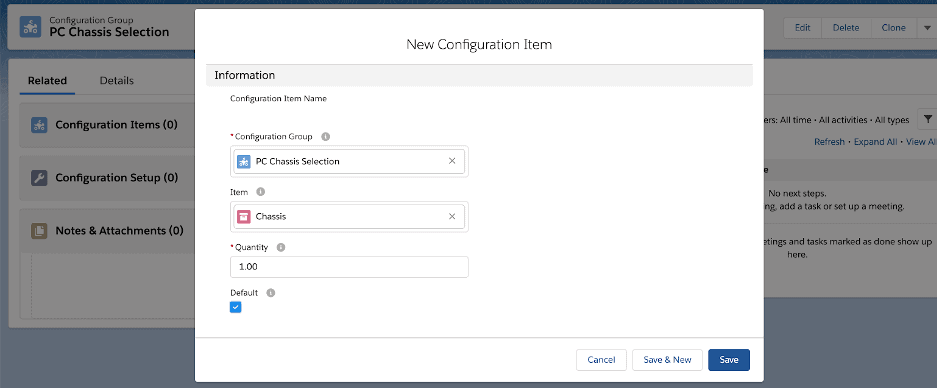
The Configuration Group field will be filled in for you. You then can enter:
- Item – one of the selections you will allow for this selection group
- Quantity – the quantity of this item
- Default – if checked, then this item will also be checked at sales order entry line item time, meaning that by default, it will be selected.
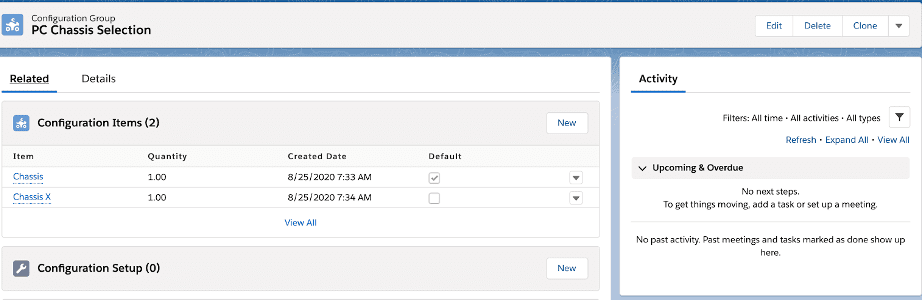
Then, put in any other item that would be in this selection group.
Notice that this one did NOT have default checked.
You would repeat this process for ALL selection groups. In this example, for Video Cards, Sound Cards, and Operating Systems.
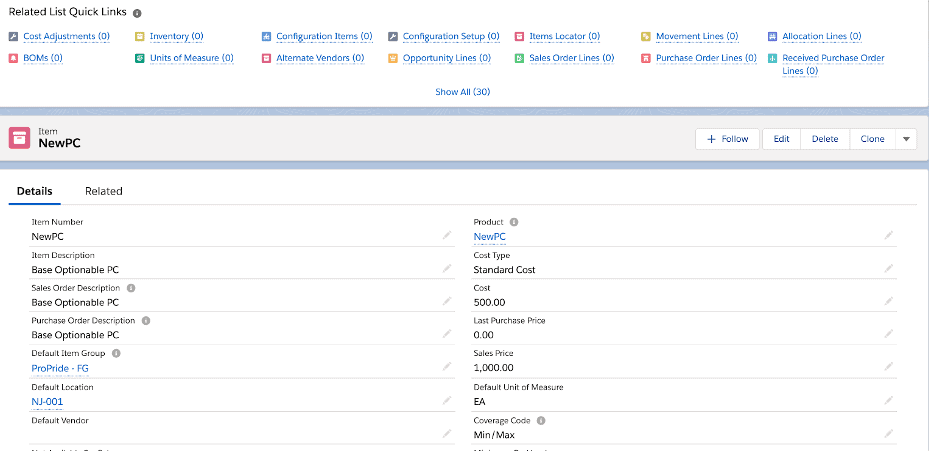
Now, you need to tie in all of the new configurable/selection groups to the newly created item: NewPC
Select the item that was originally created in the beginning of this documentation.
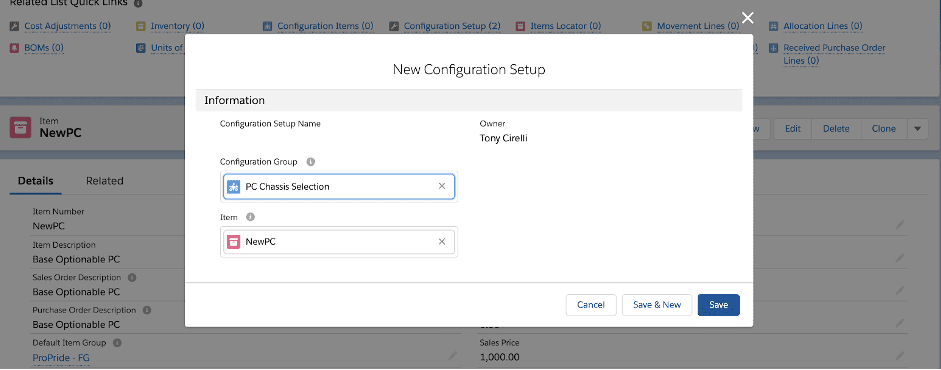
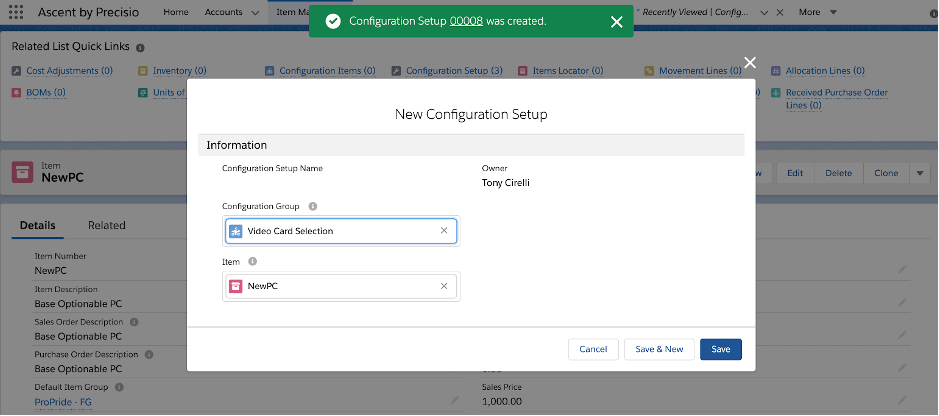
Select Configuration Setup in the related list and click on “New Configuration Setup”
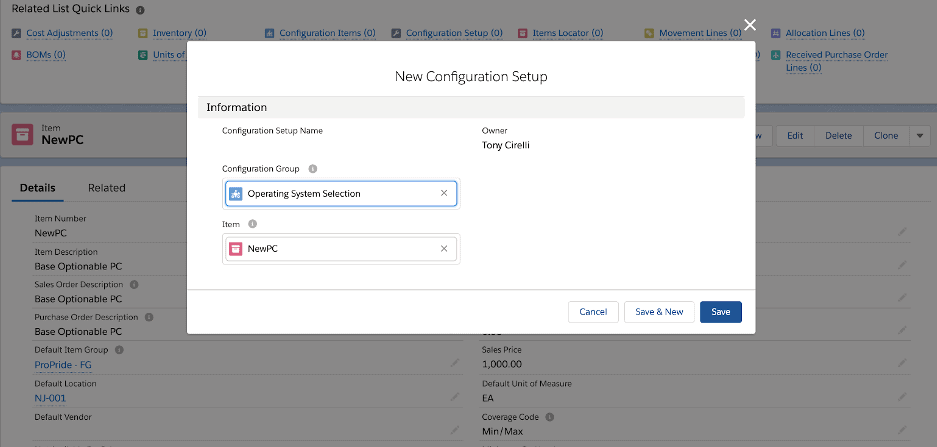
The item in question will be defaulted to. You must enter each of the configuration groups that you want to be offered as selections when entering a sales order line for this item.

Now, go back to the original item built (NewPC) and see what has been done.
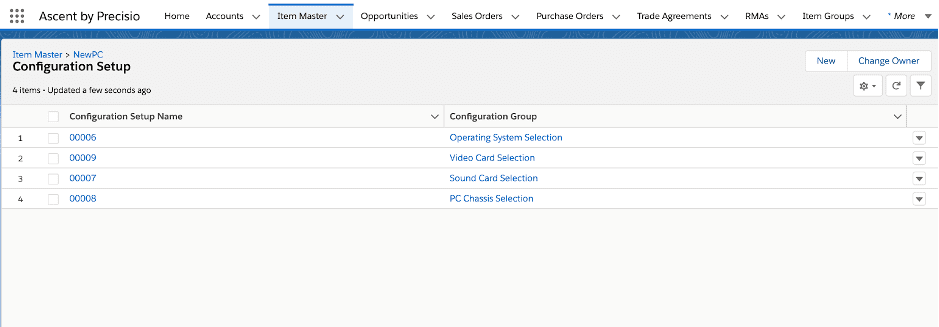
Four (4) new configuration groups have been added to NewPC.
How to Enter a Sales Order for a Configurable Item – for this first example, we will illustrate with special custom setting NOT enabled (more on that later)
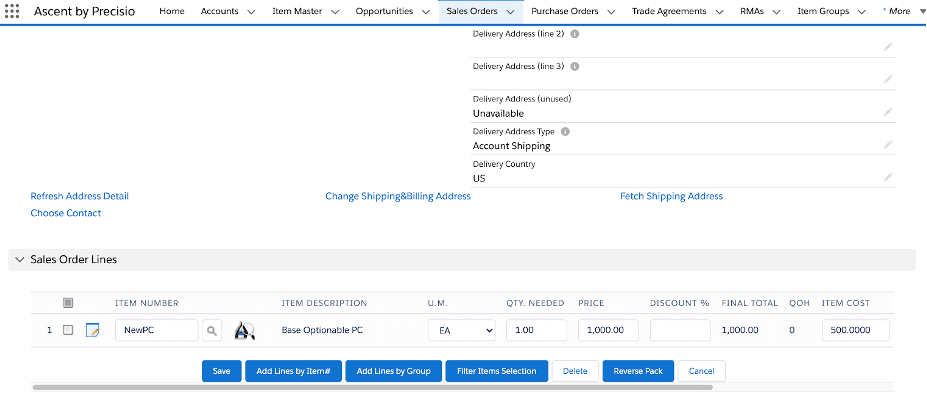
- Select Sales Orders
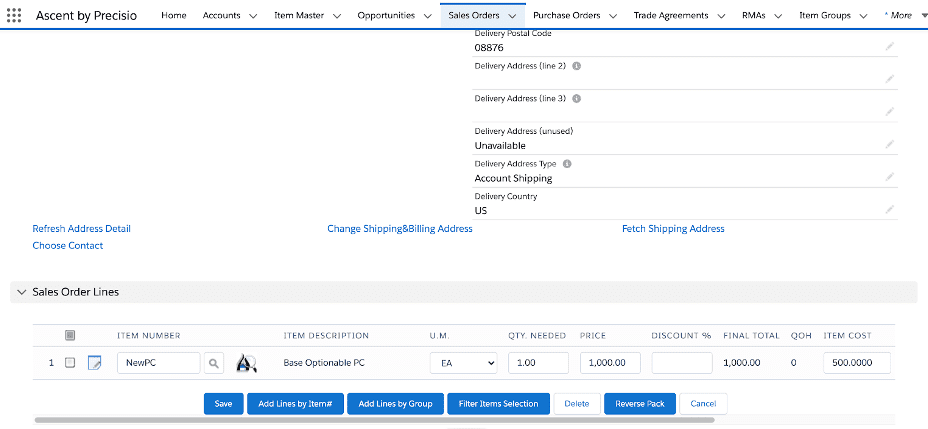
- Enter the NewPC item, a quantity, and a price. Click “Save”

Note that a new button (gear-like icon) comes up, once you scroll over to the right to see it, “Configure”.

- Click it.
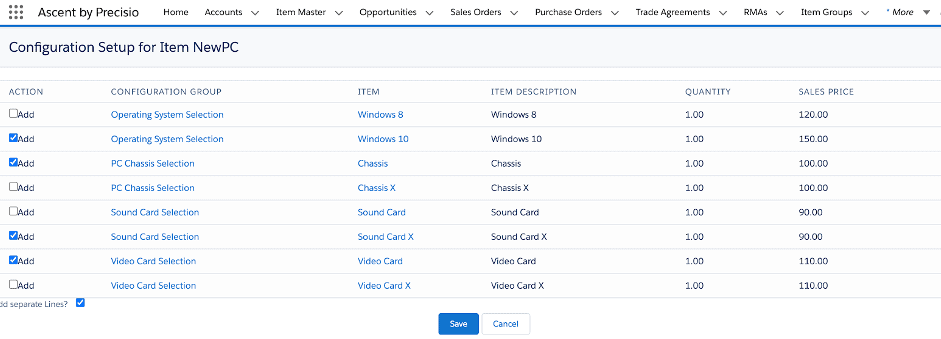
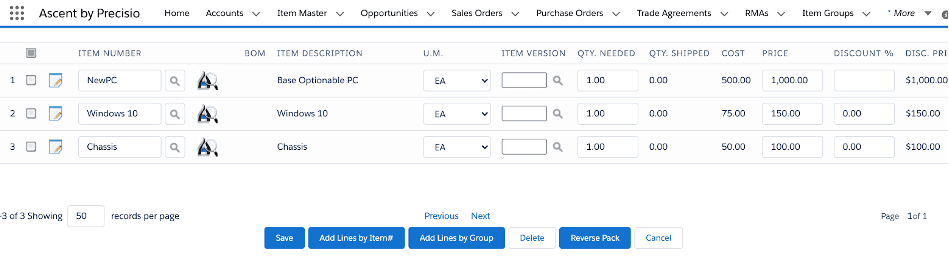
- All selections for all groups associated with NewPC appear. You can now check off the items that you want in your configuration. For those that were set up with a default item, they will appear with the action “Add” checked. You can uncheck if not desired. Also note the “Add separate Lines?” option is checked.
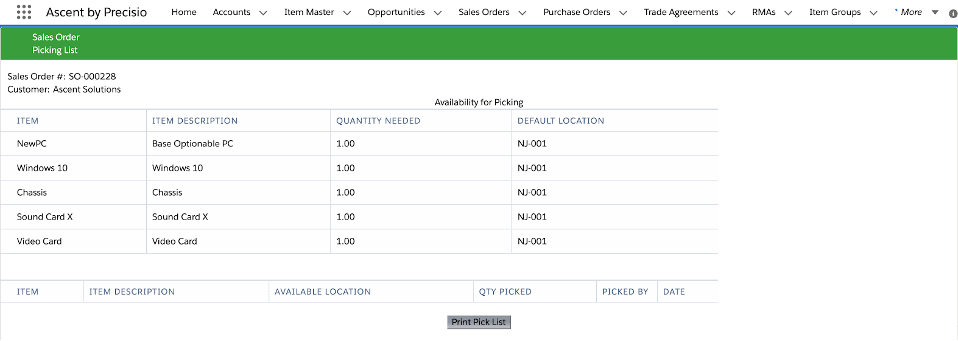
- If you wish to print a pick list, this is what you’ll see:
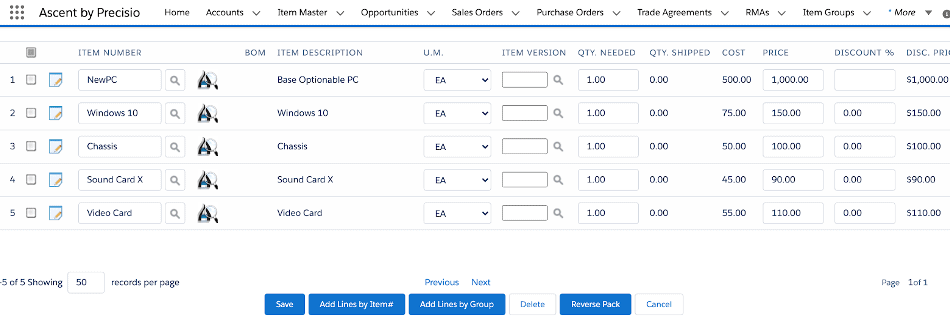
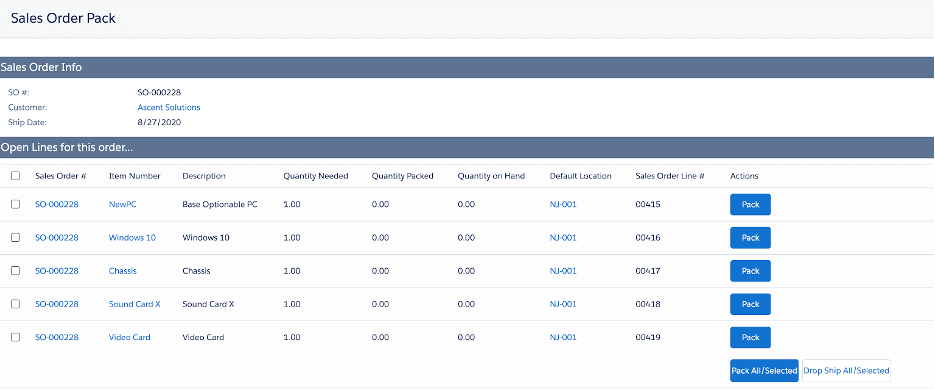
- When you perform Pack SO, the newly added lines will appear:
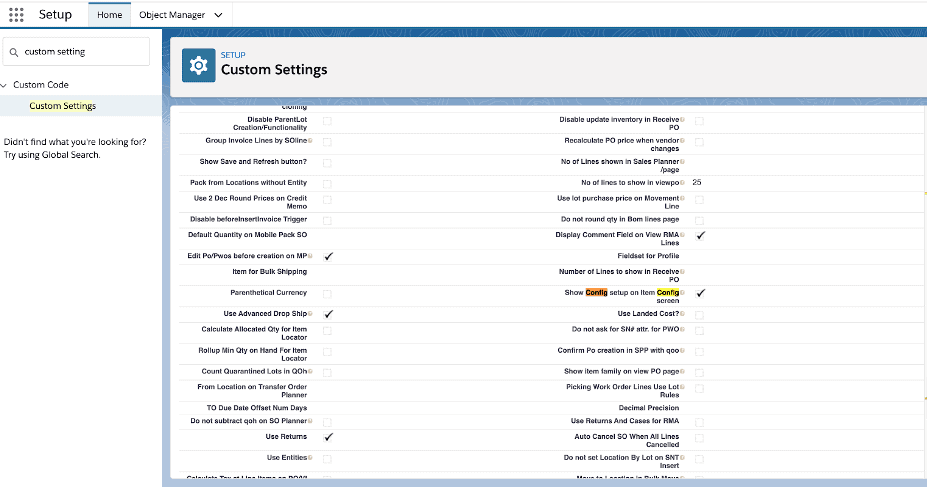
There is an additional way to be prompted for and to display your configuration options. First, this custom setting has to be enabled – “Show Config setup on Item Config screen”
Then, when entering a sales order and adding an item which is a configurable item, the screens now look like this:
Scroll to the right, and you’ll see the same configuration “gear” icon:

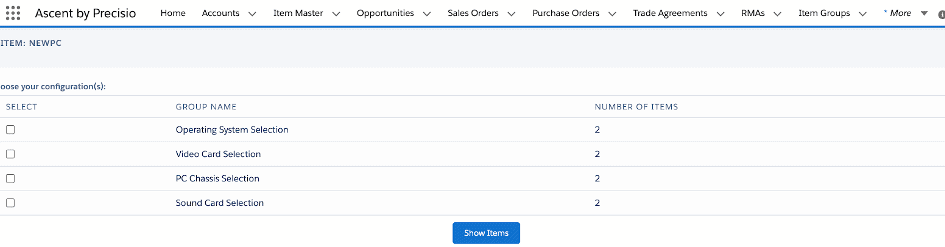
Then, click the gear icon. Here, rather than displaying ALL items that fall within every configurable group, you simply see the configurable groups, and are allowed to choose which ones become part of this selection process.
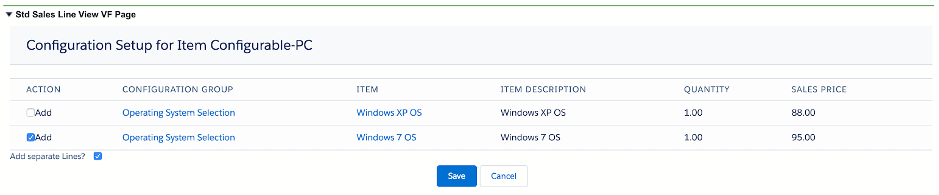
For this example, let’s choose Operating System Selection and PC Chassis Selection:
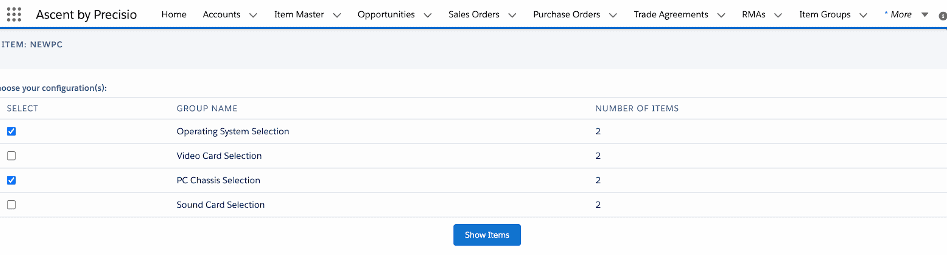
After hitting “Show Items”, you’ll see this:
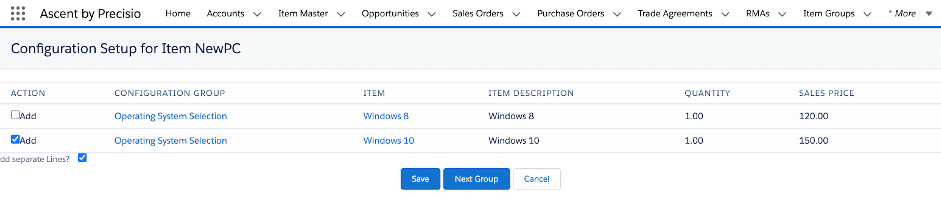
We can make changes, if desired, and hit Next Group, which will send us to the PC Chassis Selection:
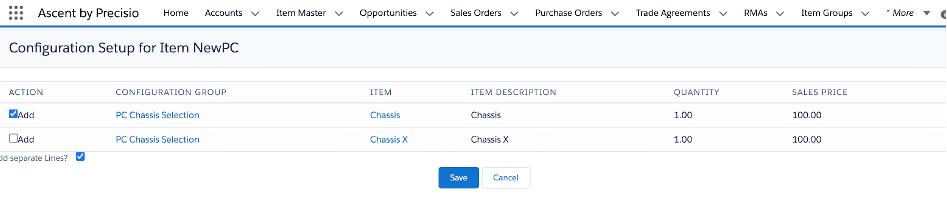
Since this is the last group, the system will not prompt us for the Next Group, but ask us to Save or Cancel:
After hitting Save, the system brings us back to the sales order lines view and shows us this – the configurable item and all of the options chosen: