Rental Opportunities and Quotes
Overview
This document will serve as an overview of the functionality available via Rental Opportunities and Rental Quotes to create a rental order.
A rental opportunity can not only include rental line items, but can also include sales items.
Definition: The Opportunity object is a standard Salesforce object. Ascent uses that object and adds additional fields to it to make it work using Opportunity Lines and Items. The Opportunity Line object is an Ascent object. It houses the item information related to the opportunity. You can have multiple opportunity lines to an opportunity.
Definition: The Quote object and Quote Line object are both Ascent objects. These can exist as a result of converting an opportunity to a quote or created manually without requiring an opportunity.
A rental opportunity can be converted to a rental quote. A rental quote can be converted to a rental order. A rental opportunity can be converted to a rental order without being converted to a rental quote.
An opportunity can be converted to multiple quotes, allowing the sales rep to present multiple quotes coming from the original opportunity.
Custom Settings of Importance: there are a number of custom settings which can affect how opportunities and quotes work. Some of them will be outlined here. A few are discussed later on in the body of this document. To see all possible custom settings, please review the Custom Settings document.
- Allow more than one SO for an Opp – this would allow a user to create any number of sales orders from a single opportunity. This could be useful if a client frequently calls for the same material that they called in for previously, or possibly a contract for those items with multiple releases.
- Carry Qty from BOM to Opportunity – if the BOM lines is marked as Add Separate and has a quantity, then if this setting is enabled, carry this quantity to the separate lines added to the opportunity. If this is not enabled, quantity will always be zero.
- Disable trade agreements for Opp – enabling this would result in not using trade agreements on the opportunity.
- Do Not Show Cost on SO Opp Quote Lines – you would enable this if you do not wish to sho cost information to the person entering/editing sales orders, quotes, or opportunities
- Include Opp in ATP? – Available to Promise calculations will not include opportunities
- Use 2 Dec Round Prices on SO/Quote/Opp – enable this field if you want sales orders, quotes, and opportunities to use discounted price rounded to 2 decimal places when calculating totals.
- Include Opportunities in Planner Data – if enabled, Sales/Purchase Planner will view opportunity data
- Synch Quote to Opp when converting to SO – when you convert a quote to a sales order, Ascent will also sync the newly created/converted sales order to the opportunity.
- Allow Rental Serial Billing by Daily – if selected, this allows users to generate rental serial invoices for packed rental lines with “Daily” period.
- Allow Pack from Customer Rental Location – if enabled, this allows the user to pack material from a customer rental location. (a location that starts with “Rental – “).
- Allow Return in Customer Rental Location – once selected, you are then allowed to upon performing a rental return, to return the material to a customer rental location. (a location that starts with “Rental – “).
- Disable price recalculation on rental SO – when the date in and date out are changed on a rental order, and this is selected, then the price will not be recalculated.
- Hide Delivery/Return Date on Serial Inv – if enabled, the system will not display the Deliver and Return Dates on the rental serial invoice header.
- Do not Show QOH on QR Views – this will prevent display of QOH on rental lines
- Do not show QOH by Period on QR Views – enabling this inhibits display of QOH by Period on rental lines
- Don’t calculate Return Date on Quote – if selected, Ascent will not calculate the Return Date on a rental quote.
- Don’t calculate Return Date on Sales Order – if selected, Ascent will not calculate the Return Date on a rental order.
- Hide Duration on Serial Invoice – once enabled, Ascent will not display the duration on the serial invoice header.
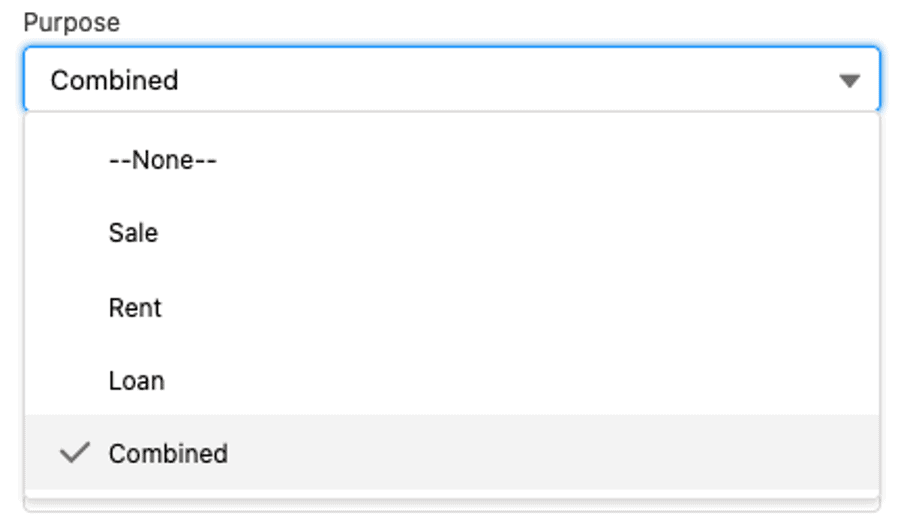
- Loan Rental Orders get zero price? – some companies loan out goods as a try-and-buy, and don’t charge a fee. To do this, enable this custom setting and make the Order Purpose = “Loan”.
- Order Return Date Add/Subtract Days – the value you put in here will either be added to or subtracted from the calculated Return Date.
- Rental Master Start Date – if a date is entered in this field, then the Start Date on the Rental Master screen will be this.
- Rental Master End Date – if a date is entered in this field, then the End Date on the Rental Master screen will be this.
- Rental Extension Offset – not currently being used
- Use Dated Item Reservations – Dated Item Reservations (DIR) is a feature that can be enabled here. DIR allows you to reserve material for the duration of a rental order.
- Use Returns Instead of POs for Rentals – in the past, Ascent only allowed purchase orders to be used as a method of getting material back in-house as a result of a rental return. By selecting this custom setting, Ascent will use Returns and Return Lines in lieu of purchase orders and purchase order lines.
- Use Venue on Pack Order – if this is selected, then Ascent combines the venue location (which must be created as a location) with the account name where the rented material resides between the Pack Order function and the Rental Return function.
Process
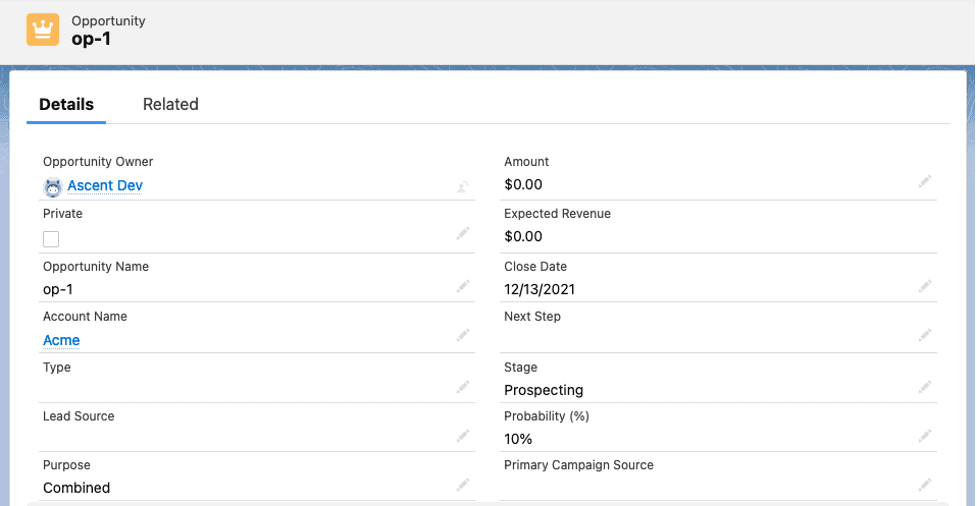
To create an opportunity, go to the tab labeled “Opportunities” and click “New”. The following fields are available for entry/display, based on what your company has chosen to expose for use.
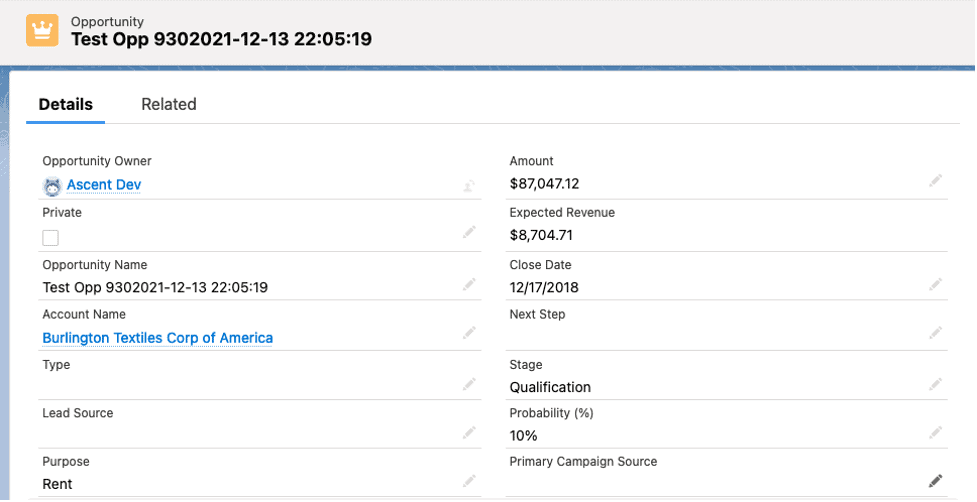
Opportunity Detail – we will describe fields on the opportunity, however, the screenshot below will only show selected fields, and groups the rental specific fields under Rental Information in the screenshot.
- Opportunity Owner (not prompted for, displayed after creation) – this is the owner of this opportunity
- Opportunity Name – this identifier of the opportunity is manually entered by the user
- Account Name – this can be selected by clicking the magnifying glass icon and being displayed 3 of the most recent Accounts or adding a New Account or by keying in some characters of the Account Name, and you will be given a message “Select an option from the picklist of remove the search item”.
- Account Group – the account group this account resides in
- Type – select the opportunity type from a picklist. Typically, the system administrator will customize this picklist to suit specific business requirements.
- Lead Source – where this lead came from; it is optional; typically, the system administrator will customize this picklist to suit specific business requirements.
- Opportunity Currency – the default currency of this opportunity; can be changed based on what currencies (if a multi-currency ORG) have been set up in this ORG.
- Trade Agreement – you can manually enter one or a trade agreement (TA) will be filled in for you if the account has an “order” specific TA.
- Quantity – this field can be manually entered; it does not sum up the quantities from the line items;
- Delivery Address, Delivery City, Delivery Country, Delivery Postal Code, Delivery State – this information comes from the Account on this opportunity. It can be overridden.
- Order Number – this is a manually entered field; Ascent does not use this field.
- Tracking Number – this is a manually entered field; it can be used when clicking on the Delivery Status button to get delivery information.
- Created by – this is the user who created this opportunity.
- Description – this is a good place to document a conversation you may have had with the account regarding this opportunity; it is optional;
- Change Delivery Address – if this is selected, then you will be prompted with another screen which will allow you to select the default location (if the default had been previously overridden) or any of the Address Trackers that have been set up for this Account.
- Delivery Status – if this is selected, you will be brought to a freight carrier screen (like FedEx); that carrier screen will use the Tracking Number to provide delivery information;
- Discount (%) – this is the discount to be applied to this opportunity; it can come from the TA or can be manually entered/overridden.
- Final Total – this is the sum of all Totals from the opportunity lines
- Expected Revenue – you can enter what revenue you hope to achieve from this opportunity; optional, and manually enterable;
- Close Date – when entering a new opportunity, this field is mandatory; you must enter the date which you anticipate closing the deal.
- Stage – this too, is mandatory; it is a drop down picklist, with these values below; with each value, the Probability (%) is assigned
- Prospecting – 10%
- Qualification – 10%
- Needs Analysis – 20%
- Value Proposition – 50%
- ID Decision Makers – 60%
- Perception Analysis – 70%
- Proposal/Price Quote – 75%
- Negotiation/Review – 90%
- Closed Won – 100%
- Closed Lost – 0%
- Probability – value is based on the previous field, Stage
- Sales Order – this would be filled in for you once the opportunity or one of its quotes are converted to a sales order. It can also be selected as a lookup field.
- Next Step – a reminder to the user as to what the next step in the sales process should be.
- Primary Campaign Source – is Salesforce campaigns are used, this search field could be used to select what campaign generated this opportunity
- Enable Trade Agreements – this defaults to selected (checkbox checked), which would allow TAs to be assigned to this opportunity
- Tax Code – this would be the tax code assigned to this opportunity; it can come from the Account.
- Main Competitor(s) – this is an optional enterable field, where you can enter who the main competitors are for this opportunity.
- Delivery/Installation Status – an optional picklist, with picklist values of –None–, Completed, and Yet To begin
- Last Modified By – this is the user name who last modified this opportunity.
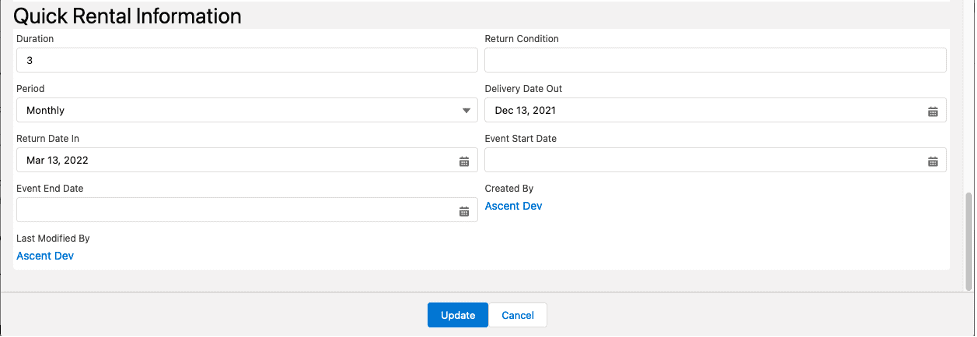
- Purpose – this would be the type of rental opportunity:
- Period – what is the Period (also called QR Period) pertaining to this opportunity:
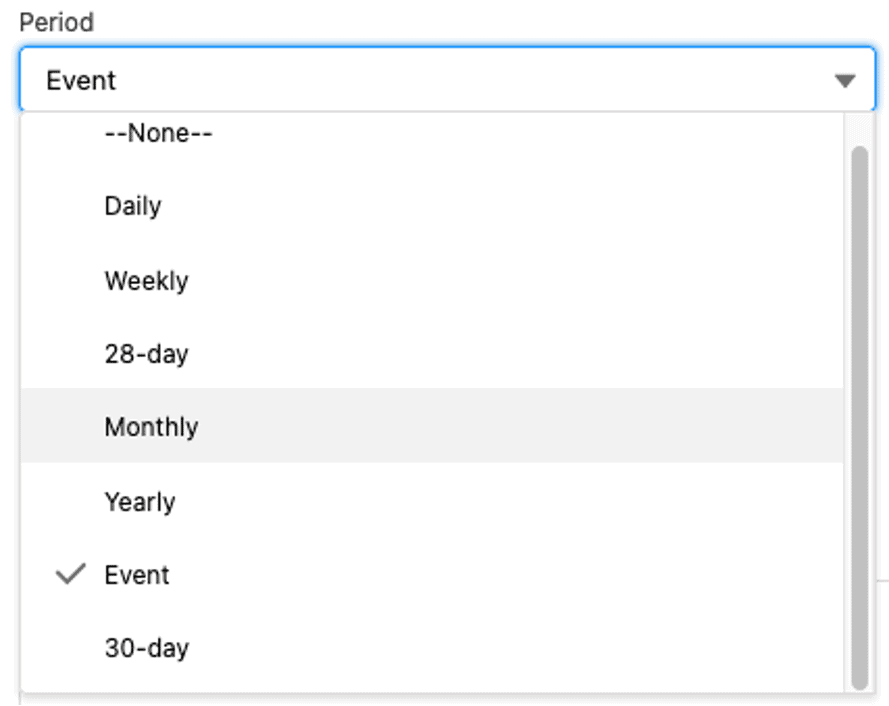
- Duration – this is a numeric field, equal to the duration of time in terms of what period is chosen. For example, if Period = Monthly and Duration = 3 then this opportunity is a monthly opportunity for a 3 month period.
- Delivery Date Out – this should be the first day on which the rented material should be delivered and out to the client. It is manually entered.
- Return Date In – this calculated field is based on the Delivery Date Out plus the duration.
- Event Start Date – if this opportunity has a Period of “Event”, then this date will be the start date of the event, like a trade show.
- Event End Date – this would be the last date of the event.
- Return Condition – not applicable necessarily for opportunities or quotes, but this would be the condition the returned material is in.
- Description – this is a memo field, optional, and can include whatever descriptive information you require.
Opportunity Line Creation:
When using Ascent Rental items, there are two possible pages that can be used to enter line items. One is Rental Opportunity Lines (RentalOpportunityLines), used for rentals, and the other, Sales Opportunity Lines (SaleOpportunityLines) is used for non-rental, or sales lines.
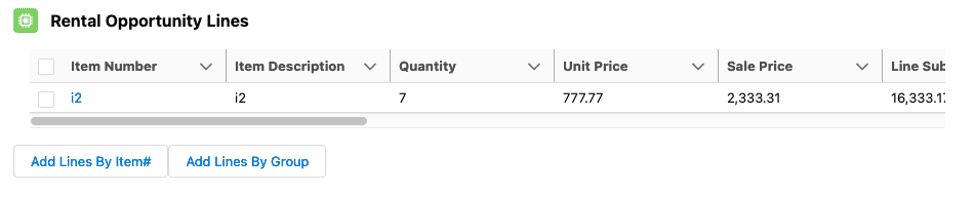
RentalOpportunityLines. This is a function that allows you to add/change/delete rental opportunity lines on the opportunity.

The buttons at the bottom of the RentalOpportunityLines screen are:
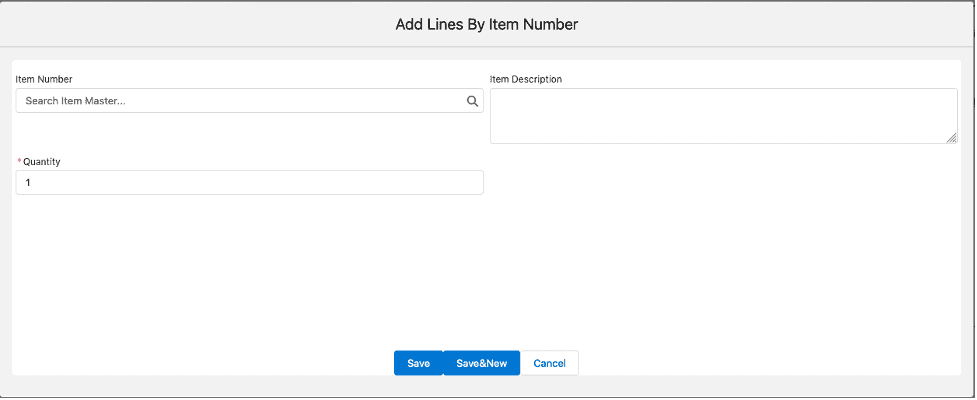
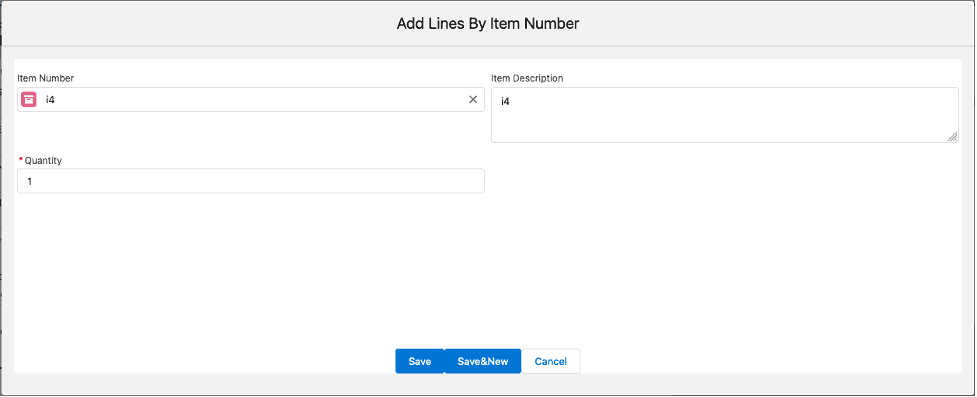
Add Lines by Item – this will display fields for entry, to create a new opportunity line. If you click this, you will be prompted with a new opportunity line. You are then shown the display below, which allows you to search for the item you wish:
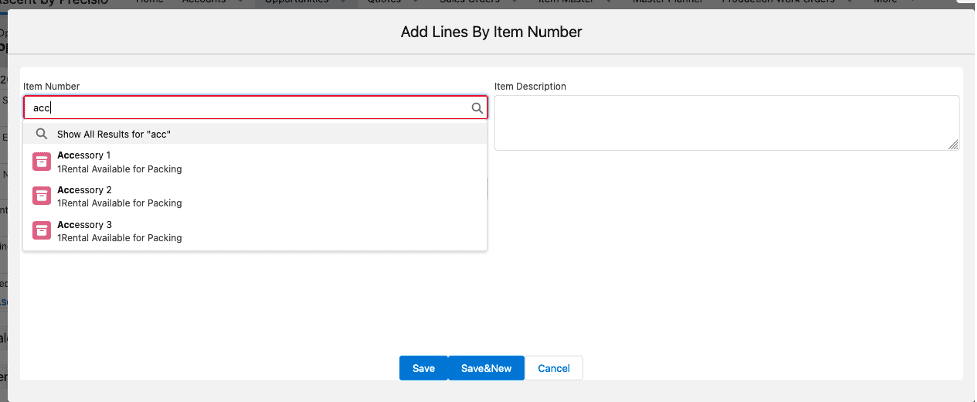
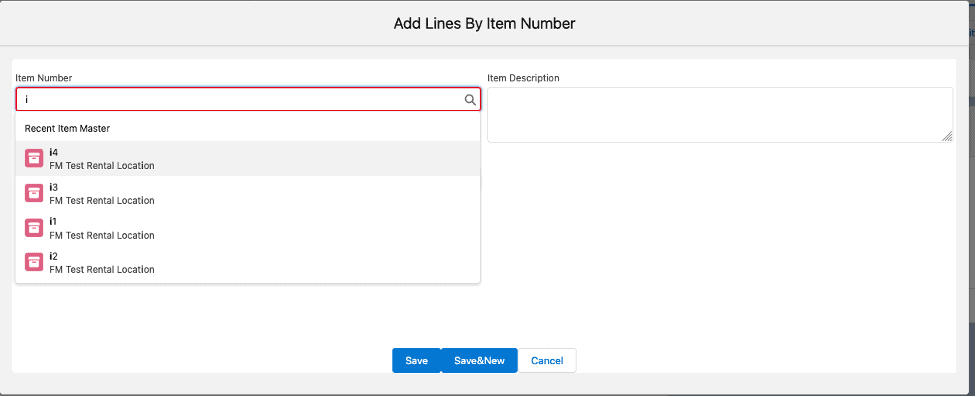
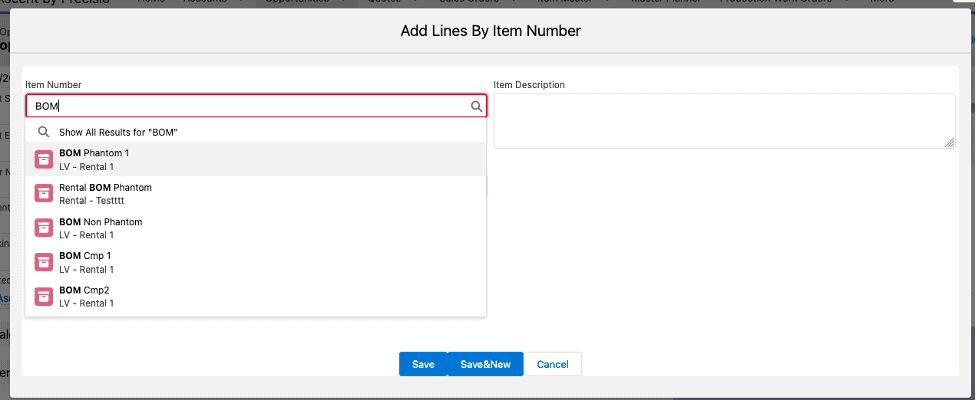
You can enter any part of the item number (from left to right) to see a list of those items that meet that criterion. Here are some examples:

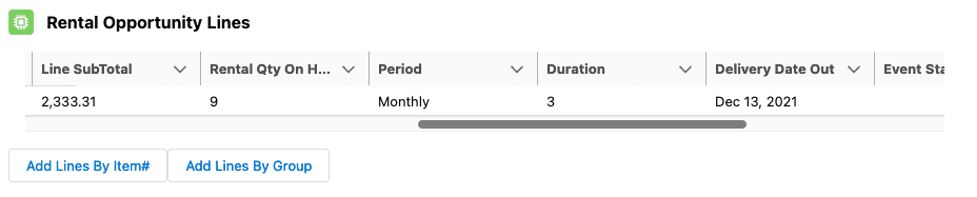

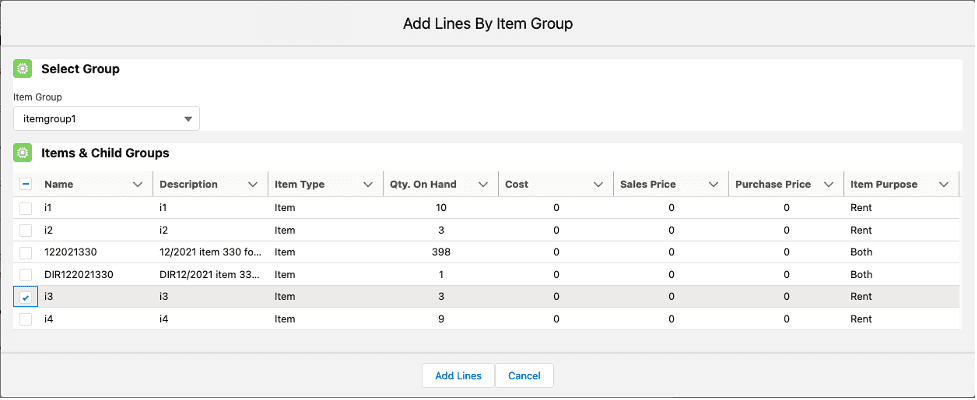
Add Lines by Group – if you click this then you will be prompted to select from a list of item groups.
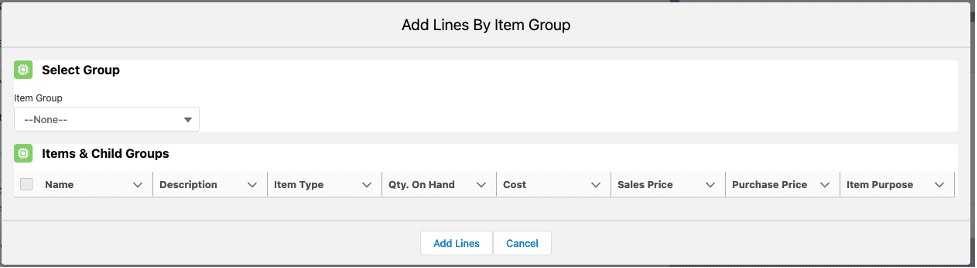
You will be shown items that fall into the item group, as well as any item groups whose parent group is in this list. In our example, our example item group is itemgroup1. By clicking this you will get this display:
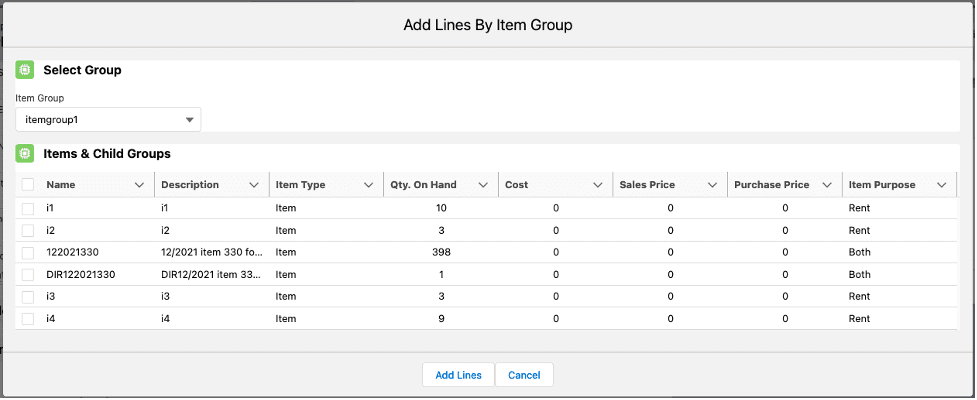
Let’s select i3 by selecting the checkbox next to it and hitting Add Lines:

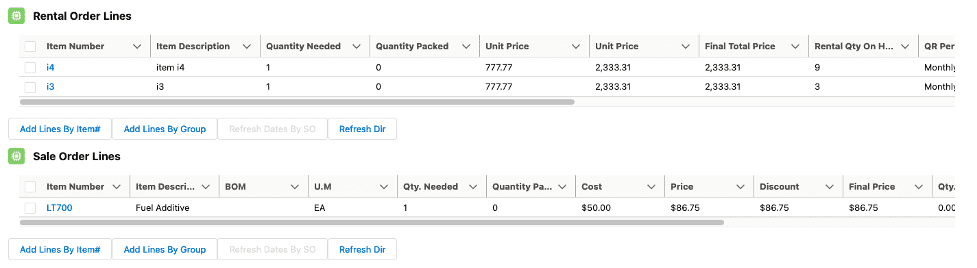
Now, to add that line to the opportunity, we can hit Save, and you’ll see this:
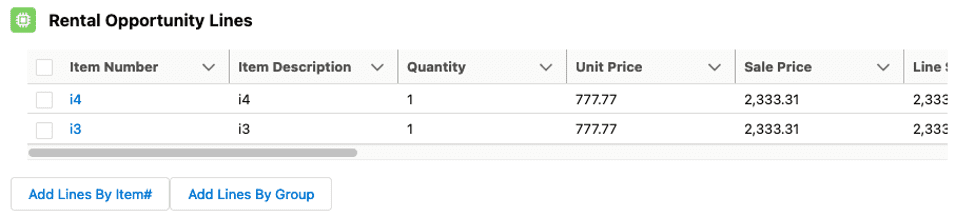
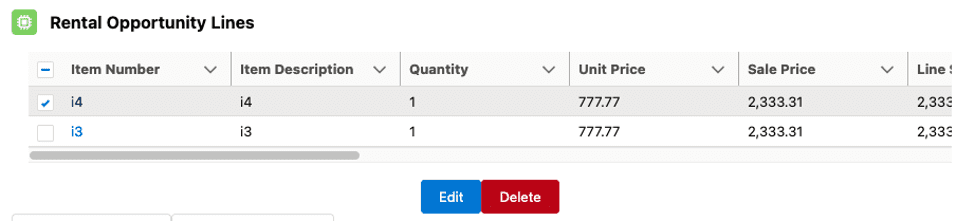
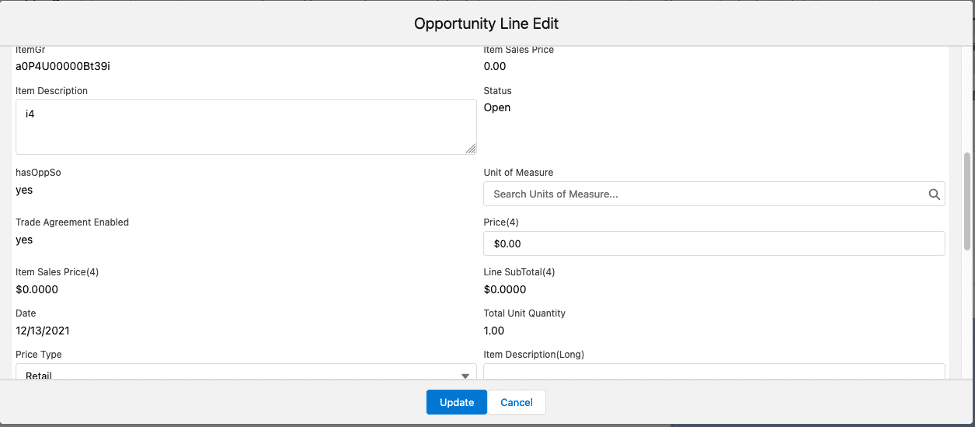
We now have two rental opportunity lines. Of course, each rental opportunity line can be edited and more data added to it. Simply select the line you wish to edit and hit Edit:
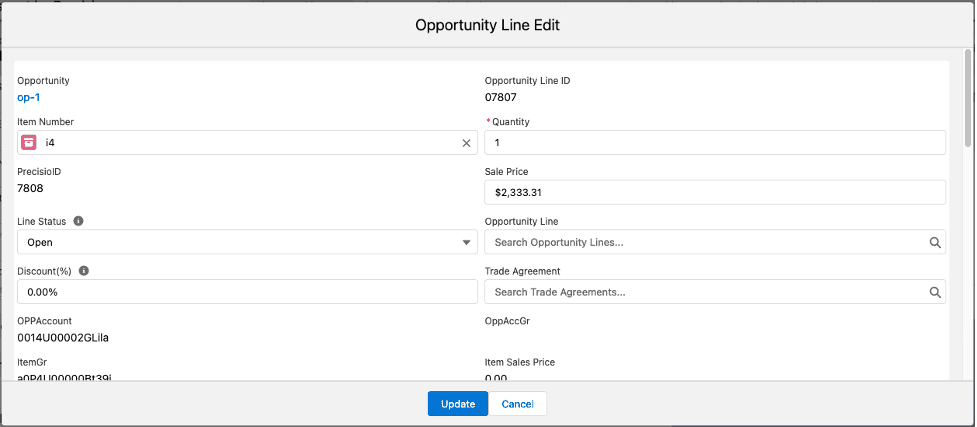
Other fields can be entered:
- Sale Price – this is the total price of the rental, the Unit Price times the Quantity times the Duration.
- Period – this is defaulted from the opportunity header, but is editable here.
- Duration – this comes from the opportunity header, but can be changed here.
- Delivery Date Out – again, this cascades down from the opportunity header but can be changed here.
- Return Date In – this cascades down from the opportunity header but can be changed here.
- Event Start Date – if the Period is “Event”, then this field is filled in from the opportunity header. It can also be manually changed. If the Period is NOT “Event”, this field is non-enterable and nothing will be displayed.
- Event End Date – if the Period is “Event”, then this field is filled in from the opportunity header. It can also be manually changed. If the Period is NOT “Event”, this field is non-enterable and nothing will be displayed.
- Return Condition – this defaults from the opportunity header, but can be entered/edited here
- Unit Price – this price comes from the trade agreement, although it can be edited here.

Ascent Rentals also gives you the opportunity to use field sets and some custom page configuration to change the Rental Opportunity Lines view. For more information: Click Here
Important notes:
1) this feature is only for the old-style Visualforce page, NOT a Lightning page, and 2) since this is a field set, your system administrator can change the order in which many of the fields display, can remove some fields from being displayed, and can add fields to this set. There are certain mandatory fields that cannot be removed, for example, Item Number, Item Description, and Quantity.
SaleOpportunityLines – if the opportunity Purpose is either Sale or Combined, you can add sales opportunity lines, allowing you to pack this material for sale to the client, not for rent.

or

You would use this section to add a sales opportunity line:

To add a line, select Add Lines By Item. Enter the first couple of characters of the item number and you’ll see this:
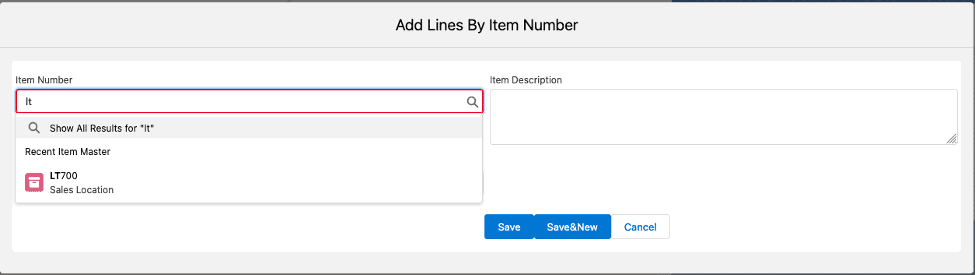
Select that item:
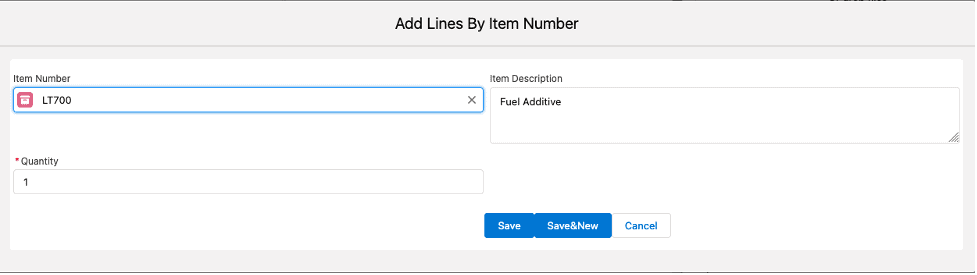
After hitting Save, you’ll see this. The item has been added to a sales opportunity line:

Conversion of an Opportunity to a Quote:
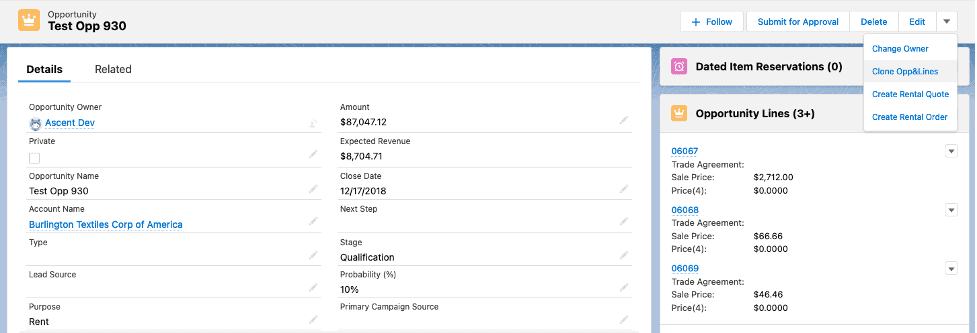
To convert an opportunity to a quote, click the down arrow next to the Edit button on the upper right hand portion of the screen and select Create Quote:
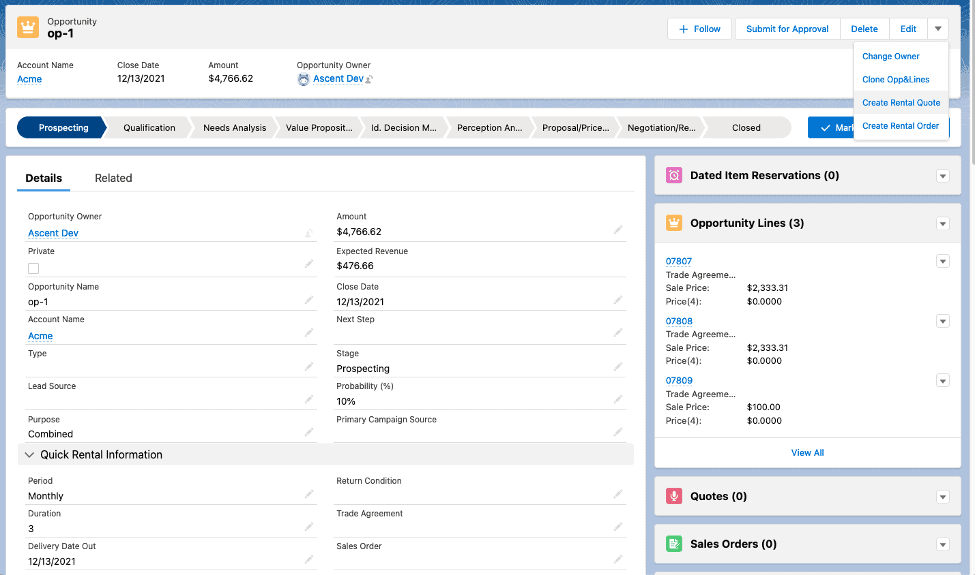
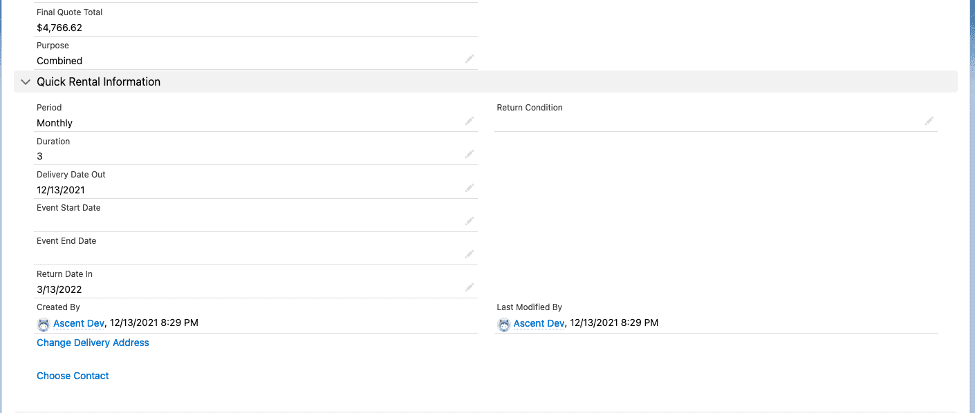
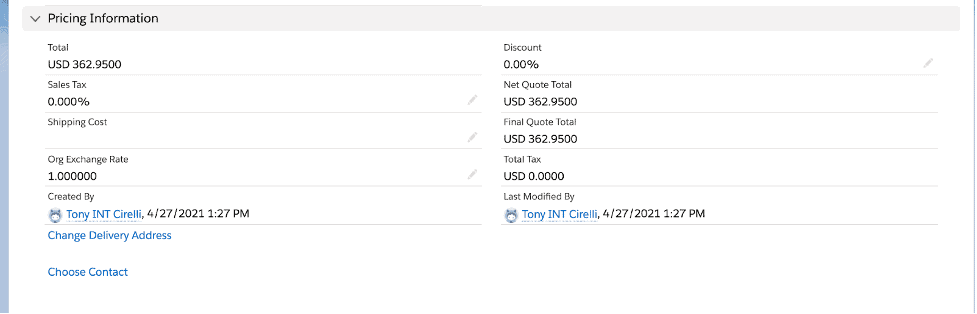
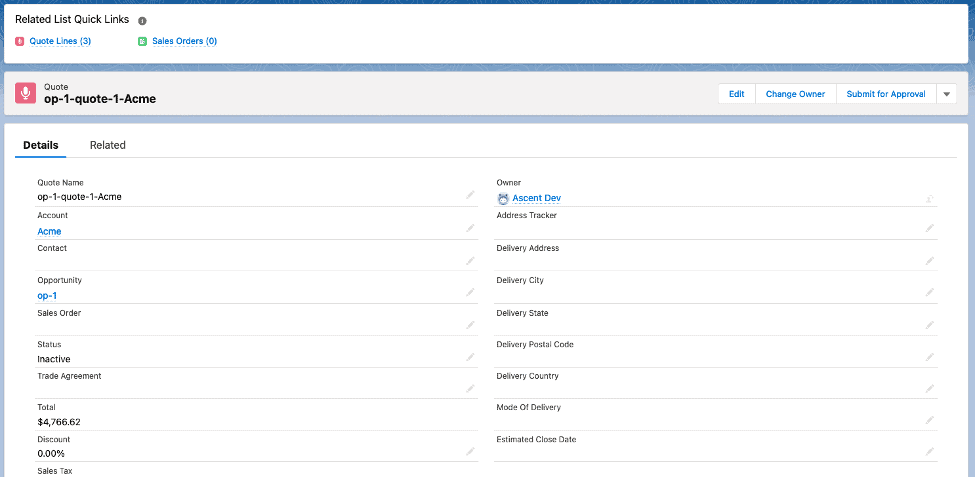
Once you do that, this screen will appear after a quick display indicating that Ascent is preparing the rental quote. Because the amount of data displayed won’t fit on a single display screen, scroll down to see the rest of the screen:
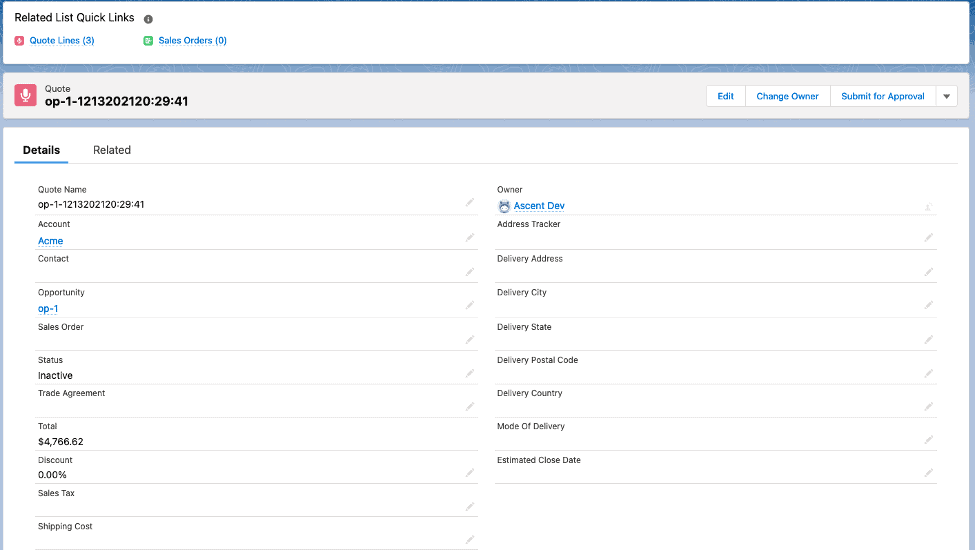
Note that the quote name is the opportunity name followed by the month/day/year/hour:minute:second (mmddyyyyhh:mm:ss). It can be edited to make sense for your organization.
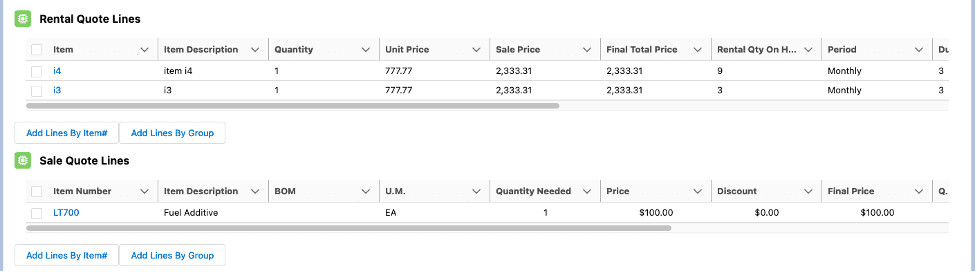
The resulting quote lines will look just like the opportunity lines:
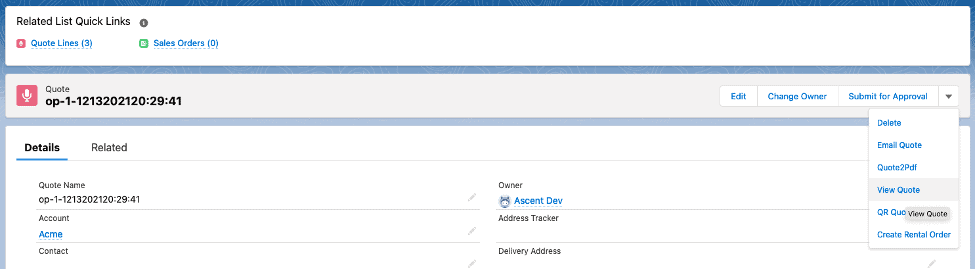
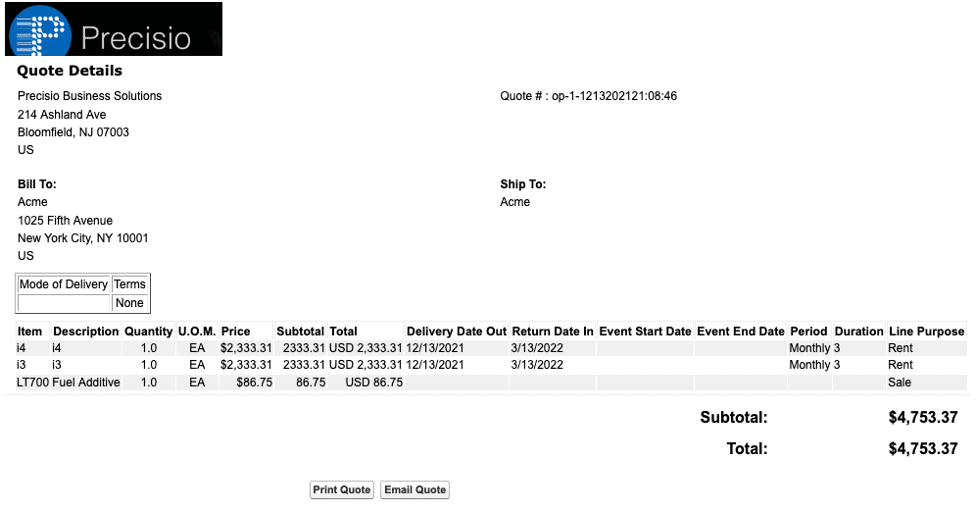
If you wish to print the quote, you can click the down arrow next to the Delete button and select View Quote (or Quote2PDF, Email Quote).
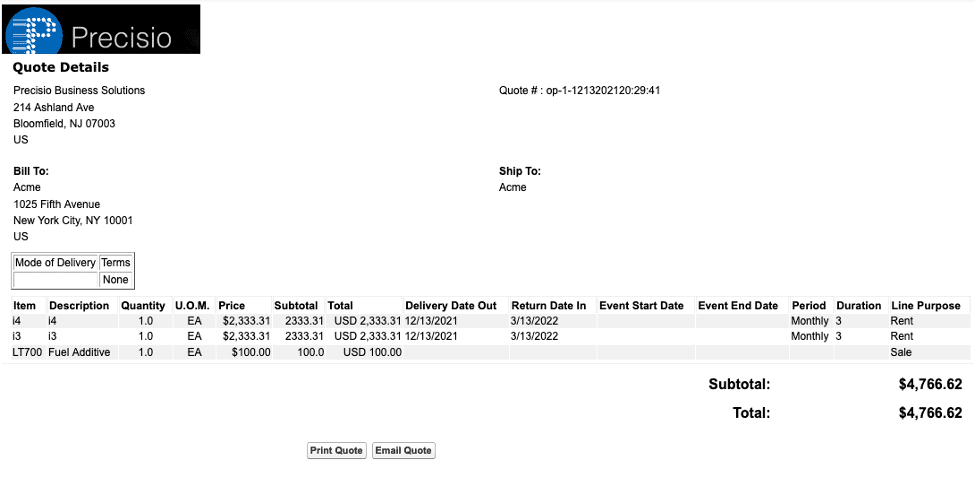
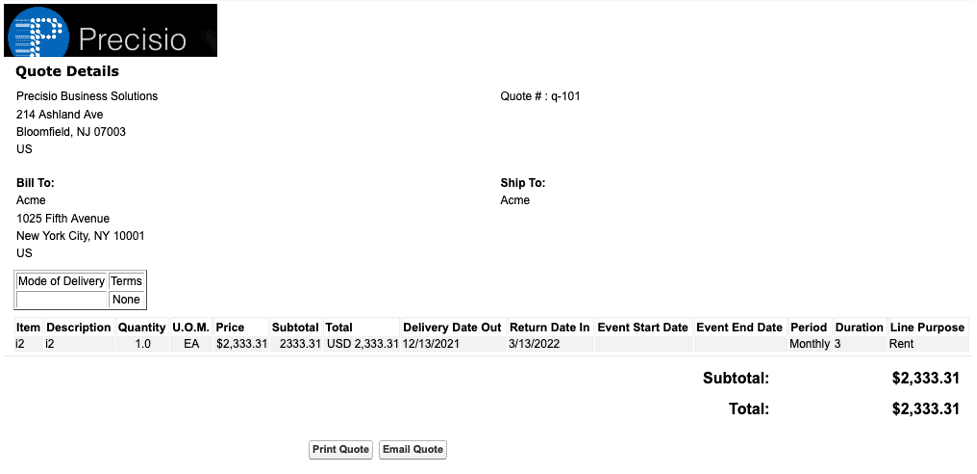
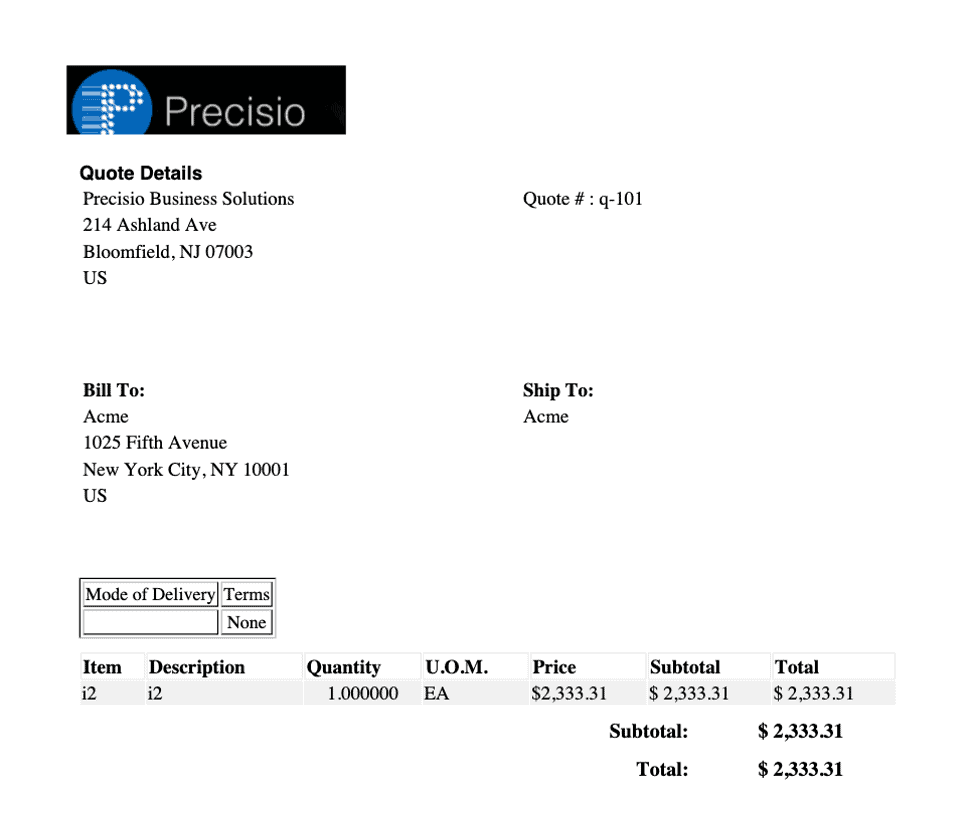
Here is the quote. Please note that your system administrator can upload your logo, and use that in lieu of the AscentERP logo, and that most customers will design their own quote form, as opposed to using the standard out-of-the-box Ascent quote:
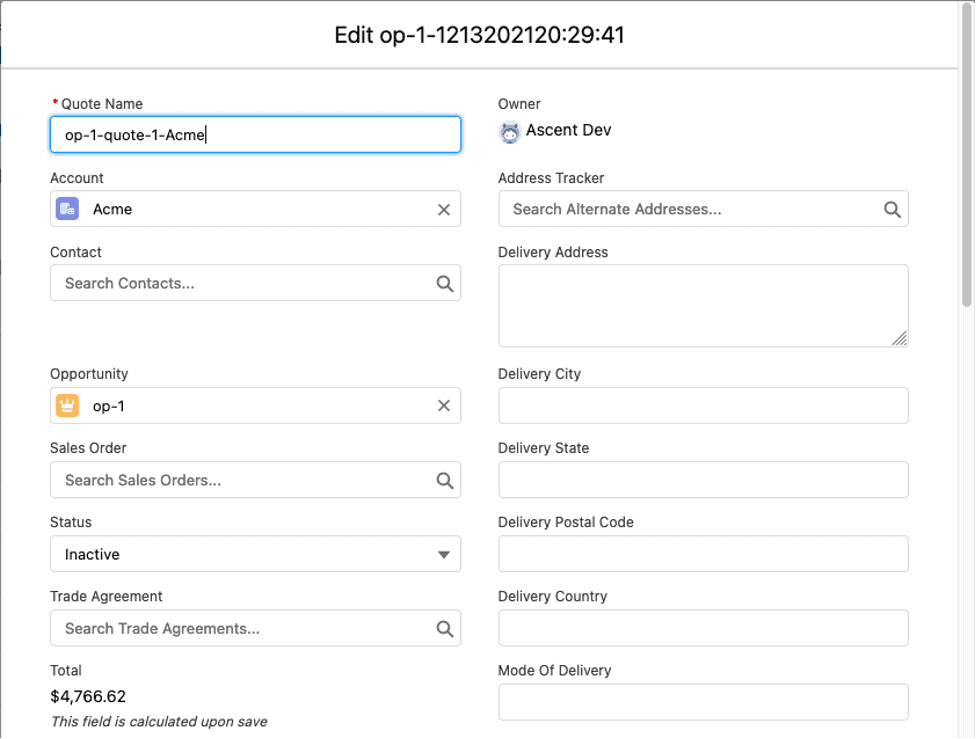
Changing the Quote Name:
Additionally, it should be noted that you can change the quote name to be something that relates to the client. This can be done by going to the quote, clicking Edit, and overriding the existing Quote Name, then hitting Save:
Making an additional quote:
If the client wishes better prices, you can leave the existing quote alone, and create a NEW quote, simply by going back to the opportunity, and selecting Create Quote:

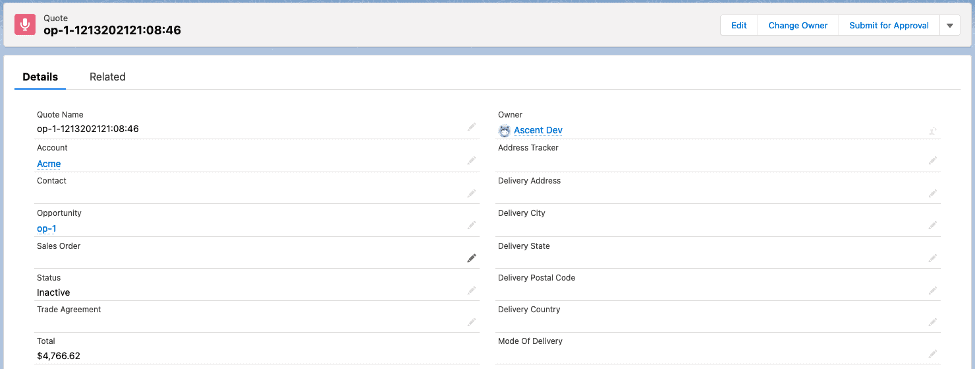
Here is the newly created second quote from that opportunity. The opportunity name was carried over to this second quote (in addition to being on the first quote, and all subsequent quotes for this opportunity):
Now, you can also change the prices on the new quote (as well as the quote name):
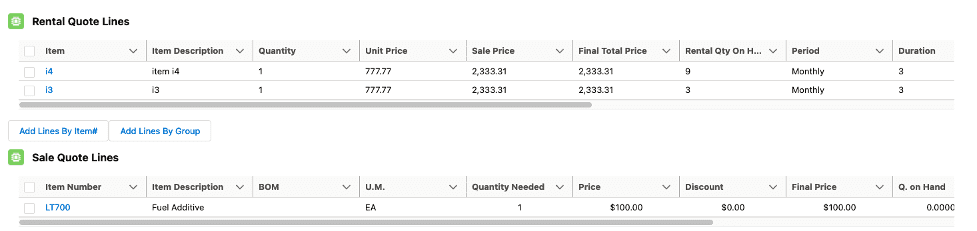
In this example, we’ve selected the Sale Quote Line anad the Edit and Delete buttons appear:

Press Edit:
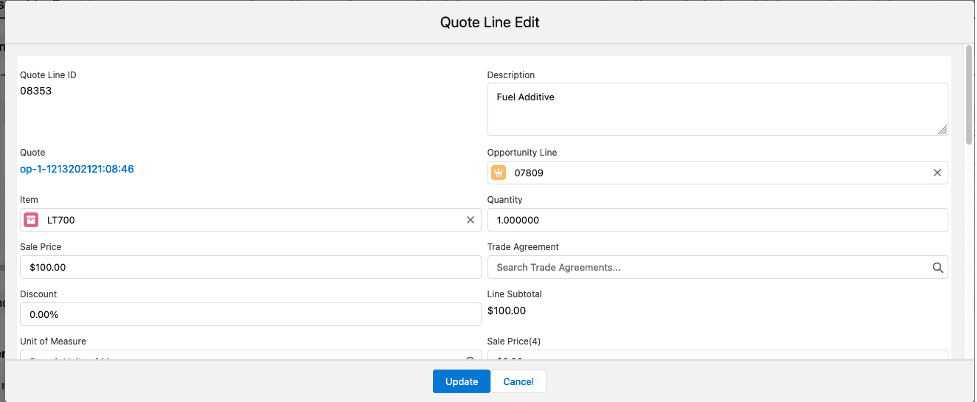
Change the Sale Price:
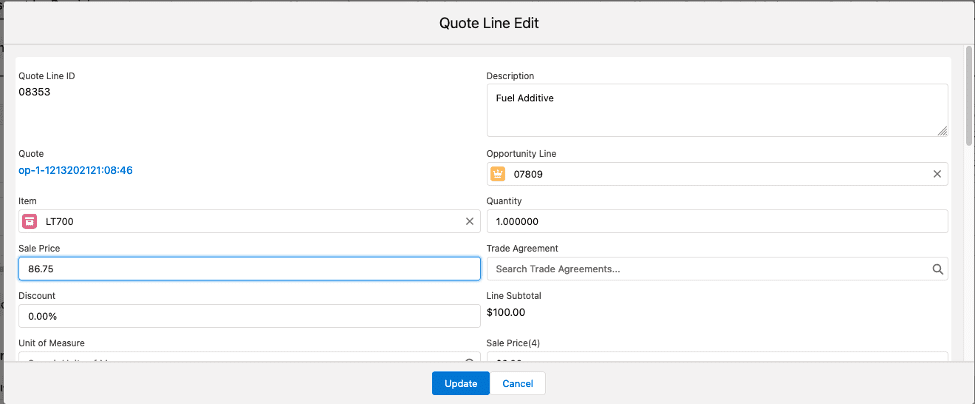
Then, hit Update:

The new sales price is on the quote. Now you can reprint the quote for the client:
Converting the Quote to a Rental Sales Order:
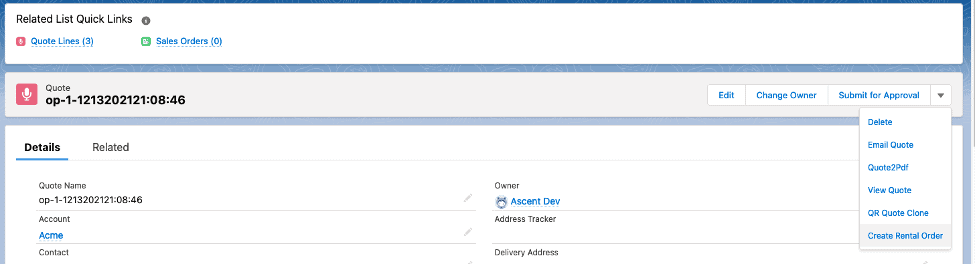
The customer agreed to the second quote, and wished to purchase the material and rent the goods. Converting to a rental order requires you to go to the quote, click the down arrow next to the Delete button, and select Create Rental Order:
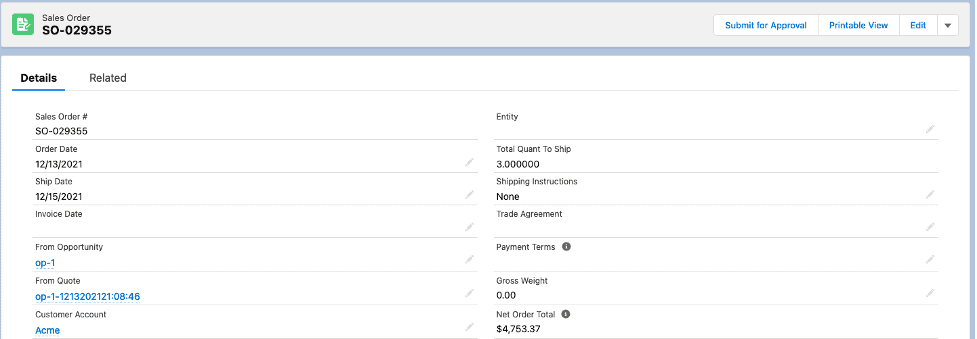
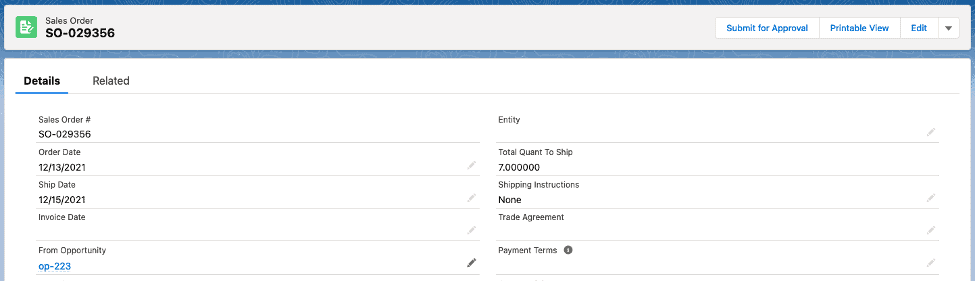
Here is the newly created Rental Order. The opportunity name and the quote from which this sales order was created reside on the sales order header, for reference.
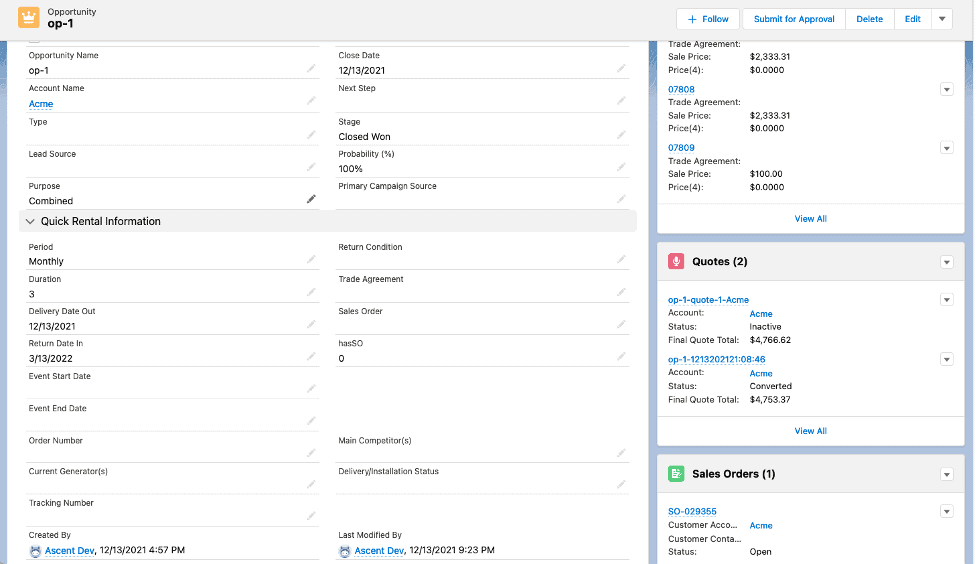
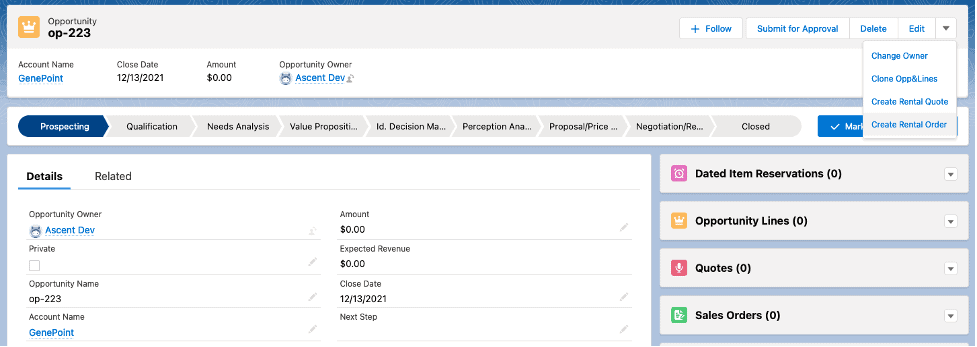
If you go back to the opportunity, you will see the Sales Order number, the Stage having been changed to Closed Won, and the Probability (%) now at 100%:
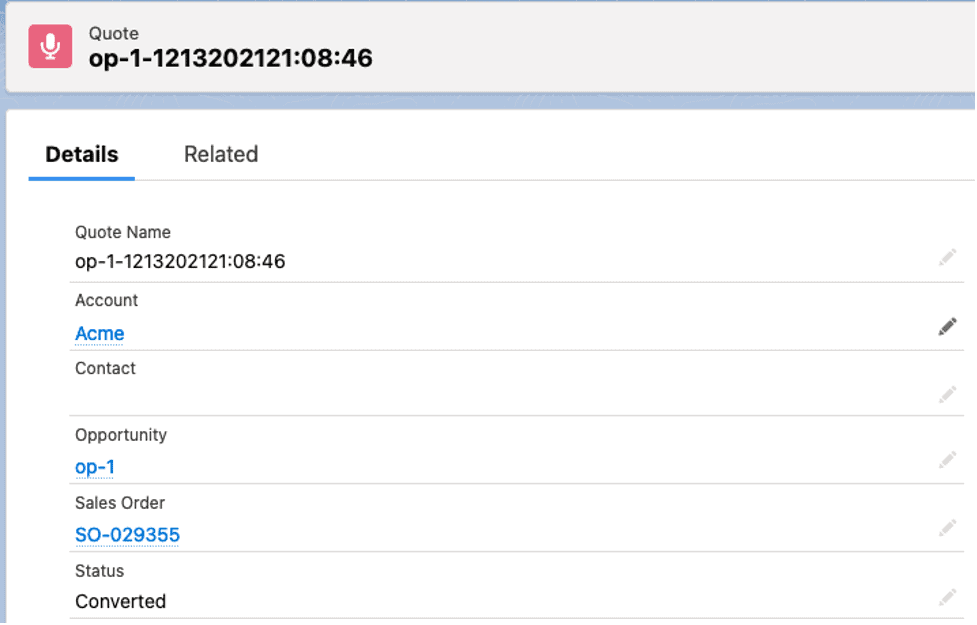
The quote that was used to convert to the Sales Order will show you the originating opportunity and the Sales Order as well as the new Status of Converted:
Converting an Opportunity directly to a Sales Order:
Some customers may be happy with the prices given to them by the customer service / sales rep, and not require a quote. In those instances, an opportunity can be converted directly to a Sales Order, eschewing the Quote. To do that, create your opportunity, and then select the down arrow next to the Edit button, and choose Make Sales Order.
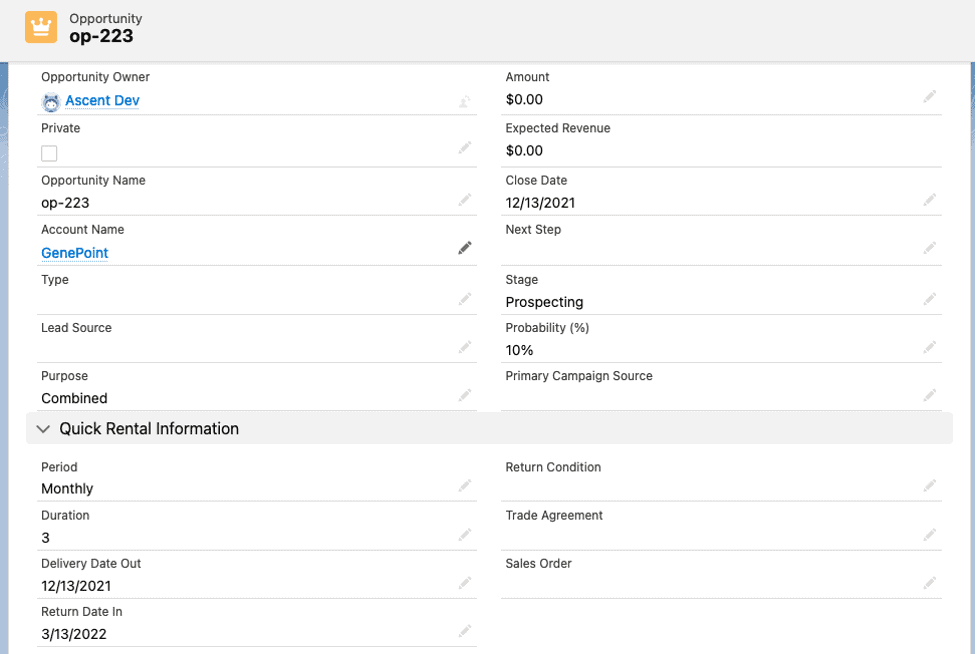
Here is your newly created Sales Order directly from an Opportunity. Note the Opportunity Name resides in the Sales Order. Since the Sales Order was directly created from an Opportunity, the From Quote is blank.
Entering a Quote Directly:
Some companies don’t bother creating opportunities. They just enter a quote, send it to the customer, and if the customer requires an additional quote, they’ll clone the original quote and update the cloned quote.
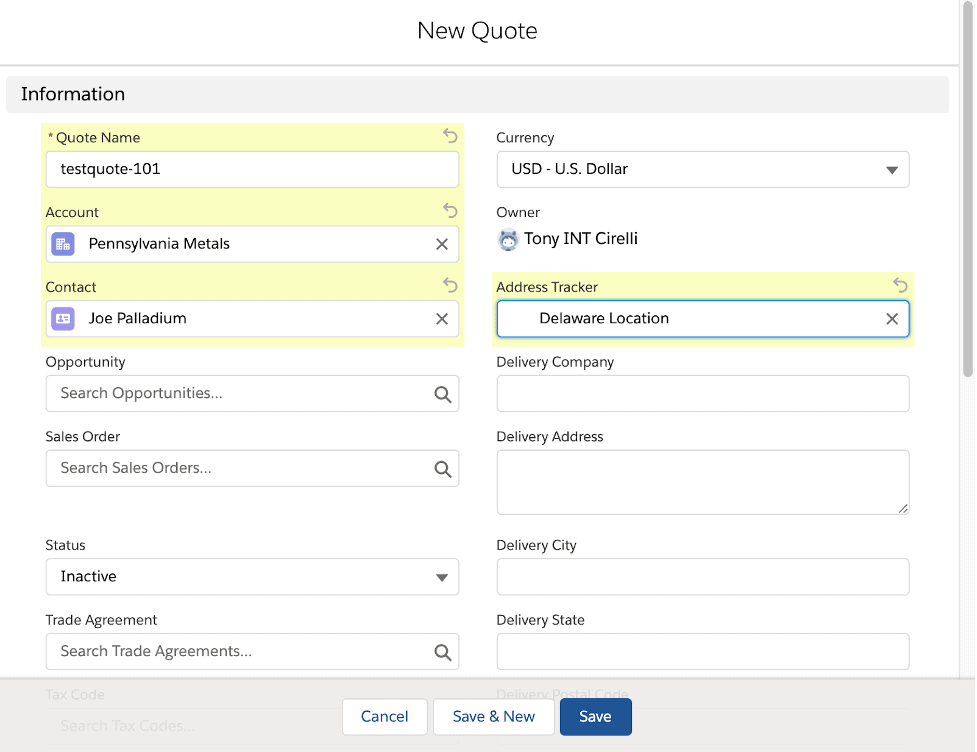
To create a quote, go to the tab titled Quotes and select New Quote. Once you enter the minimum information (only Quote Name is required, but Account is recommended, also), and any other pertinent information, hit Save:
To add a quote line, scroll down to the Rental Quote Lines and select Add Lines by Item#. Here is the added line:

You can now view the quote and print it, if required:

Should you wish to email the quote, you can also click the down arrow next to the Edit button, and then select Email Quote. You’ll then see this screen:
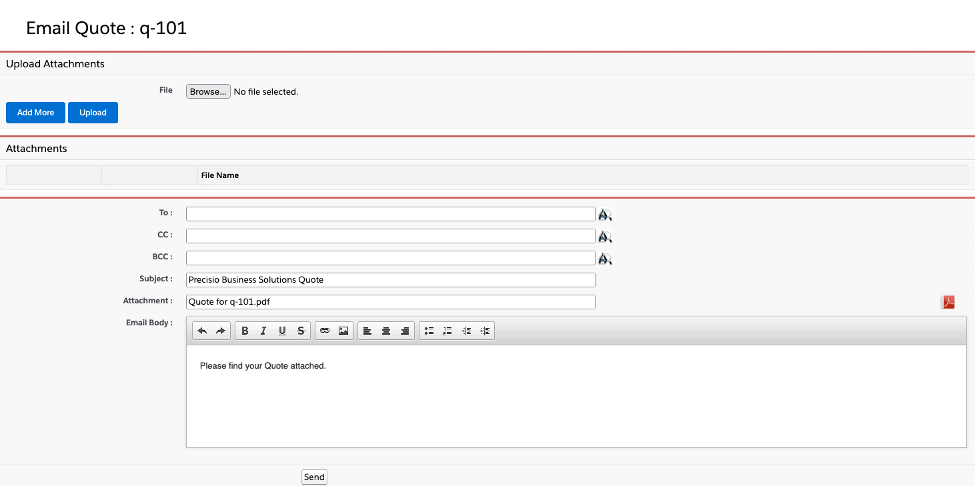
To email it, you must first select a To: email address. Click the icon on the To: line. You’ll then be shown contact information for the Account.
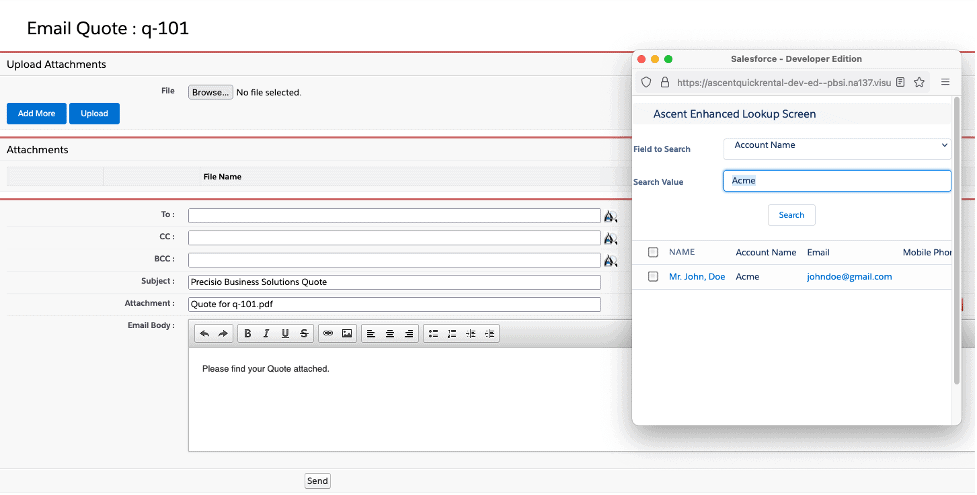
And then scroll down to Add Selected:
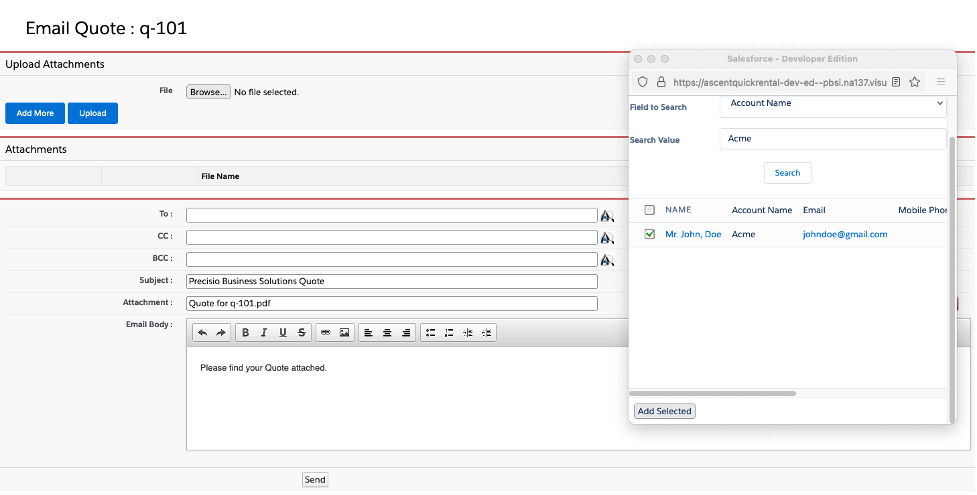
You will now see that email address in the To: box. You can repeat this process for CC: or BCC:. IF you click the Adobe icon to the right of the screen, you can display the quote: that will be sent:
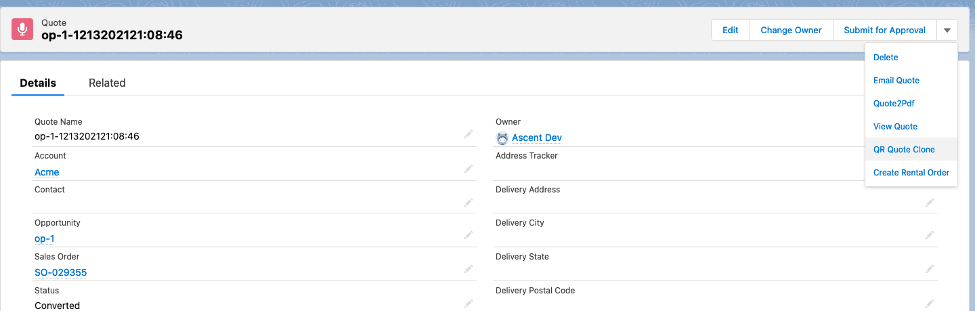
Cloning an Opportunity or a Quote: The process involved is the same for both. Simply go to the opportunity or quote and click the down arrow next to the Edit button:
For quotes, use QR Clone Quote:
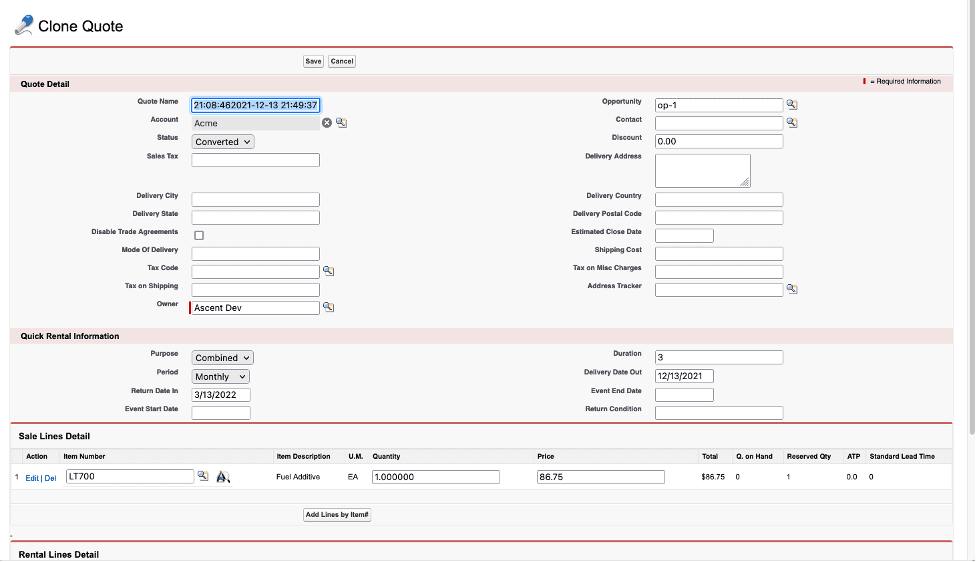
You’ll see this screen, which would allow you to change information on the quote or quote lines:
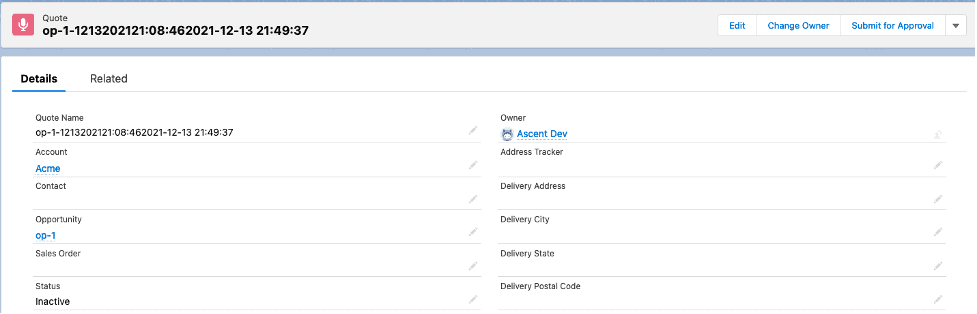
Once satisfied, click Save, and then the newly cloned quote will display:
For opportunities, use Clone Opp&Lines:
You’ll see this display where you can make changes:
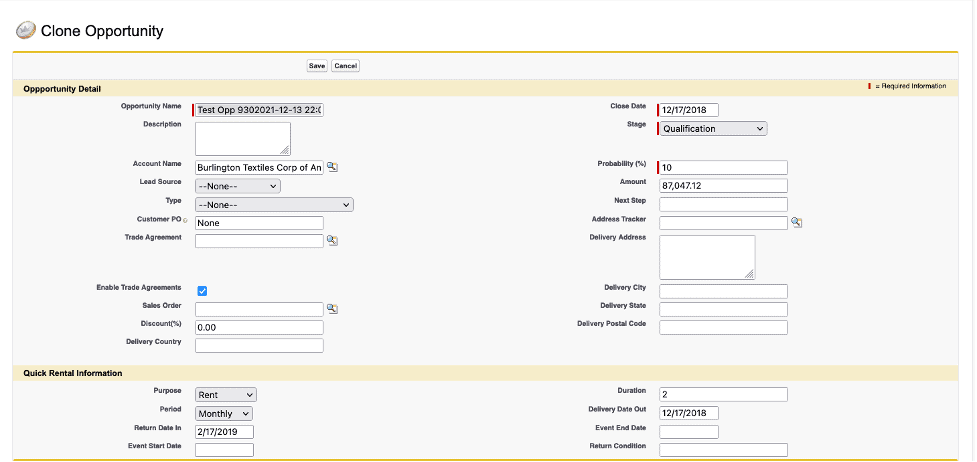
You can also make changes to the line items as well as add or delete line items. Once satisfied, hit Save and you’ll see the newly cloned opportunity: