Rental Returns
Overview
Inevitably, material that is rented will be returned. Ascent uses Returns and Return Lines to perform the return of the material.
Definition: A return, as stated before, is a way that rented material can be returned from a customer. It consists of a return header (called a return) and any number of return lines (called return lines).
Returns can be generated from Sales Orders by clicking the down arrow next to the Change Owner button on the Sales Order screen and clicking Create RMA.
Returns can be processed by:
- Going directly to the Return itself and performing the return.
- Going to the sales/rental order and clicking Rental Return
On a return line, there will be one type of return that is used: Return – This type of return is used to record the return of material from a customer back into inventory. It will record the return and make that information known to the sales/rental order line. It does NOT change the quantity ordered on a sales/rental order.
Custom Settings: There are a number of custom settings which can affect how a sales/rental order works. Some of them will be outlined here. A few are discussed later on in the body of this document. To see all possible custom settings, please review the Custom Settings document.
- Use From Location on RMA Return – Use this setting if you want to make sure all the products that your customers will be returning will go into the same location you packed out from. Caution should be taken here if the material being returned is one that would need inspection first. Oftentimes, the ship from location is a regular finished goods inventory location, and you may not want returned material defaulting to a finished goods inventory location.
- Use Serial Number Detail – If this custom setting is checked, then every time activity occurs for a serial#, a new record of the activity gets written out to the Serial Number Detail object. This becomes very useful when analyzing returns for an item.
- Use Returns – Allows users to use the Returns object in lieu of CASE. Does not need a full Salesforce license.
Process
Since there two (2) ways to process a return, this document will have 2 “Process” sub-sections:
- Returns with Return Lines – Customer Returns from Sales/Rental Order
- Returns with Return Lines – Customer Returns from the Return itself.
Returns with Return Lines – Customer Returns from Sales/Rental Order
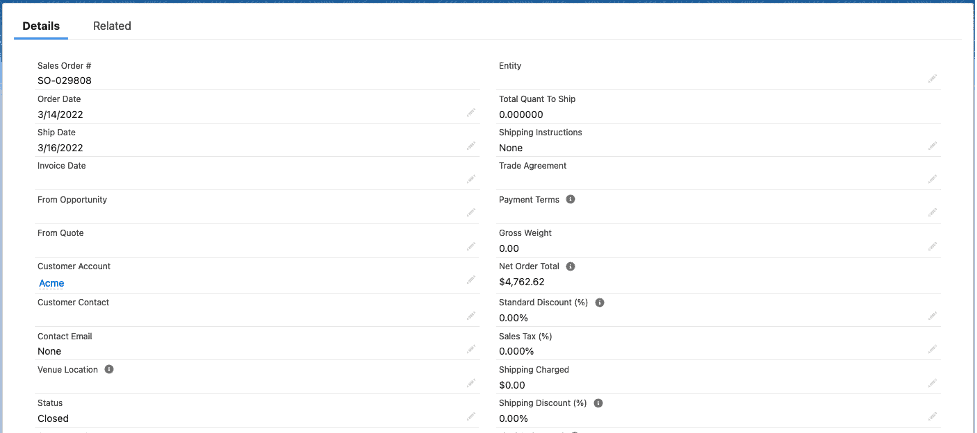
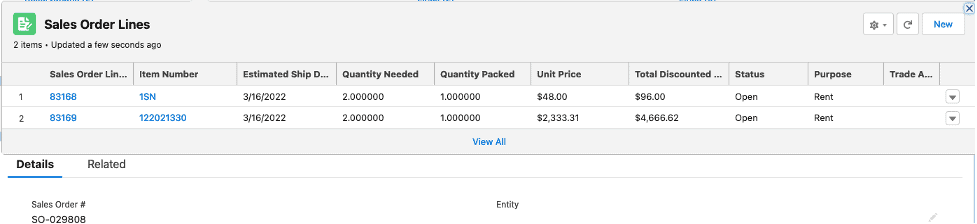
We’ve created a sales/rental order, and have packed it. There are two (2) rental lines, one that is serialized, and one that is not. Let’s display the packed lines (each line is for quantity ordered of 2, but for now, we’ve only packed quantity of 1 for each line):

And the return lines view from the return itself:

Now, let’s perform the return coming from the sales/rental order. Go to the order and select the down arrow next to the Edit button:
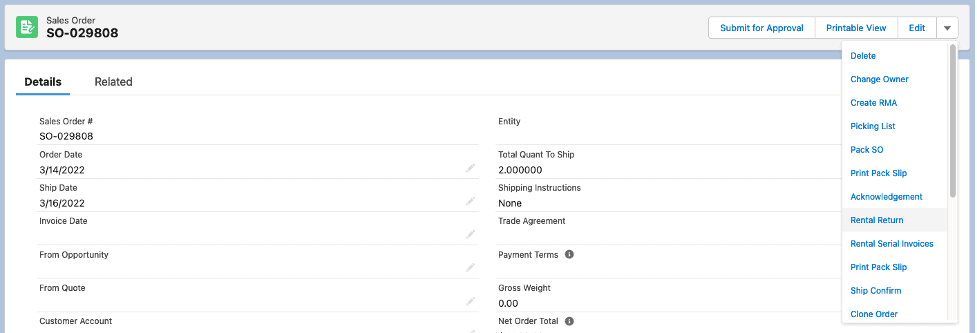
Then, select “Rental Return”, and you’ll see this screen:
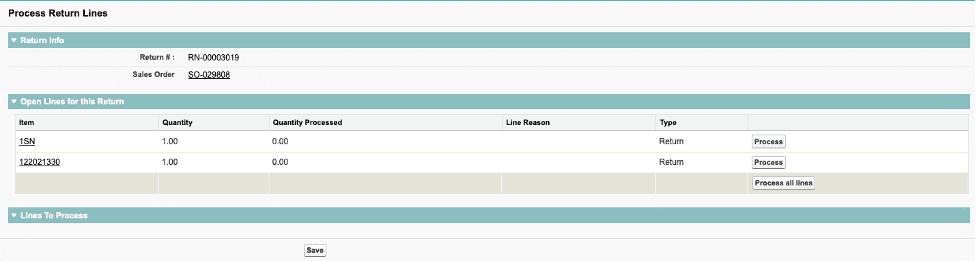
Since we are going to process both lines, let’s select Process All Lines. And when we do that, this section of the screen will appear:

Notice on the serialized line, Ascent will display the serial number packed.
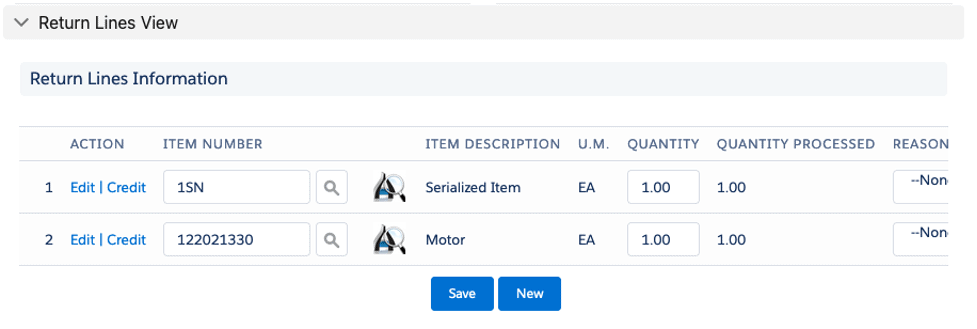
Additionally, you can change the lot to which the material is to be returned. We will accept the lots being displayed as well as the serial number, and hit Save. Then, you will get this confirmation message:

Looking at the sales/rental order again, we see that the serial number us back in inventory:

Looking at the return, we see that the Quantity Processed is now equal to the Quantity:
Returns with Return Lines – Customer Returns from the Return itself:
We’ve also just now packed the other open quantities on the sales/rental order:


Now, let’s go directly to the Return. Either find the tab called Returns and then select the one in question, or click the Related List Quick Link for Returns:

Here’s the return (we have also clicked the Related button to see the Return Lines):

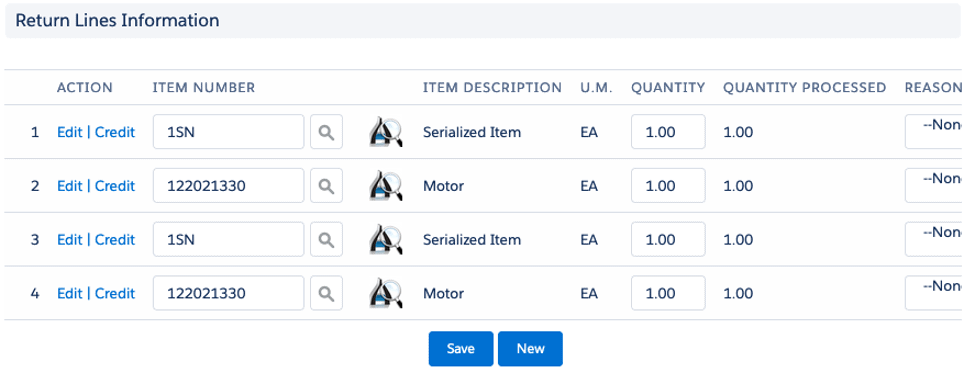
Notice there are two additional Return Lines. These are the ones we just packed. Also notice there are 2 Return Archive Lines. These get created when a return is completed.
Now, to perform the return, click the down arrow next to the Clone button

After clicking the Process Return Lines button, you’ll see this screen:
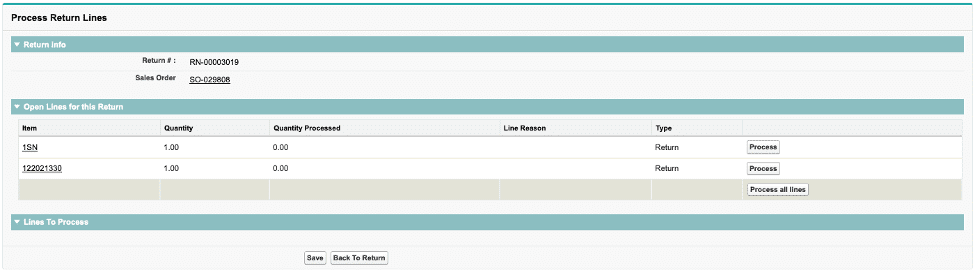
As before, let’s click Process all lines, and you’ll see this appear:

Let’s just accept the screen by hitting Save, and we’ll get this confirmation message:

Now, after selecting Back to Return, we’ll see the updated Return Lines Information:
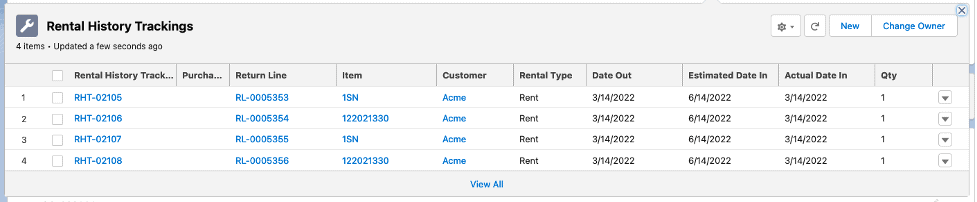
Going back to the sales/rental order, we’ll see the additional 2 Rental History Tracking records:
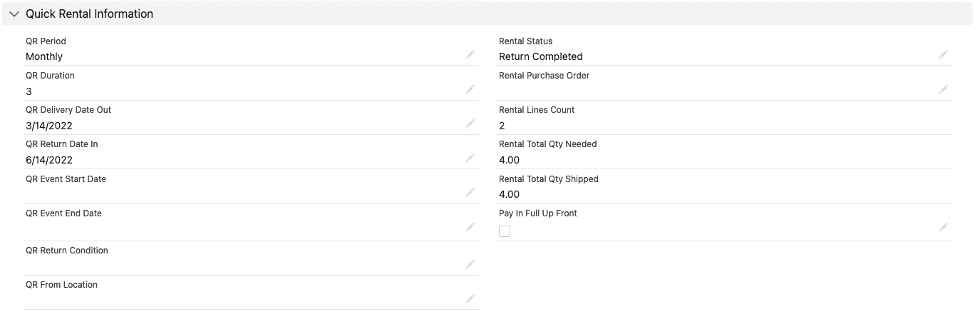
Our sales/rental order is now closed, and the Rental Status is completed: