Flow Rack Processing
Flow Rack Processing
A location is defined as a place where you store your items. It can be a stockroom, an aisle/row/tier combination, an entire warehouse, a bin, or just about anything where material can be stored and counted. Flow racks are forward stocking locations that typically have a small quantity of goods from which a picker can pull goods from a more convenient location than running up and down the aisles of a warehouse. Flow racks can be used in conjunction with pallets, in that material can be requested to “refill” the flow racks, and that material can come from pallets.

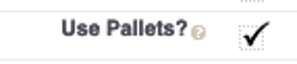
Custom Setting of Importance: you must turn on Use Pallets?
Inventory Set-Up Requirements:
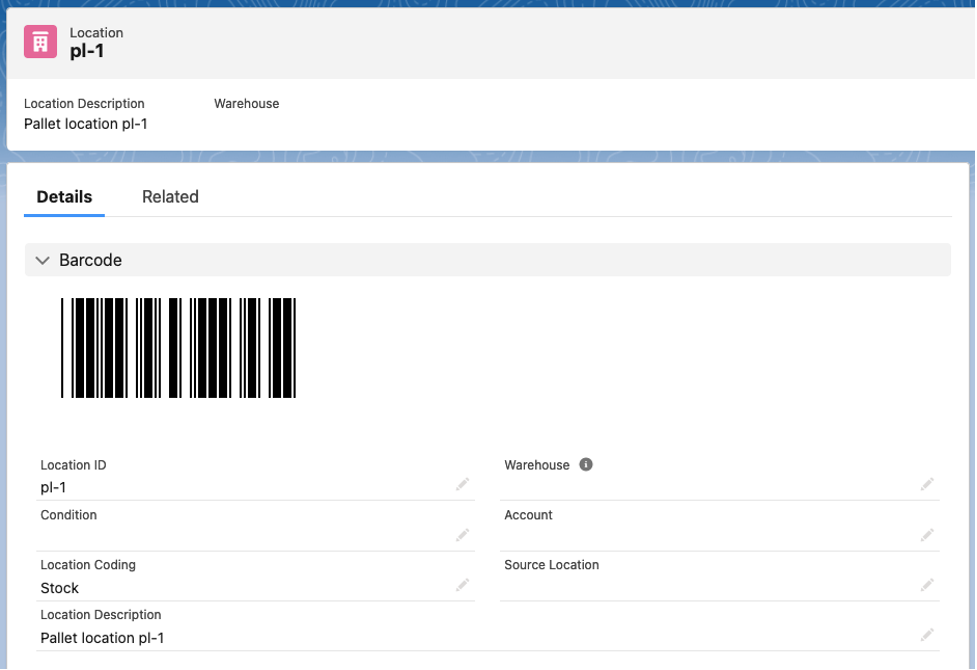
In order to be able to store material in a location, you’ve got to first create the location. The following displays show what the Location screen looks like. We’ve created a pallet location pl-1, which is where we’ve received a quantity of 50 into inventory.
In order to move material to a flow rack, you must also have a flow rack location created. We’ve created one called fr-1. A flow rack should only have a single item associated with it, so in the screen, we’ve added an item which is available to be put into a flow rack (Flow Rack Item), designated this location as a flow rack (Flow Rack?), and entered a Flow Rack Qty (5).
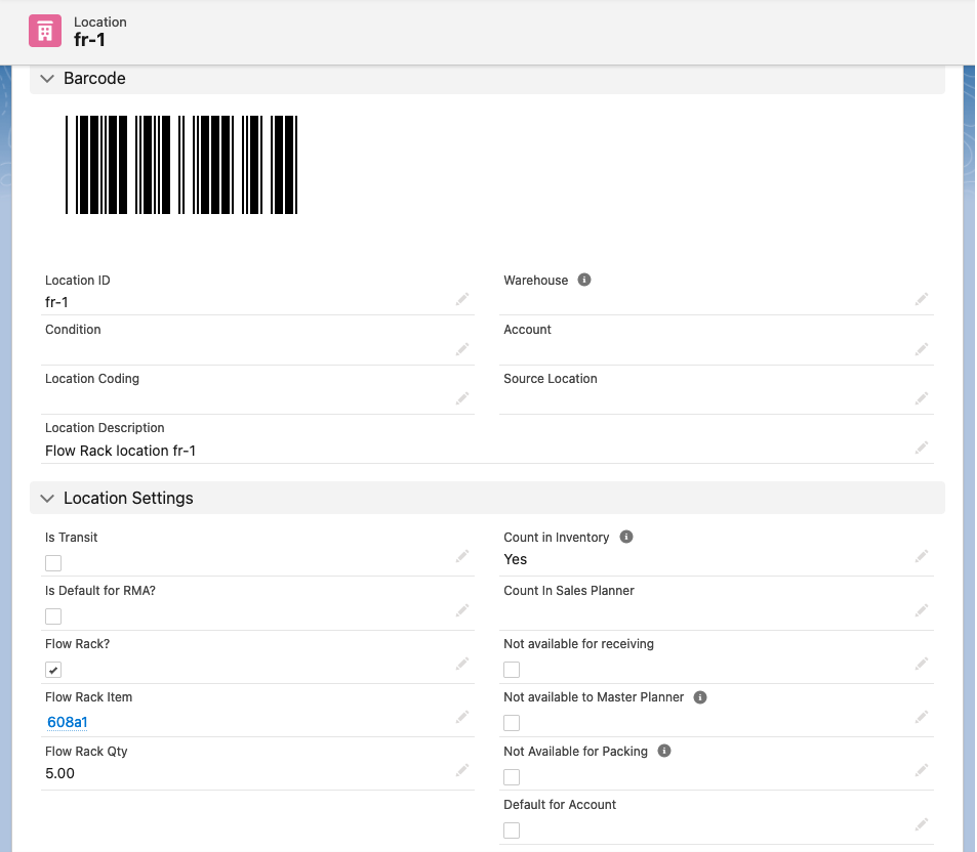
The fields that are used on the Location object to specify the Flow Rack functionality are as follows (Note: not all fields are displayed on this document. To see that, please refer to a separate document called Locations):
Flow Rack? – This checkbox, used in conjunction with Flow Rack Qty and Flow Rack Item, designates this location as a flow rack location, meaning that it is one that is refilled from bulk locations or from pallets in bulk locations. This is a process which can be accessed through the Ascent Mobile Menu called “Refill” and allows a company to move material from one of the bulk locations to a refill location. This functionality would be used typically only if the Custom Setting “Use Pallets?” is activated.
Flow Rack Qty – This is the maximum quantity of the Flow Rack Item that can be held in this location at any one time.
Flow Rack Item – This would be the item that is stored in this location.
For this document, we are going to use a combination of the location and an item to illustrate how flow racks work.
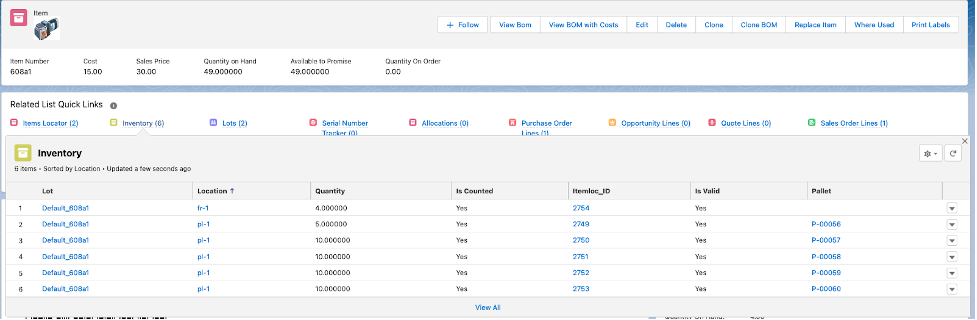
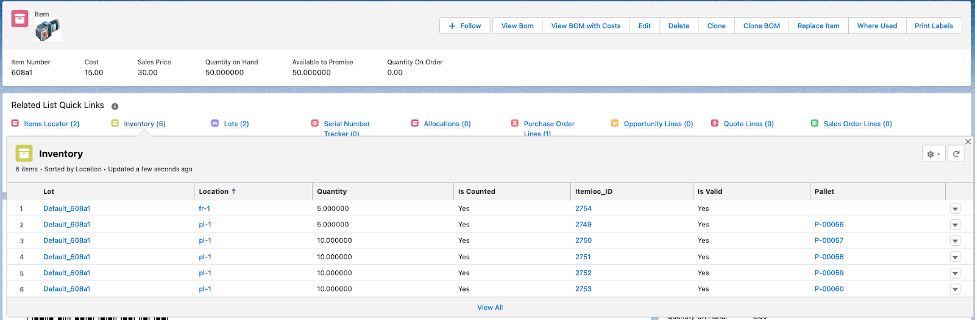
Let’s use an item (608a1 – Motor) and a flow rack location where it can be picked from (sm-001). Here’s the item. We’ve displayed the Inventory, so that you can see we have 50 on hand in 5 different pall
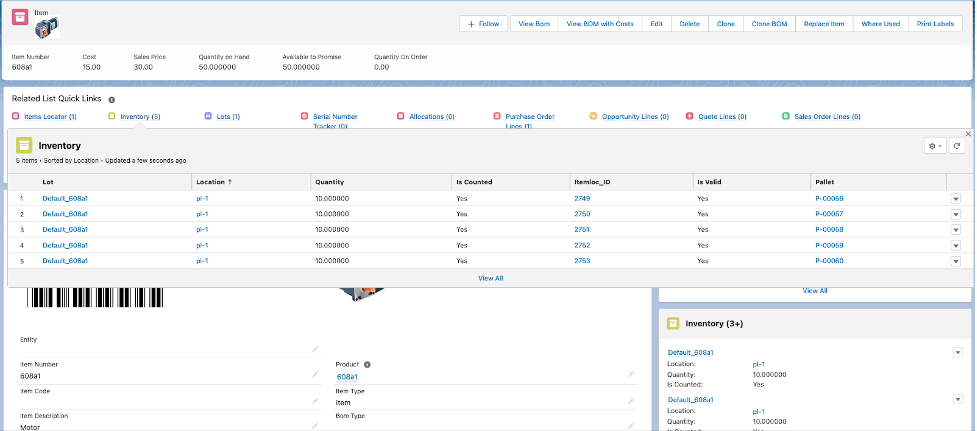
Now, here’s where we’ve referenced the quantity to be stored on a pallet:
In the document entitled Pallets, we illustrated how to receive an item to a pallet or pallets, and how to pack an item from a pallet. In this document, we will show how to move material from a pallet to a flow rack location, and how to pack from a flow rack location.
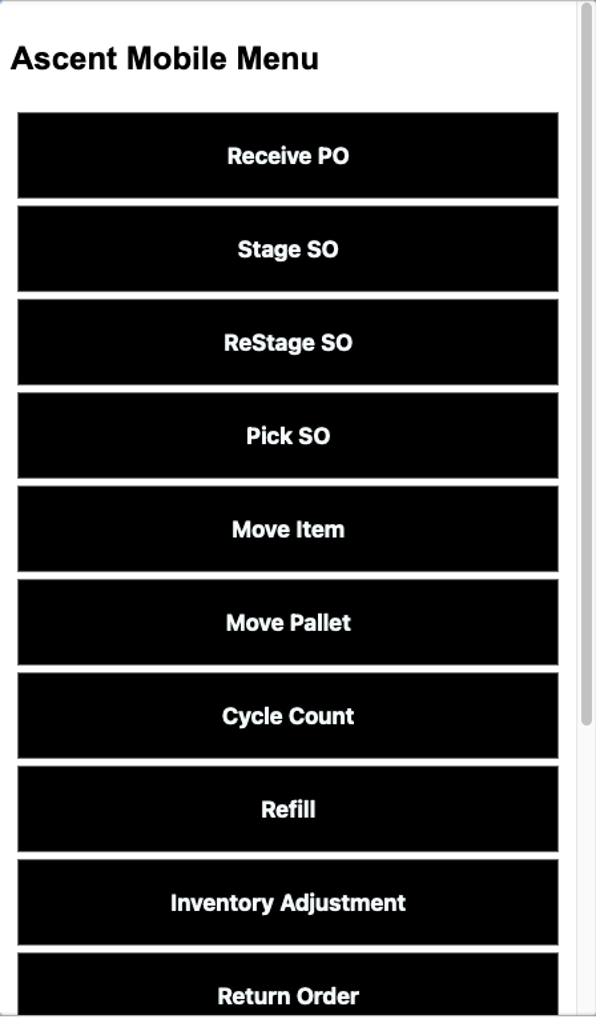
Refilling a flow rack location: First, let’s move material to a flow rack location. To do this requires the use of the Ascent Mobile Menu, and the Refill transaction. Here’s the Ascent Mobile Menu screen. We used a laptop and “shrunk” the screen down to simulate a handheld device. On the right hand side below, you will see the result of selecting Refill:
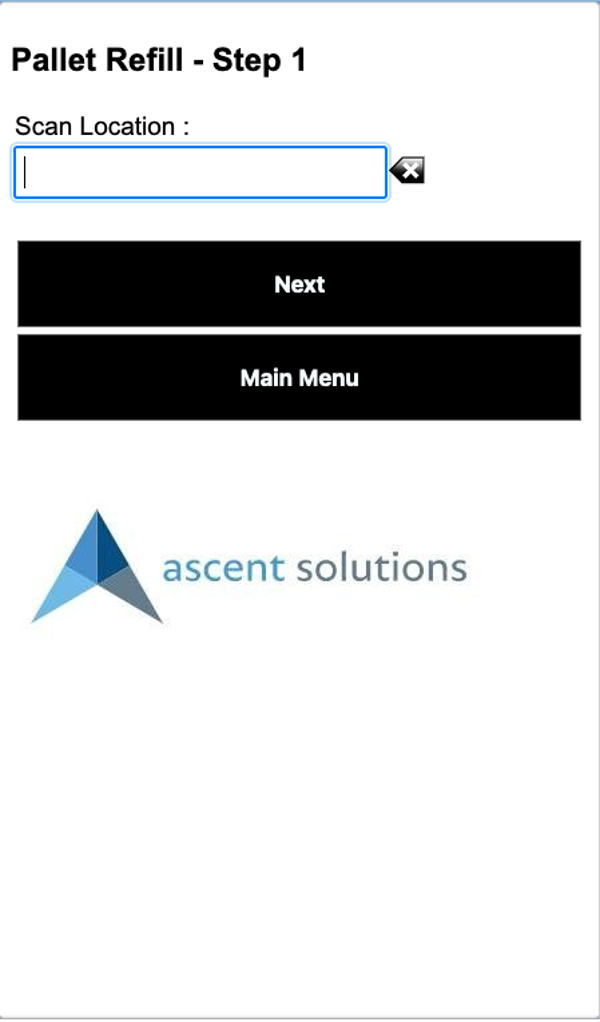
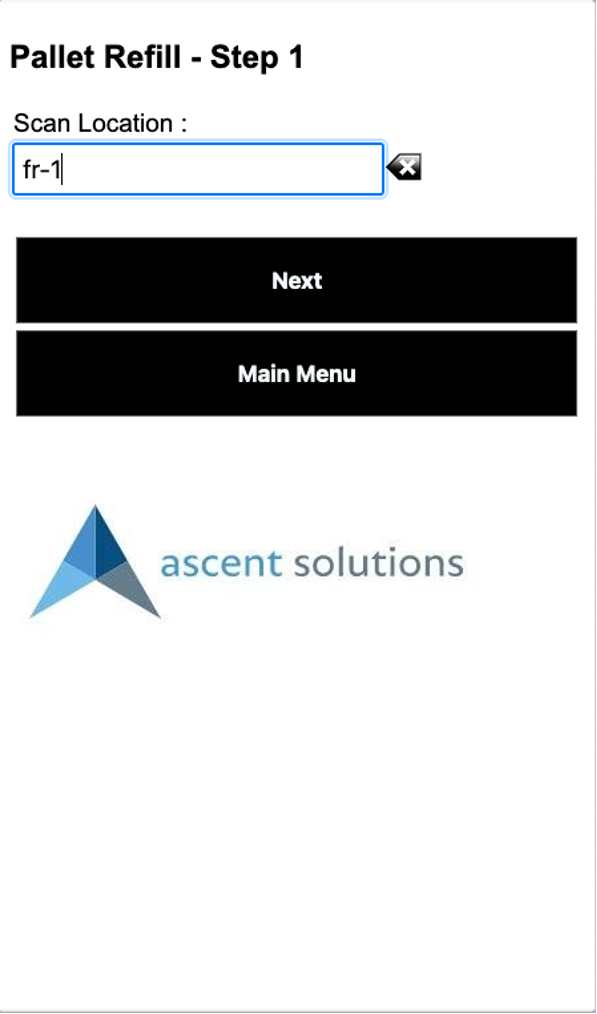
Now, scan the flow rack location you wish to move the pallet inventory to, and hit Next:
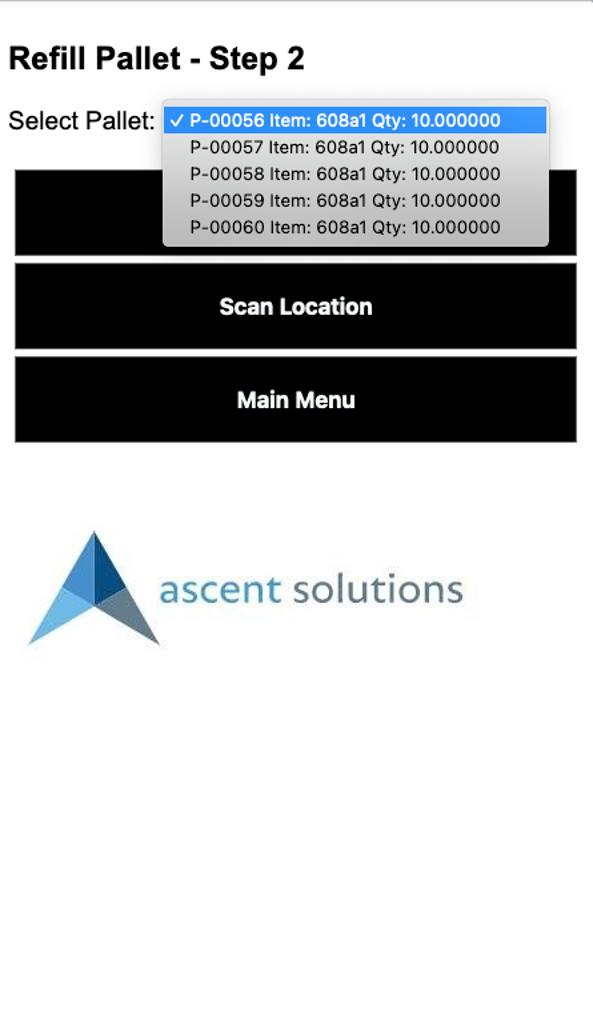
You will be then asked to Select Pallet. There is a drop down window that you can use to select the appropriate pallet to be pulled from to refill the flow rack location. Let’s select the first one, and then hit Next:

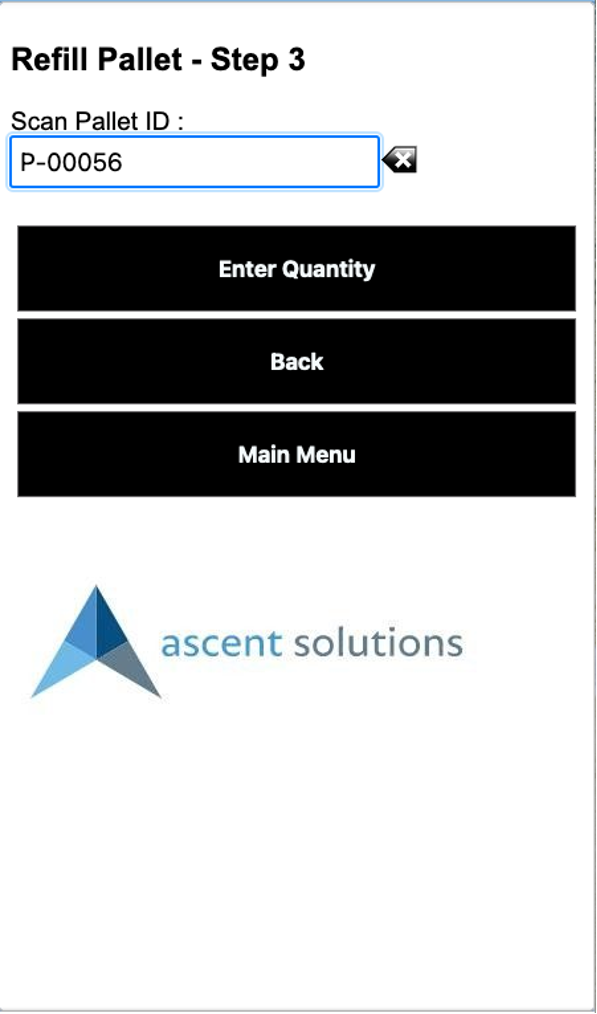
The mobile menu will now ask you to scan/enter the Pallet ID, as an additional point of confirmation. Once you do that, then select the Enter Quantity button. At this point, you can enter the quantity you wish to move from the pallet to the flow rack location:
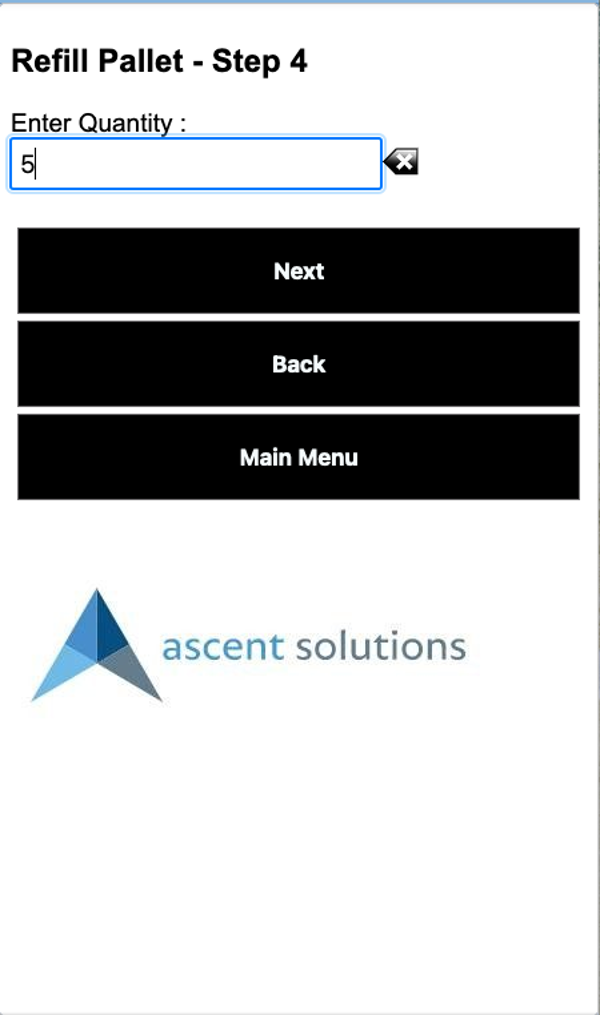
You will get a message at the bottom of the screen saying Saving … and will be returned to the Ascent Mobile Menu when done.
You can now look at the inventory records to see how they’ve been updated. You’ll see that the material (quantity of 5) has been moved from location pl-1 pallet P-00056, to flow rack location fr-1. Note that the link between the pallet and the material has been severed, since 5 has been moved to the flow rack. Of course, the remaining quantity of 5 still appears on the pallet P-00056.
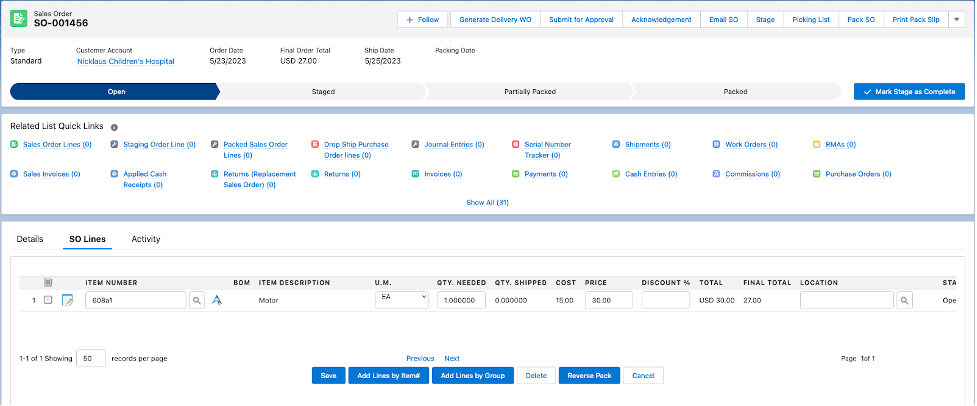
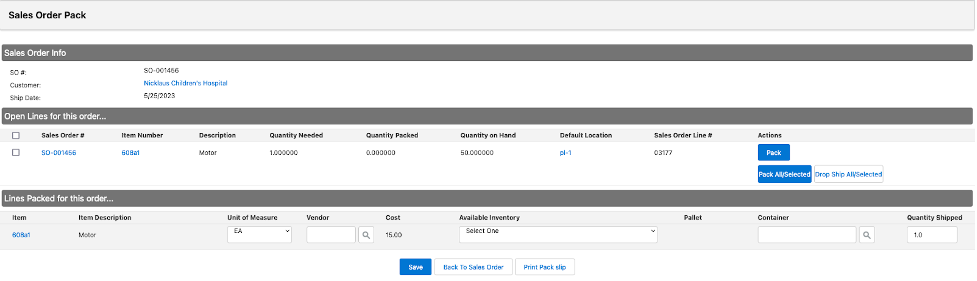
Packing from a flow rack location: Let’s create a sales order, using item 608a1 as the requested item, for a quantity of 1. You can enter the location from which to pull the material. We will not opt for that now.
After selecting Pack SO, you’ll see this:
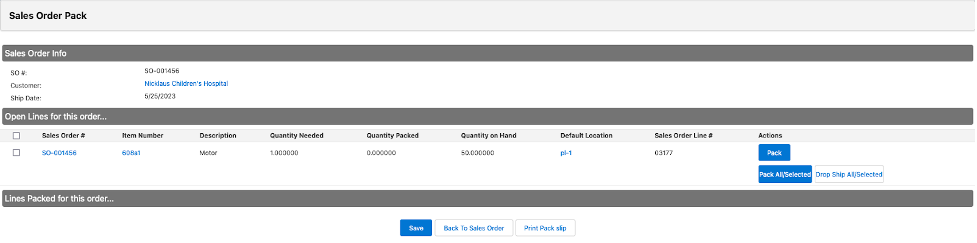
Select the Pack button and this will appear:
View the drop down window to select the flow rack location:
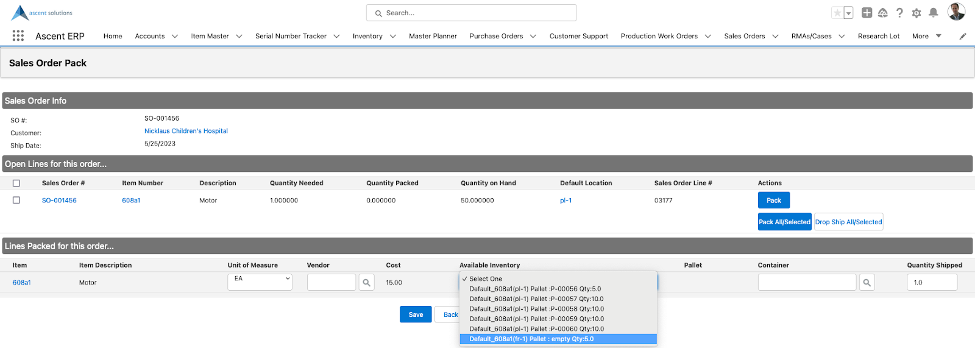
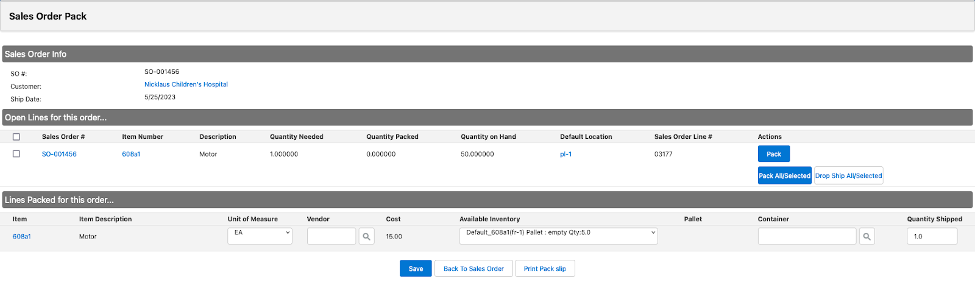
You’ll then see just the selected location and quantity. Note that next to the word Pallet is empty, meaning that this is not in a pallet location:
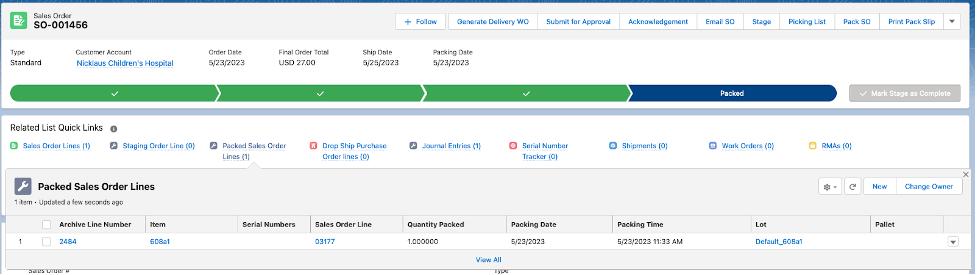
After hitting Save, you’ll see confirmation of packing:
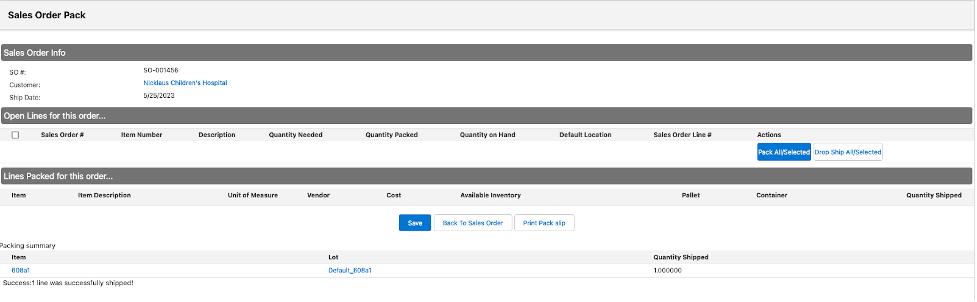
Upon returning to the sales order, you can see the Packed Sales Order Line:
Lastly, let’s review the inventory records to see that the material has been deducted from the flow rack location: