Pallets
Definition, Categories, and Prerequisites
Definition: Pallet is an object/record in Ascent that can become part of the inventory (item/lot/location) detail or be referenced during the packing process as a container.
Categories: There are two categories of pallets – inventory pallets or outbound pallets. The explanation of both follows.
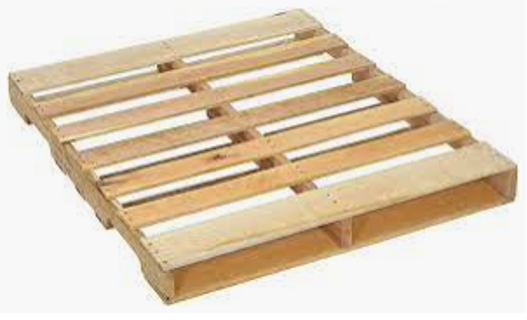
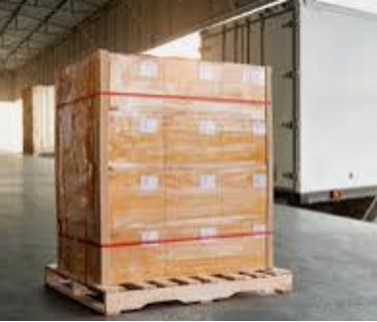
Inventory Pallets – This type of pallet is used typically when goods are ordered and come in, for example, on a wood pallet, shrink wrapped. Each pallet would have the same quantity except for any quantity that is not the standard quantity for a pallet. For example, if the standard/max pallet quantity is 25, and 140 are ordered, there would be 6 pallets with 25 on each and an additional pallet of 15. In Ascent, you cannot commingle different SKUs on a single pallet.
Outbound Containers – This type of pallet is only, and optionally used when packing out a sales order. The container can contain one or multiple SKUs on it, unlike an inventory pallet, since a customer can order multiple items.
Prerequisites: In order to be able to use pallets, there are certain fields on the item master and on the location object that need to be filed in, as well as a custom setting.
Custom Settings – in order to use pallets, you need to set the custom setting called Use Pallets? By checking it (that makes it TRUE).
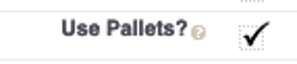
Additionally, if you are using outbound containers, there is a custom setting that if selected (checked), says that you can use a container on a single sales order, and not used across multiple sales orders.

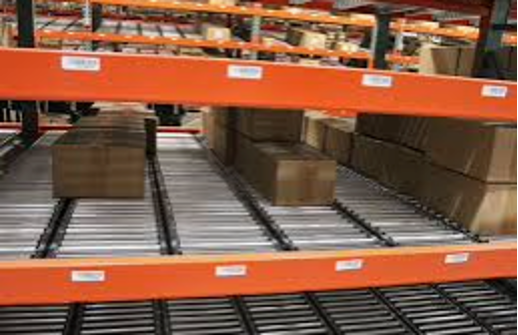
Location – you can create a flow rack location, if you intend to use flow racks. Other than that, the location can simply be one that can house a pallet or pallets. Flow racks are entirely optional. Flow racks are forward stocking locations that typically have a small quantity of goods from which a picker can pull goods from a more convenient location than running up and down the aisles of a warehouse. Flow racks can be used in conjunction with pallets, in that material can be requested to “refill” the flow racks, and that material can come from pallets. This document will not go into detail other than the definition of flow racks. There is another document called Flow Rack Processing which will go into that in detail..Here are some flow rack examples:

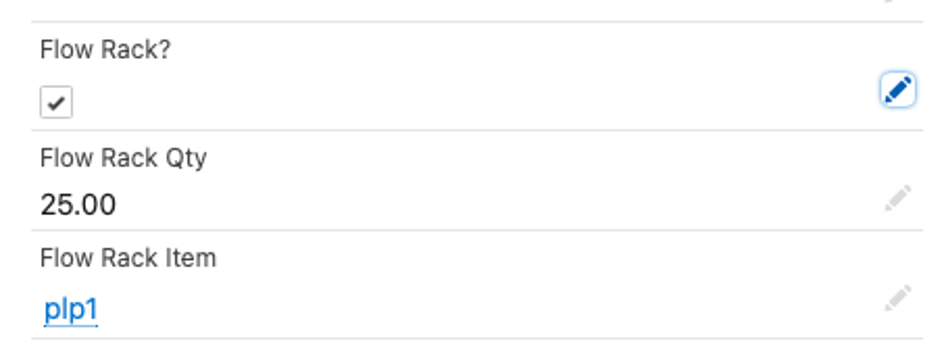
This location must reference the following bits of information:
Flow Rack? – This checkbox, used in conjunction with Flow Rack Qty and Flow Rack Item, designates this location as a flow rack location, meaning that it is one that is refilled from bulk locations or from pallets in bulk locations. This is a process which can be accessed through the Ascent Mobile Menu called “Refill” and allows a company to move material from one of the bulk locations to a refill location. This functionality would be used typically only if the Custom Setting “Use Pallets?” is activated.
Flow Rack Qty – This is the maximum quantity of the Flow Rack Item that can be held in this location at any one time.
Flow Rack Item – This would be the item that is stored in this location.
Here’s an example of those fields on the location object:
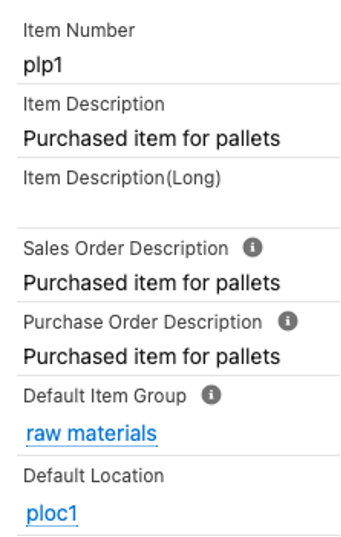
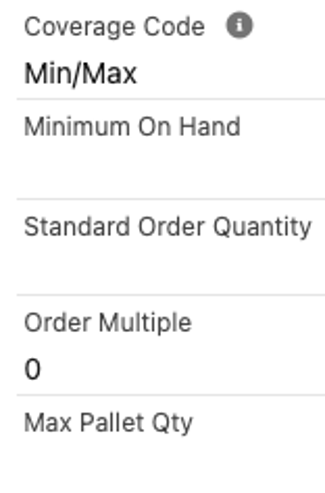
Item Master – This is the specific identifier for the item. It must be unique. These are the fields that pertain to pallets:
Default Location – a location is defined as a place where you store your items. It can be a stockroom, an aisle/row/tier combination, an entire warehouse, a bin, or just about anything where material can be stored and counted. There must be a default location defined for an item. That does not mean that an item must only be in a specific location; it can be stored in any of a number of locations, at the same time. Some locations could be considered bulk locations, while others can be “pull-from” locations. It can be shared with other items. Many items can have inventory stored in a single location.
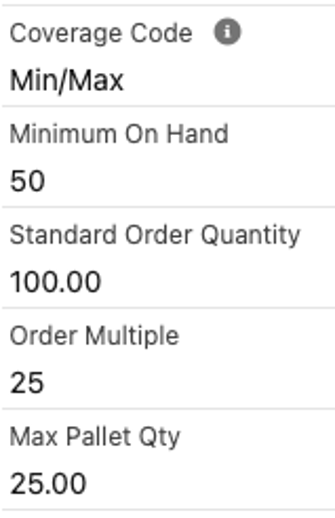
Max Pallet Quantity: This field would only be used if you have the Custom Setting (Use Pallets?) activated. For example, if this field value is 44, then when receiving a PO or completing a PWO for this item, a pallet record will be created for each quantity of 44 received. If 100 is received, the system will create 3 pallets, 1 for 44, another for 44, and the third for 12. If you use pallets, however, you do not enter a value in this field, then no pallets will be created
Standard Pallet Quantity: This is a memo field, Ascent doesn’t use it. It is not displayed by default, but may be added to the layout.
Here is an example of what those fields look like on the item master:
Processes:
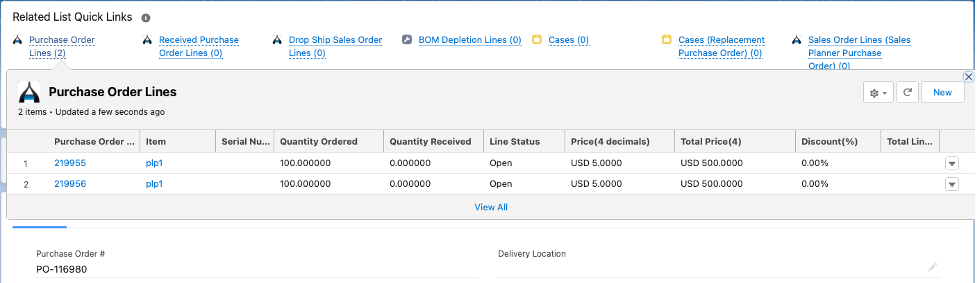
Purchase Order Receiving – the purchase order receiving process changes slightly. To illustrate this process, let’s create a purchase order with two lines, each for a quantity of 100.
Let’s receive 85 pieces via the desktop receiving function:
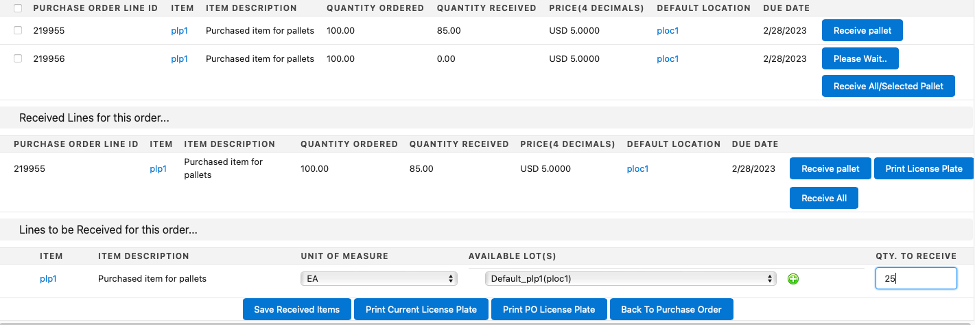
Note the following screen that you receive when the custom setting Use Pallets is enabled:
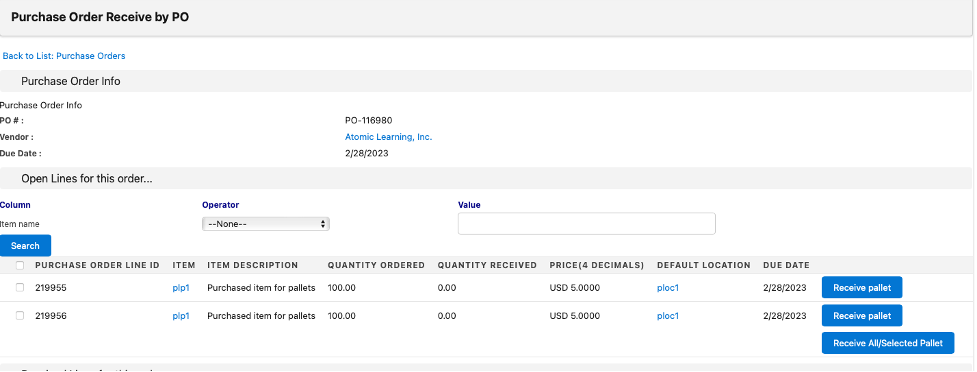
You can click Receive Pallet, or select the checkbox next to the first line and select Receive All/Selected Pallet, or if you wish to receive all lines, also select Receive All/Selected Pallet. For this example, we’ll select Receive Pallet on the first line.
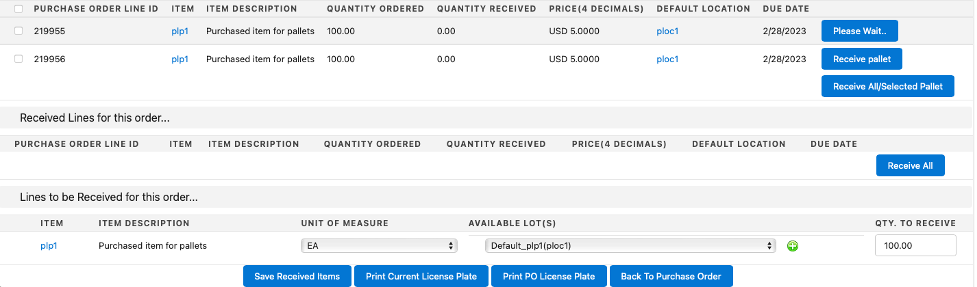
Notice that the button line at the bottom of the screen has two buttons that only appear if pallets are used, Print Current License Plate and Print PO License Plate. After we change the Qty To Receive, we select both of them.

Now that we’ve changed the Qty To Receive to 85, let’s select Save Received Items:

Ascent came back with Success:4 lines were successfully received! And that’s because the system generated 4 pallets (25, 25, 25, 10, totalling 85).
Let’s select Print Current License Plate, which will give us 4 license plates:
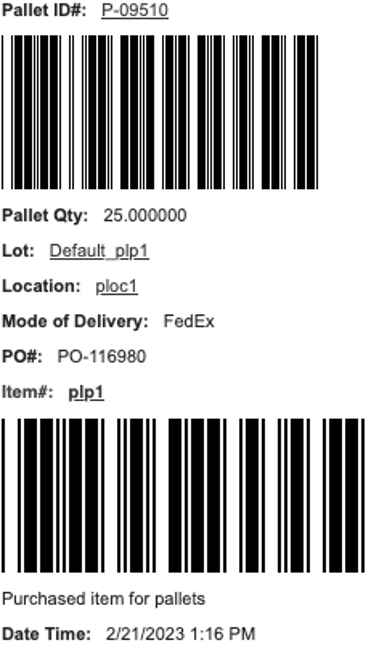

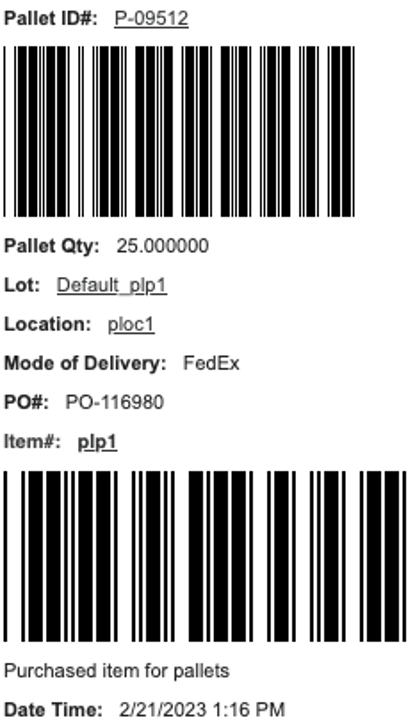

Note that the first 3 had quantities of 25 each, while the last one only 10 The Max Pallet Qty on the item master is 25, which is why each of the first 3 pallets created had a quantity of 25. The third one held the remainder of the quantity received, 10. The pallets have an odometer, which numbers them. Those numbers are in a format of P-nnnnn, so P-09510, P-09511, P-09512, and P-09513.
At the bottom of the display are two buttons, Back and Print. In real life, you would click Print and once printed, click Back. For our scenario, we’ll hit Back, which will take us back to the Purchase Order screen.
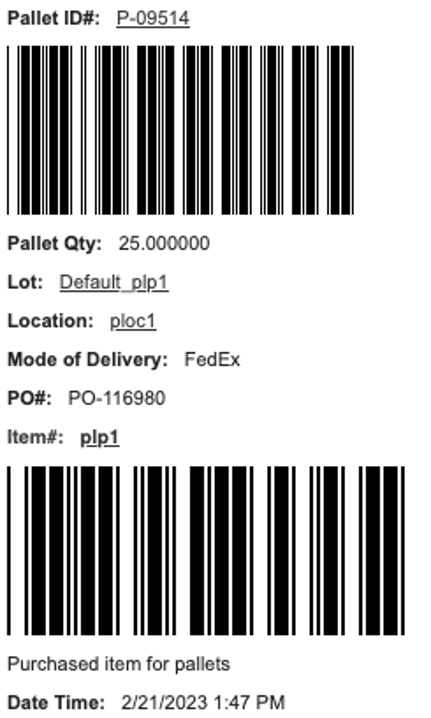
Let’s receive 25 of the second line:
But this time, we’ll select Print PO License Plate. It will print ALL the license plates, even though the ones previously printed. Here’s the last one:
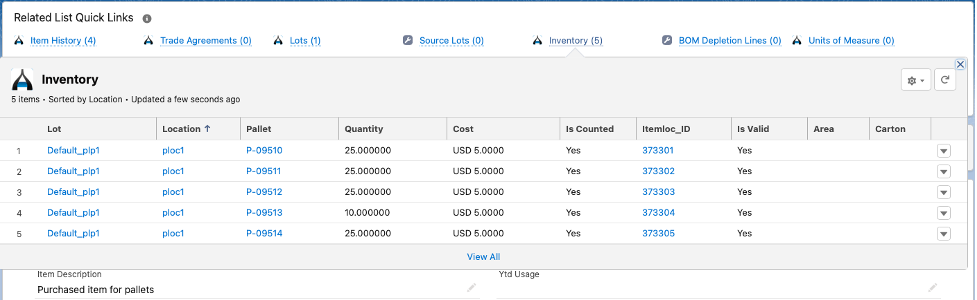
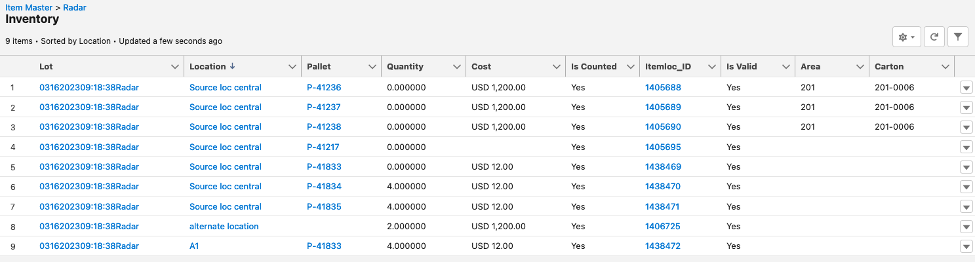
Look at Inventory Detail to see the material that was just received:
Let’s compare that to an item that has NO Max Pallet Qty.
The pallet field on the inventory record is blank.

Before we move on to production work orders, let’s see how receiving purchase order lines where the item is palletized occurs using the Ascent Mobile Menu.
Go to the Ascent Mobile Menu (normally, this would be done on a handheld device, but for documentation purposes, we have made the screen small on the desktop.
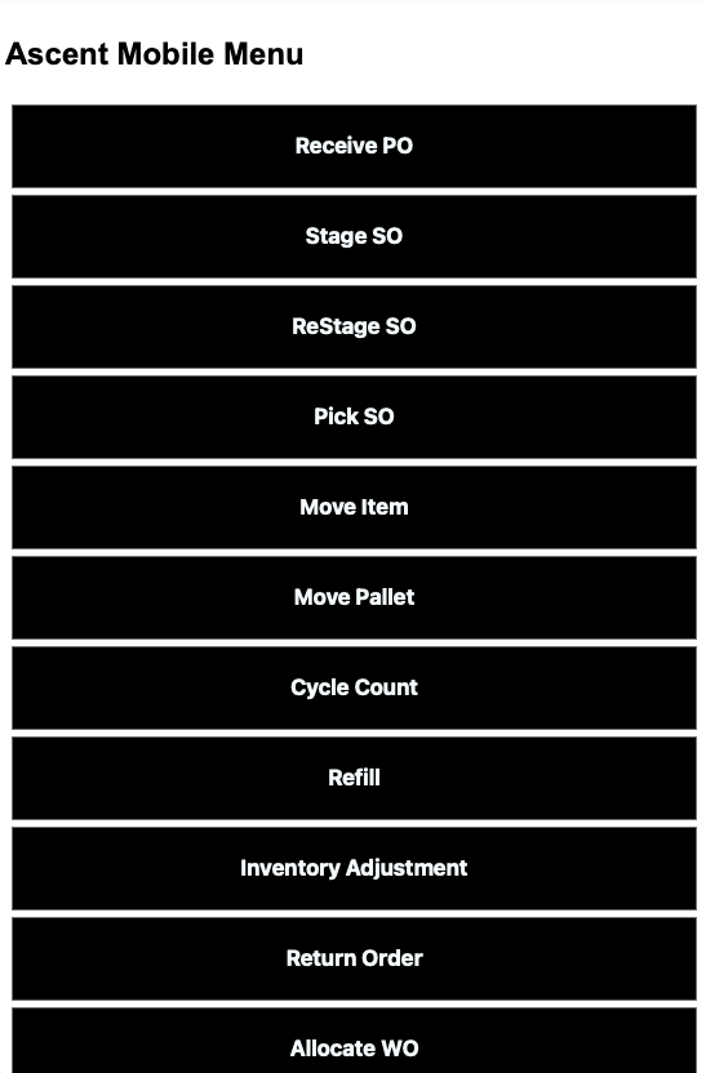
Select Receive PO, and enter/scan your purchase order:
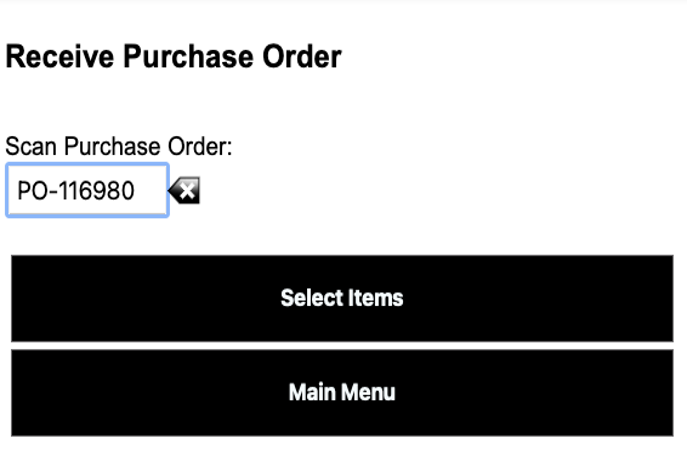
Follow that by selecting Select Items:
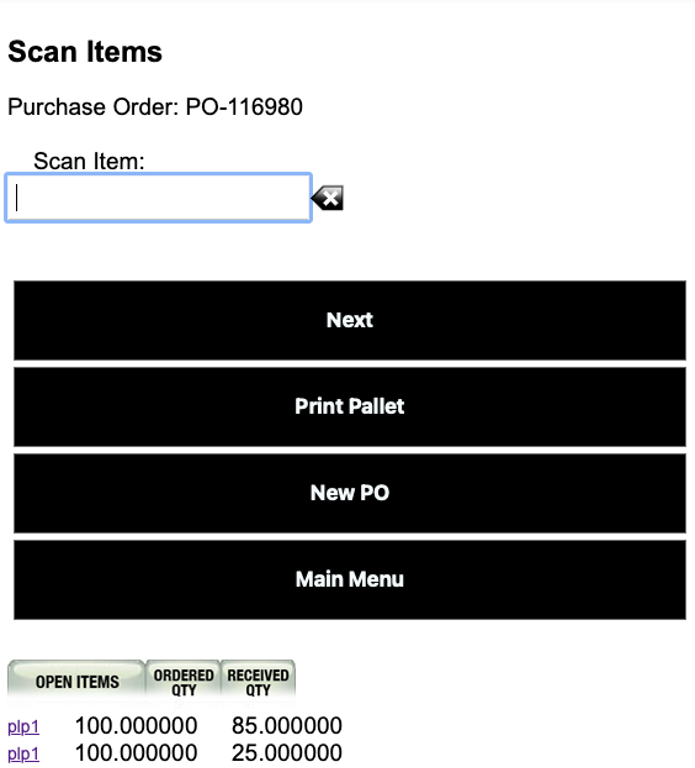
Select the line by clicking on the item number:
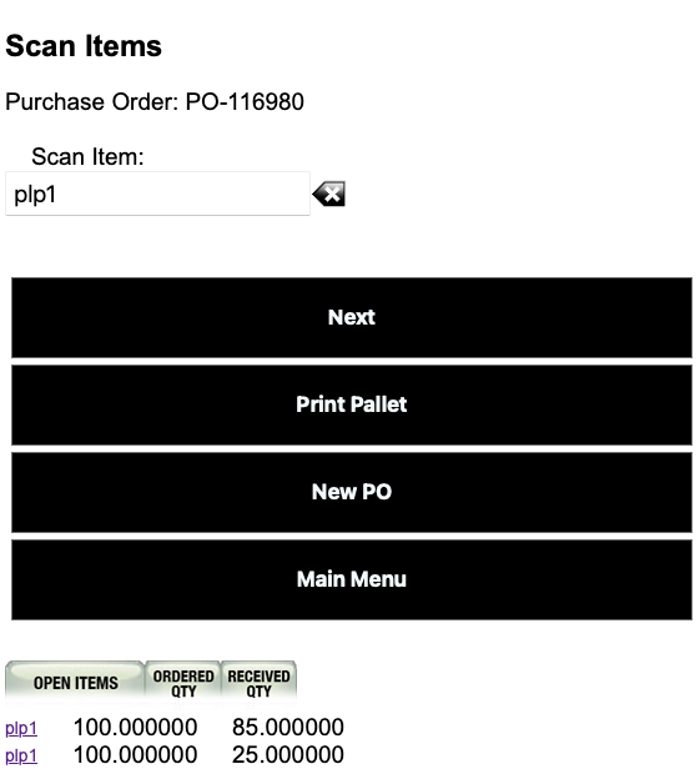
Then press Next, and you will be given the ability to select the lot:
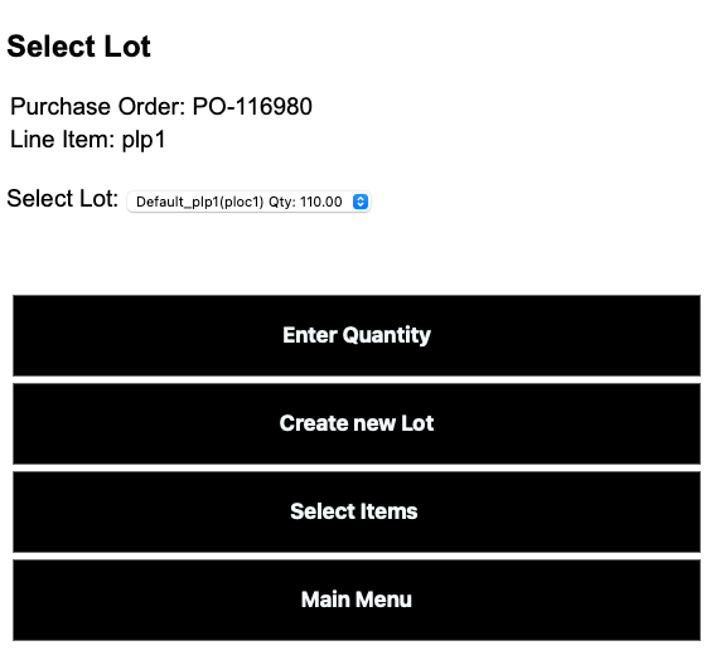
Let’s take the lot that is appearing in the drop down box and hit Enter Quantity:

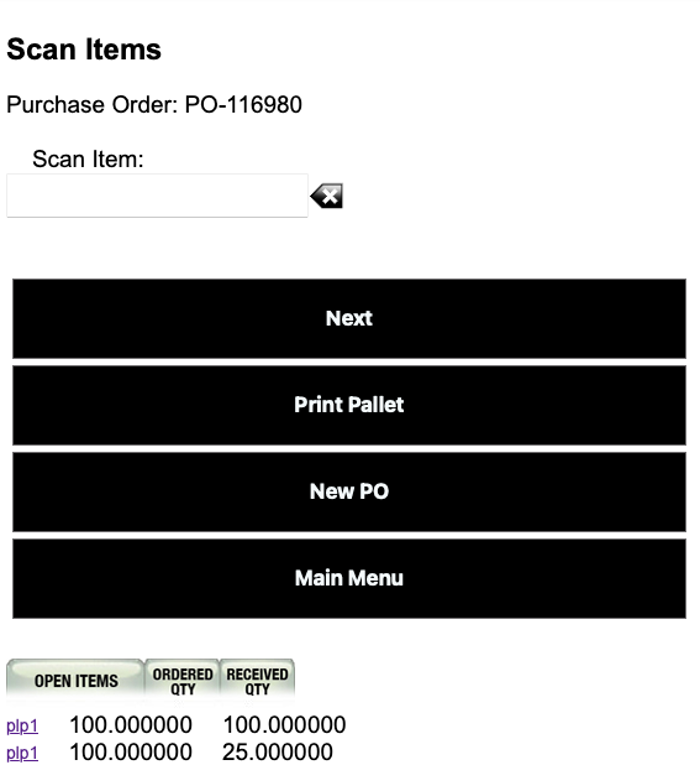
We are given a chance to either just Receive Pallet (no print) or Receive & Print Pallet. Let’s select Receive & Print Pallet. The receipt will be done and the pallet(s) can be printed. Once that’s done, you can scan another item:
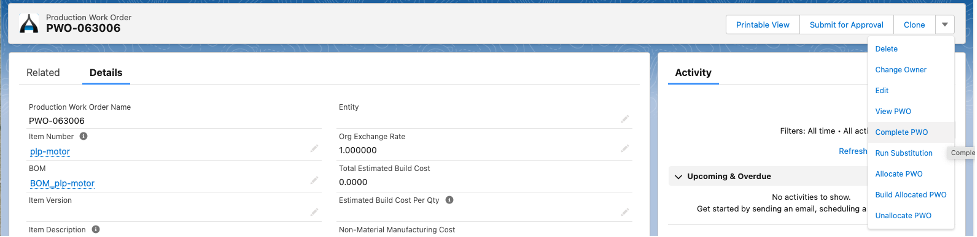
Production Work Order Build/Completion – Here is the item we are building, plp-motor, and its BOM:

The PWO’s components:

To complete the PWO let’s select Complete PWO:
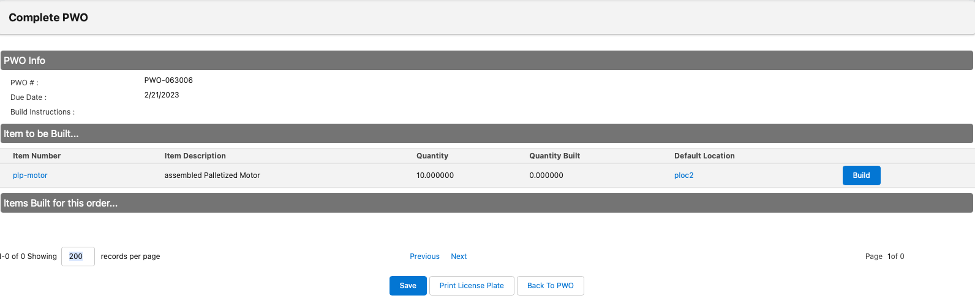
Let’s select the Build button. We’ll be shown this screen:
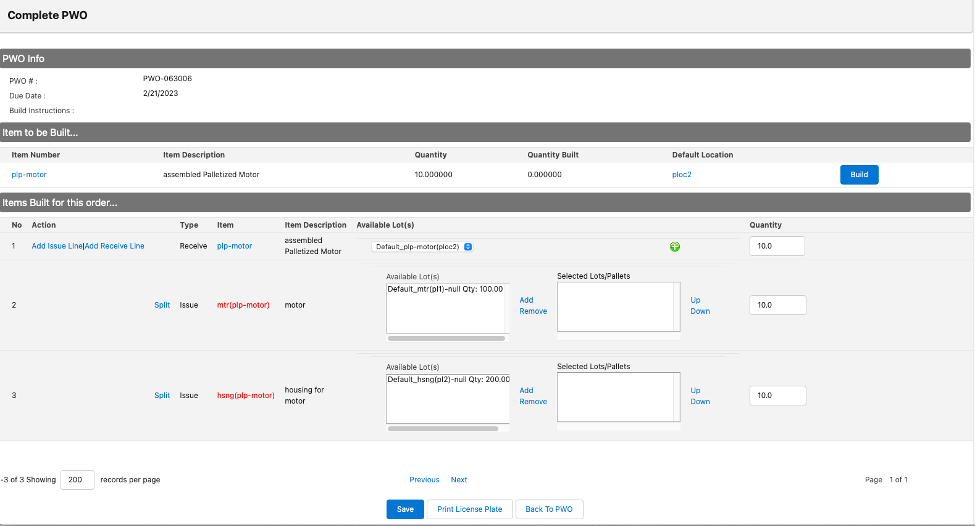
Select from the Available lot(s) windows:
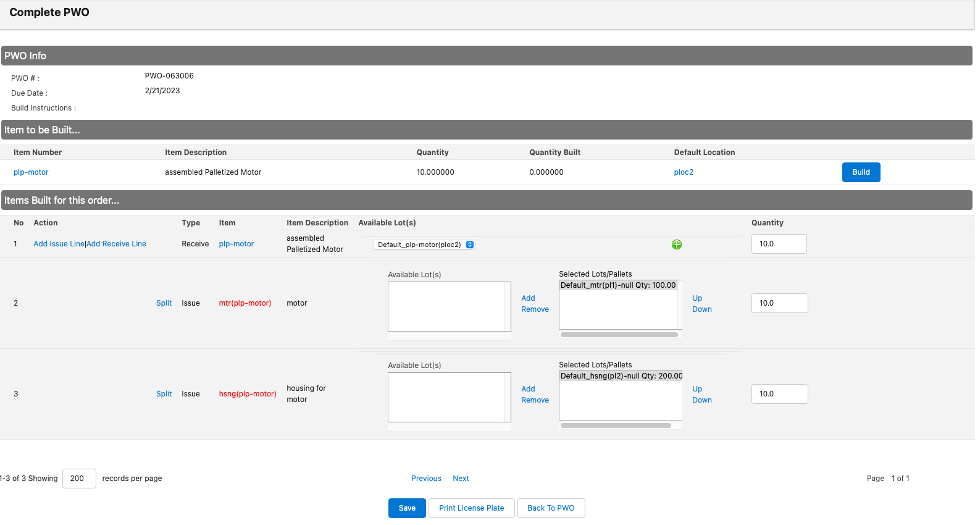
Then, hit Save, and you’ll see this completion screen:
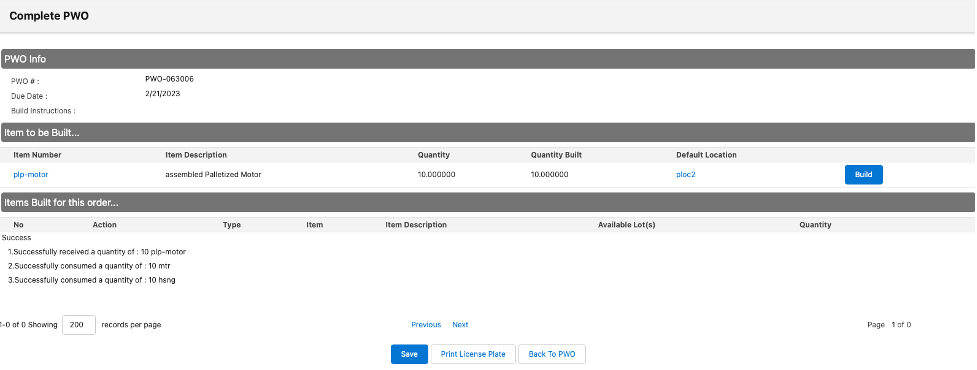
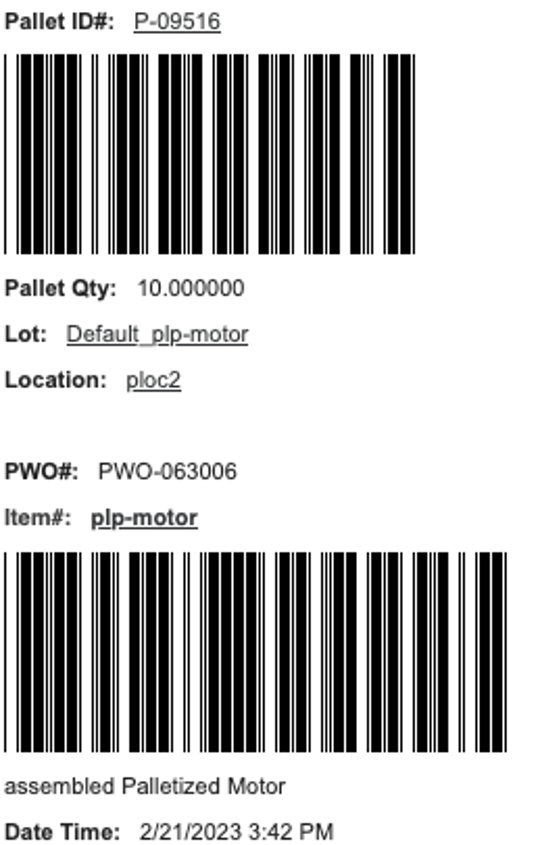
We have built 10, and consumed 10 of each of the components. Now we can select Print License Plate to print it:
Move Pallet – there may be times when pallets need to be moved from one location to another. You can use Move Pallet on the Ascent Mobile Menu to do this.
Go to the Ascent Mobile Menu:

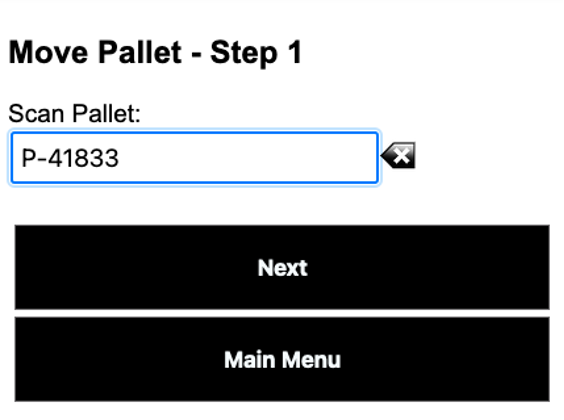
Then, select Move Pallet:, and scan/enter the pallet you wish to move. Then, hit Next:
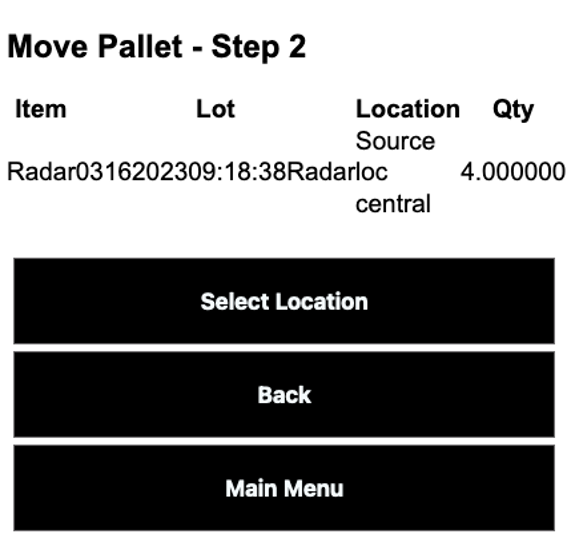
Now, choose Select Location:
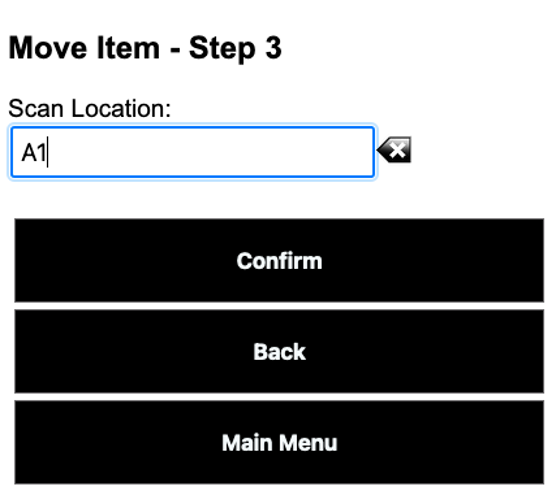
Then, hit Confirm. You will then see that the pallet selected has been moved to a different location:
Sales Order Pack / Containers – when packing a sales order with an item that is palletized, you can reference the pallet from which the material is taken. You can also, regardless of whether an item is palletized or not, can pack all the items onto a container.
Containers are outbound pallets. In order to use them in the packing process, you need to build them in advance. First, go to the Pallets tab and select New:
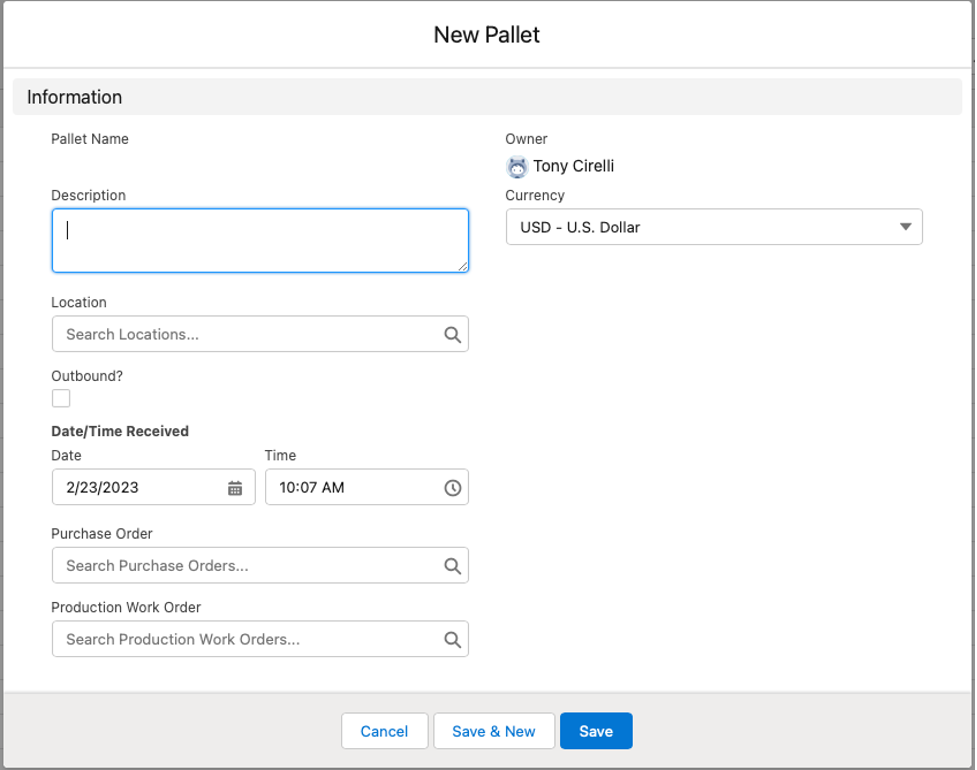
You can enter any description. Location is optional. However, you must check Outbound? In order to use this pallet for outbound processing.

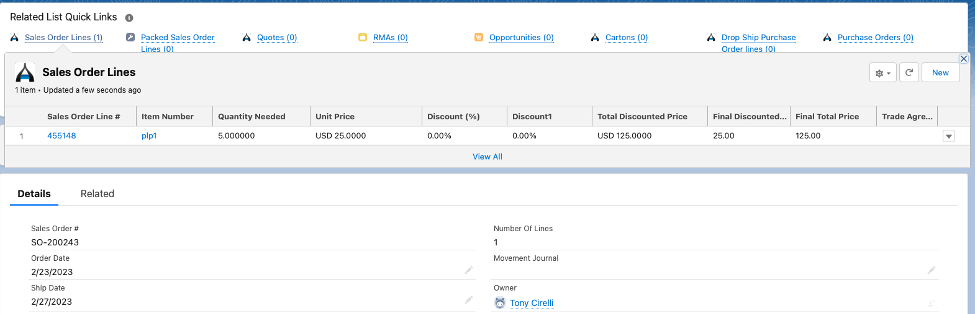
Now. let’s create a sales order:
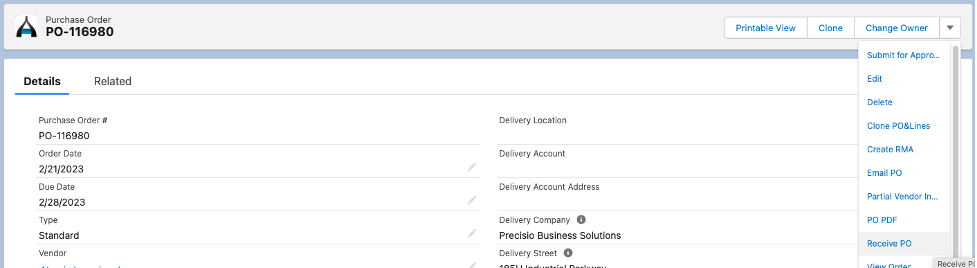
Click the Pack SO button after clicking the down arrow next to the Change Owner button:
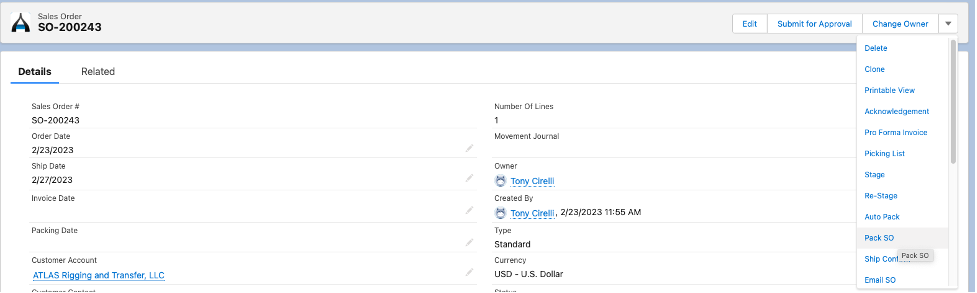
This screen will appear:
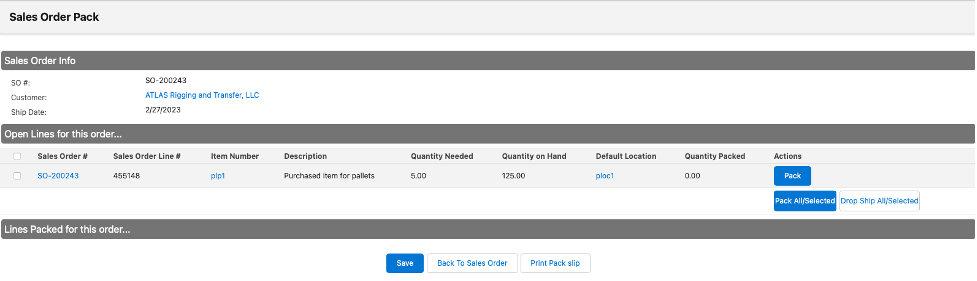
Now, select the Pack button and you’ll get this:
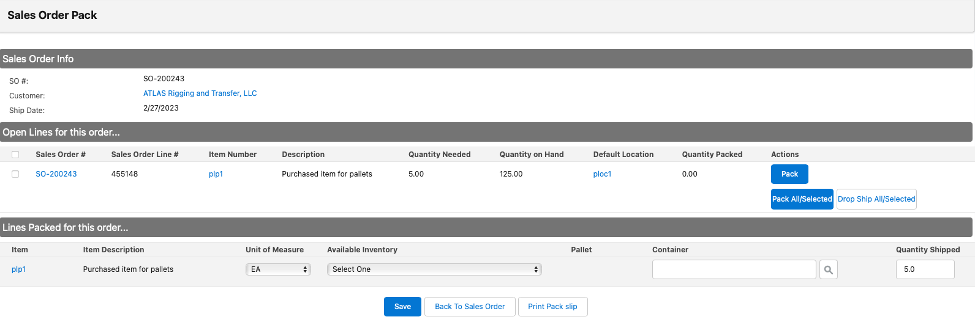
Click the Available Inventory window open and select the appropriate pallet:

Then, enter/scan the outbound container previously created:

Hit Save, and you’ll get a success message:

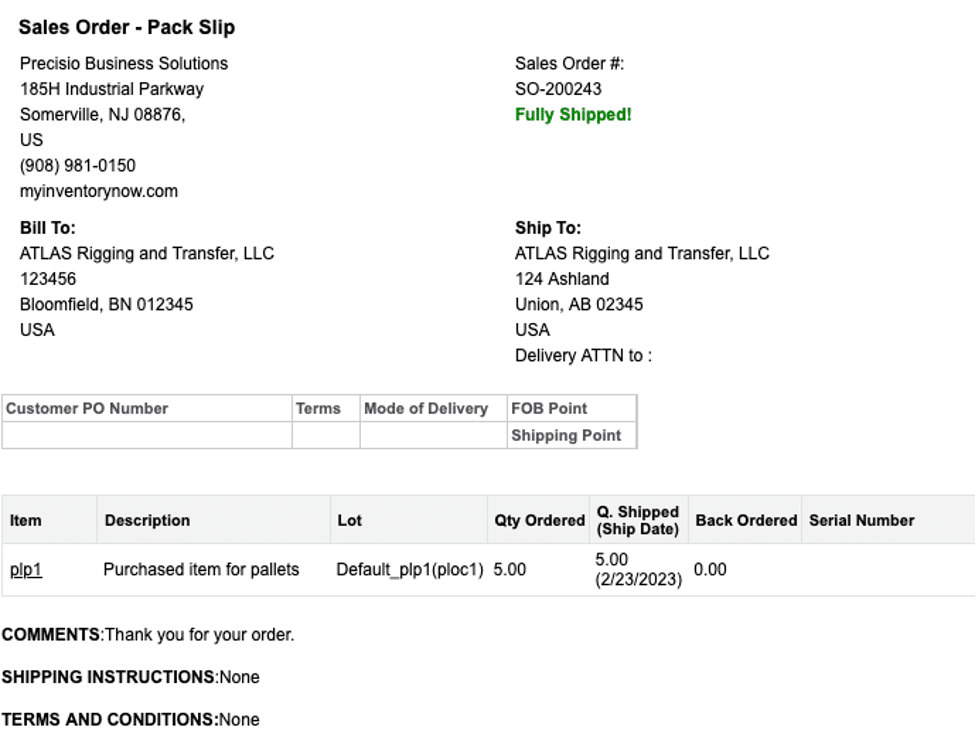
If you wish, you can then click Print Pack Slip, which would display this, and give you the option to print it:
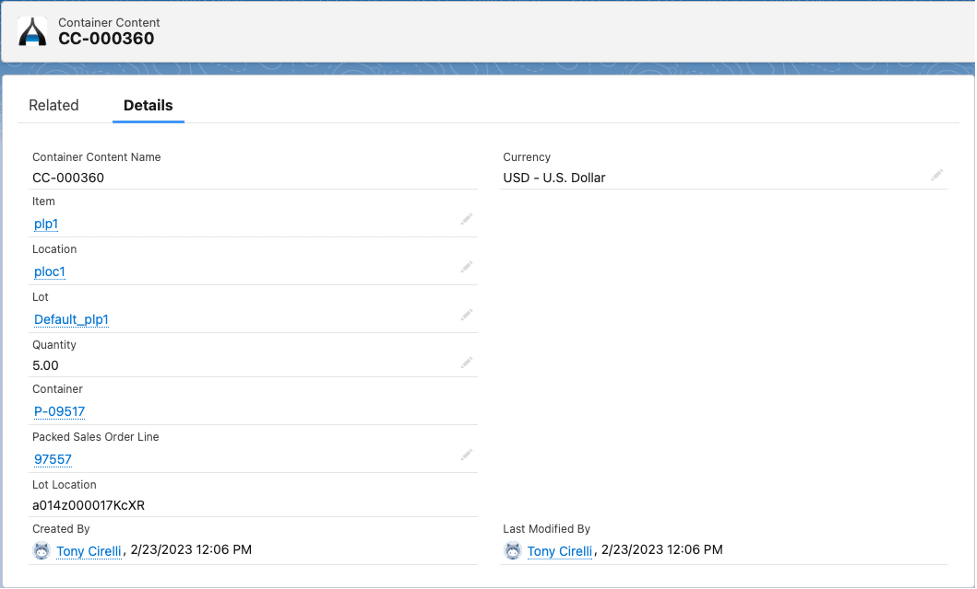
If you wish to see the container contents, you can click the container (pallet) and then go to the Related tab, which will show you the Shipped Sales Order Lines (Container) and Container Contents.

By clicking the Container Content Name (in this case CC-000360), you will see this, which indicates the item, location, lot, quantity, container (pallet) and packed sales order line.
Lastly, if desired, you can print a Pallet Contents Report for the sales order. Go to the down arrow next to the Change Owner button on the Sales Order and click Pallet Content Report:
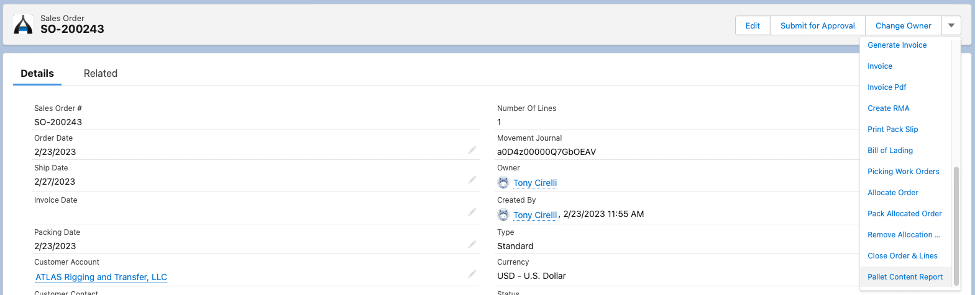
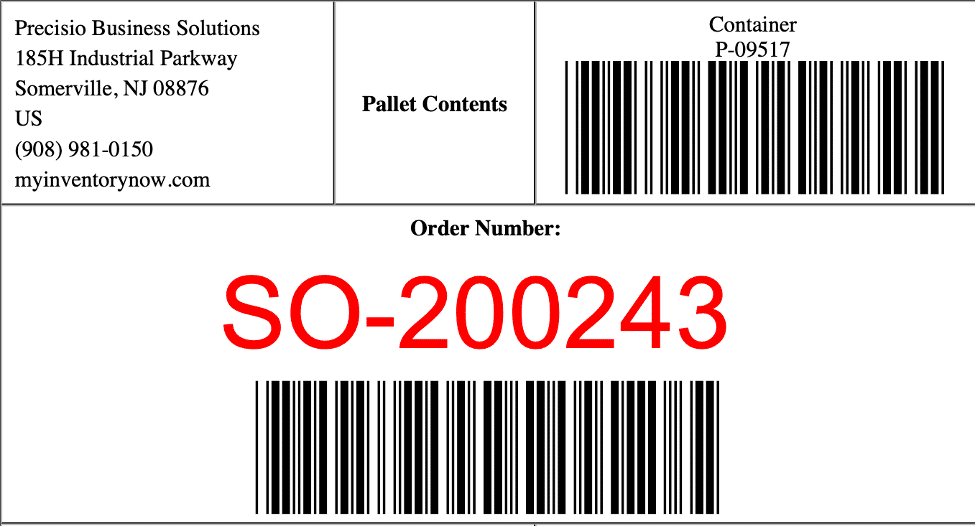
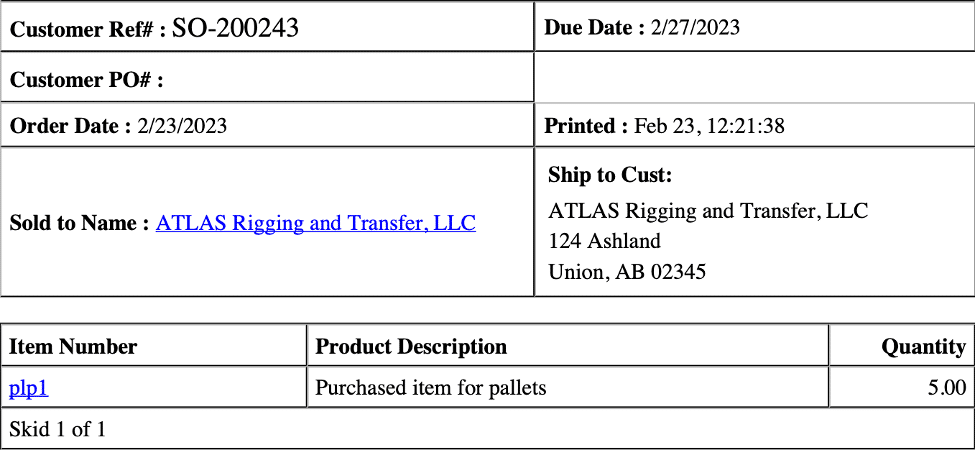
This document will print any sales order lines that have been packed.
One additional feature of containers is that you can pack multiple sales orders onto a single container, unless you set the custom setting which says Use Container on Single Sales Order.