Cycle Counting
Overview and Process
Definition: This is the process of auditing the inventory counts in your system, and letting the system post variances where physical counts are different from system quantity. The process of performing a cycle count (or count journal) can be done using the desktop or using the Ascent Mobile Menu, on a handheld device like a tablet or phone.
Custom Settings: The behavior of cycle counts can change based on some custom settings.
- Do not Close CJ when lines approved – Do not close the Count Journal if all lines have been approved; If you are first entering a CJ, and the very first line is approved, it will close the CJ;
- Move SN on CJ if on different location – If this is set to “Y”, then when a serial# is counted in a count journal line, it will allow movement of the serial# from one location to another. Inventory would be reduced in the from location, while being incremented in the to location.
- No of lines to show in countlinesview – This will display only x lines (x = the number you put into the custom setting) at a time on Count Lines VF page; developed due to SF limitations
- Do Not Allow CC to swap SN between items – If this is enabled, then when doing a cycle count, you cannot scan a serial number that belongs to item A and assign it to item B. This will assist in inhibiting the user from scanning like items and their serial numbers incorrectly.
- Make New Count Journal for each count – If multiple personnel are performing cycle counts, and you wish to have each person maintain their own count journal, rather than each of them adding lines to the same count journal, enable this setting. As a result, each “counter” will have their own count journal, allowing supervisors to more easily monitor activity and individual count journal accuracy.
Admin Settings: There are several admin settings which can affect behavior.
- Cycle Count Approval – This admin setting controls whether the entry of a count line will be considered “Approved” or “Pending”. If “No”, then once a count line is entered, the Status will be defaulted to “Approved” and then you hit “Save”, the line will be processed and if there is a discrepancy between the Quantity Counted and Quantity In Inventory, the variance will be immediately posted to inventory. If “Yes”, then the status will be “Pending”, and inventory will NOT be updated until either the individual count line status is changed to “Approved” or the “Approve All” button is selected.
- Cycle Count by Serial Number – If “Yes” is selected for this admin setting, then when performing a count journal, you will no longer have to enter a quantity for serialized items. Each scan of a serial number will count as a quantity of “1”. If “No” is selected, then after entering the quantity, you will have to scan a like amount of serial numbers.
- Cycle Count by Item Number – When this is enabled, instead of scanning/entering the quantity to be recorded for a non serialized item, you simply scan each item to be counted. If an item has 10 on hand, scan that item 10 times, and a quantity of 10 will be recorded.
Process: There are two ways to perform a cycle count. One way is to do it using the Ascent Mobile Menu. This technique will not be documented here, but in the Ascent Mobile Menu documentation. The method shown here is using desktop functionality.
Count Journal: To create a Count Journal, go to the tab labeled “Count Journals” and click “New”. The following fields are available for entry/display, based on what your company has chosen to expose for use.
- Count Journal ID – this is assigned by Ascent. It has a prefix, CJ-, followed by a 5 digit number. The number is an odometer, meaning that it has 1 added to it for each new count journal created. This field is an autonumber field, managed by Salesforce.
- Description – this is optional, but can be used to describe this count journal.
- Date – the date this count journal was created. It can be manually edited.
- Total Number of Lines – the total number of count lines on this count journal.
- Lines Pending – the total number of lines on this count journal that have not been either Approved or Not Approved.
- Count Type – this is a picklist, and available values are Cycle Count, –None–, and Other. It is purely informational, Ascent doesn’t use this in any way. Some clients have added more values to this picklist for their own purposes.
- Status:
- In Progress – counts are still being updated
- Closed – all count lines have been either Approved or Not Approved
- Approve – if this is selected, then all lines that are Pending will be Approved
- Not Approved – if this is selected, then all lines that are Pending will be Not Approved
- Entity – if entities are being used, then you would click on this field to select the appropriate entity. The count journal would then only allow you to enter counts for those locations that are associated with the entity selected.
- Currency – the currency of count lines in this count journal.
- ORG Exchange Rate – the exchange rate in this ORG
- Created By – the user who initially created this Count Journal
- Last Modified By – the user who last posted activity against this Count Journal
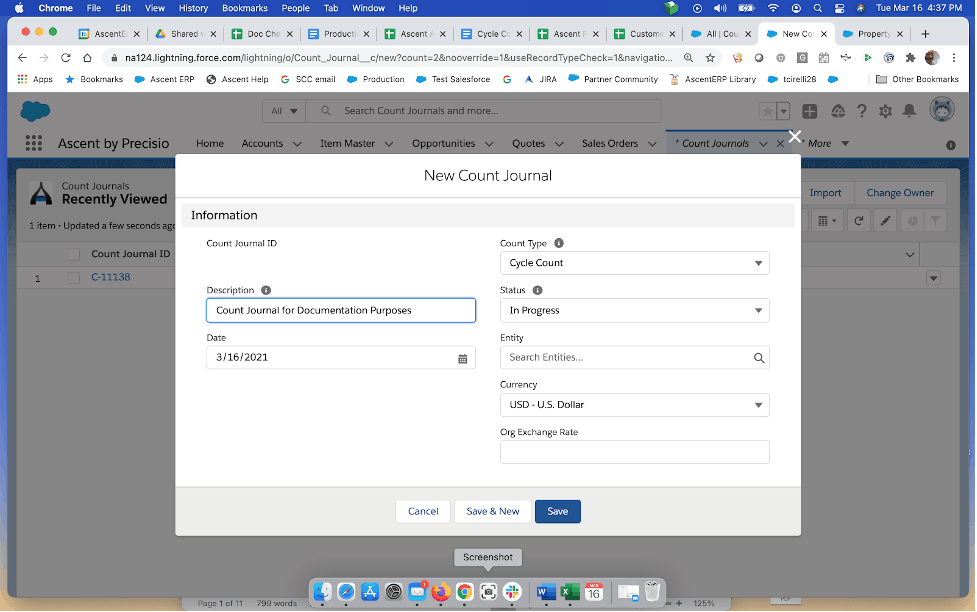
Count Journal C-11265 was assigned after hitting Save.

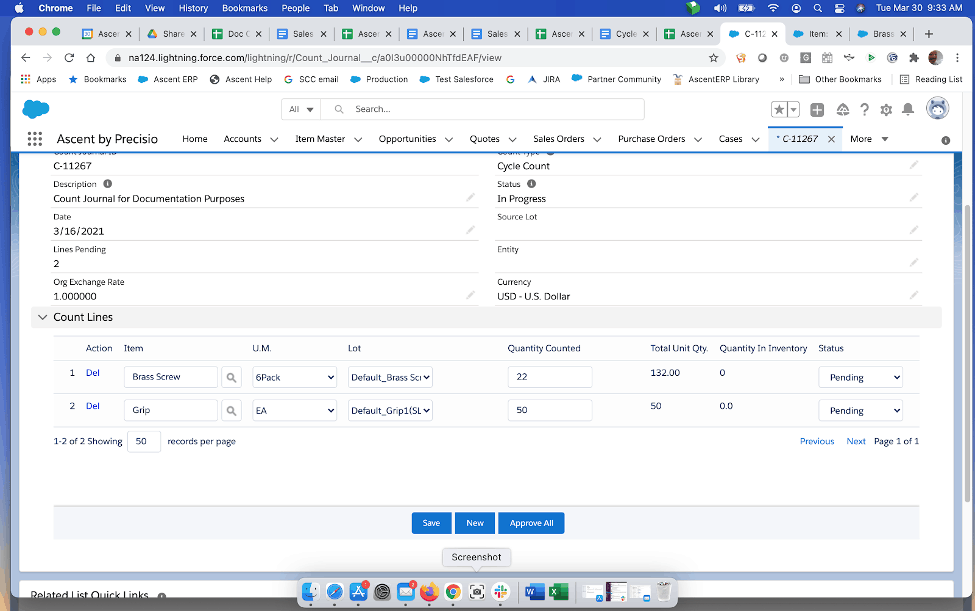
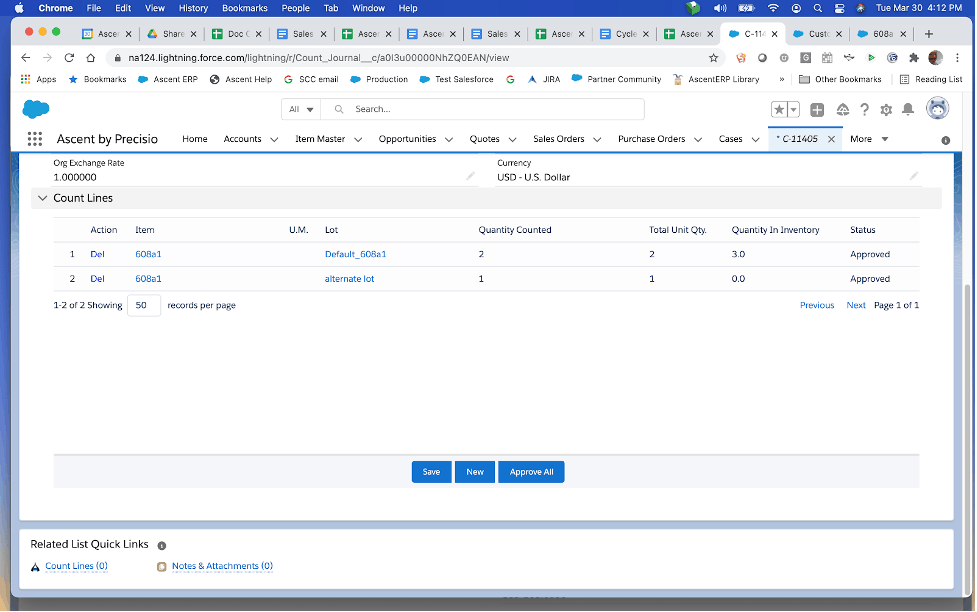
Count Journal Lines: To add count lines, scroll down to the Count Lines section and hit “New”. You will be prompted for the following fields:
- Item – this is the item being counted. You can click the lookup icon to search and find the item desired.
- U.M. – Unit of Measure – this is the default unit of measure from the item master. However, it could be overridden to be a unit of measure that was created for the item master. For example, if the default unit of measure on the item master is EA, but you have created an additional unit of measure called 2Pack, which is equal to 2 times the default unit of measure (2 * 1), when you enter the Quantity Counted, (let’s say 5), the system would multiply 5 times the conversion factor (2) and say that the Total Unit Qty is 10.
- Lot – select the location (or lot/location) that you are counting
- Quantity Counted – this is the actual amount counted
- Total Unit Qty. – see U.M field for description
- Quantity in Inventory – this is the quantity in the inventory detail record for this item / lot/location at the time this count journal line was added. This does not change on the count journal, even if the line is eventually approved.
- Status – there are 3 statuses:
- Pending – the count line has not yet been approved or not approved, and still needs review
- Approved – the count line is approved. Once approved, the Total Unit Qty is added to the Quantity in Inventory to update the inventory detail record. Once the status is approved, you cannot change it to anything else.
- Not Approved – this count line was not approved; inventory is not updated; it must be reviewed.
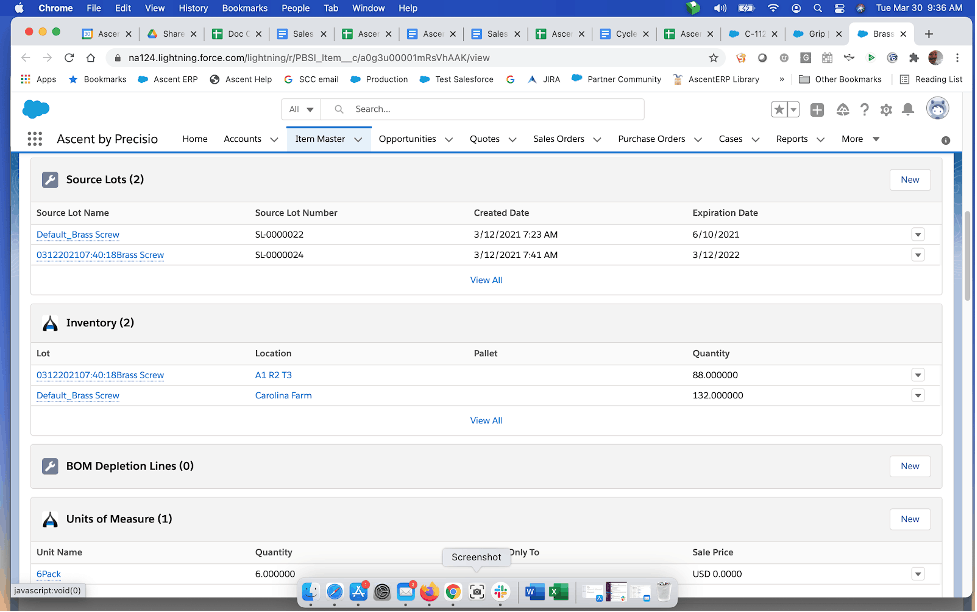
Count Journal Line screen – note that on line 1, the Quantity Counted is not equal to the Total Unit Qty. That is because a U.M. (unit of measure) that is different from the standard default U.M. from which the item master was selected. As a result, Ascent took the Quantity Counted times 6 (which was the [conversion] quantity) which resulted in a Total Unit Qty of 132.
Once the Save is selected, these count journal lines are saved as Pending. Pending does not update any counts in inventory. Only a status of Approved does that.
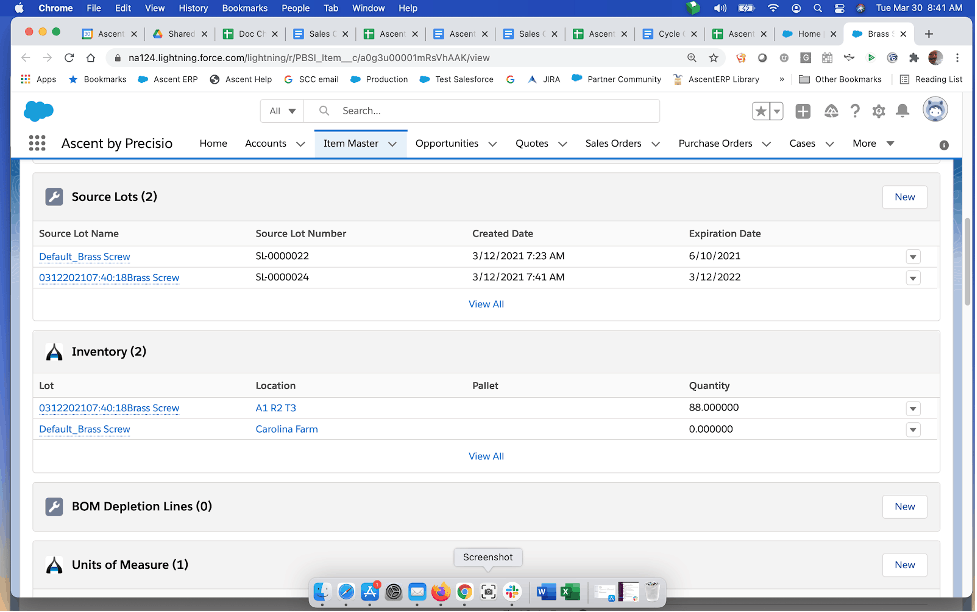
In both cases, Quantity in Inventory is zero for that item’s location. Let’s look at their current inventory:

Now let’s change the status from Pending to Approved and then look at the inventory levels.

Note that the user counted a quantity of 22 Brass Screws, however, with the unit of measure of 6Pack, multiplied the count to 132, thus updating the quantity in that lot to 132.
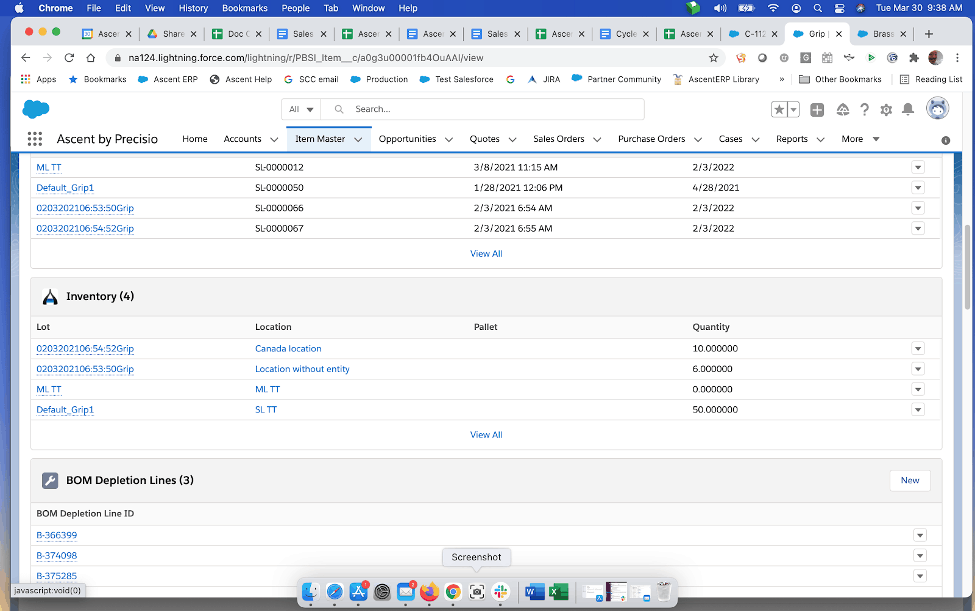
For the second line, the quantity counted was 50, and that was what was put into inventory.
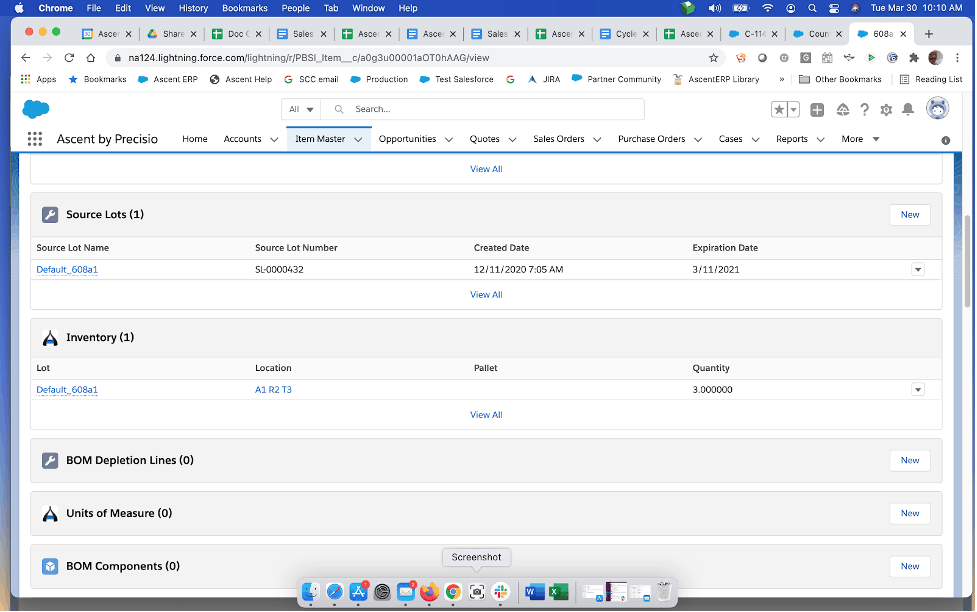
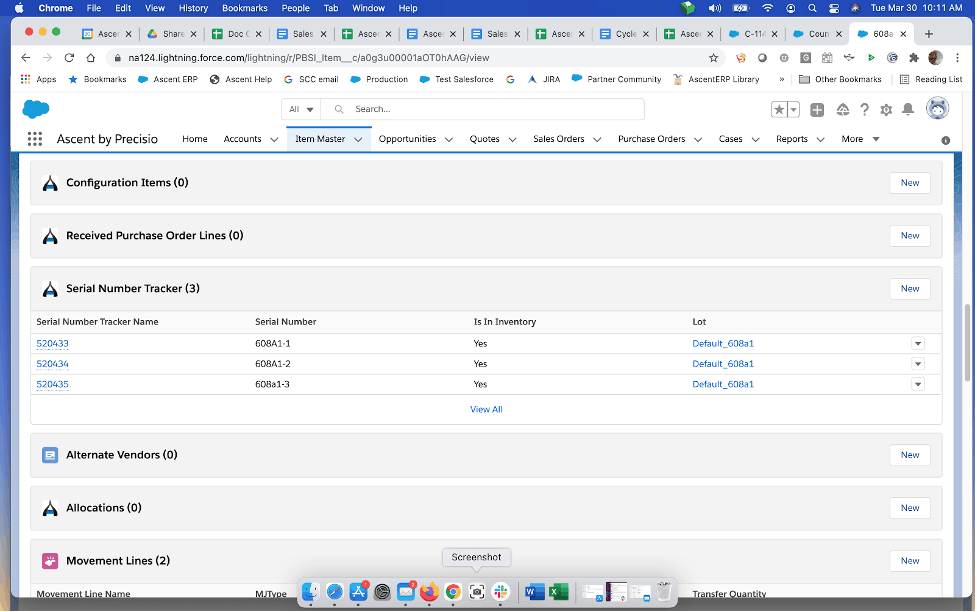
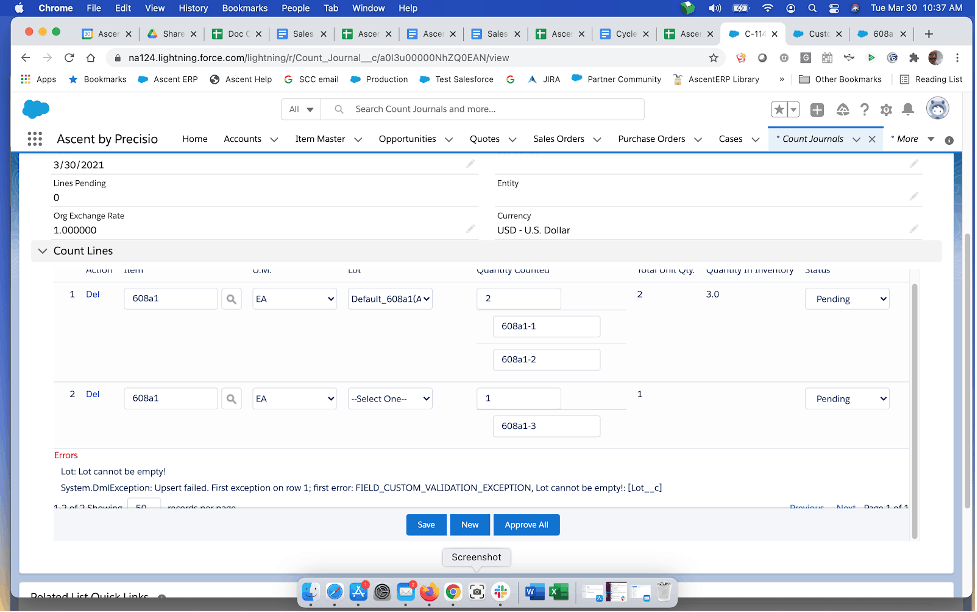
Count Journal Lines with Serialized Items: For this example, we’ll take an item that has 2 serial numbers in stock.
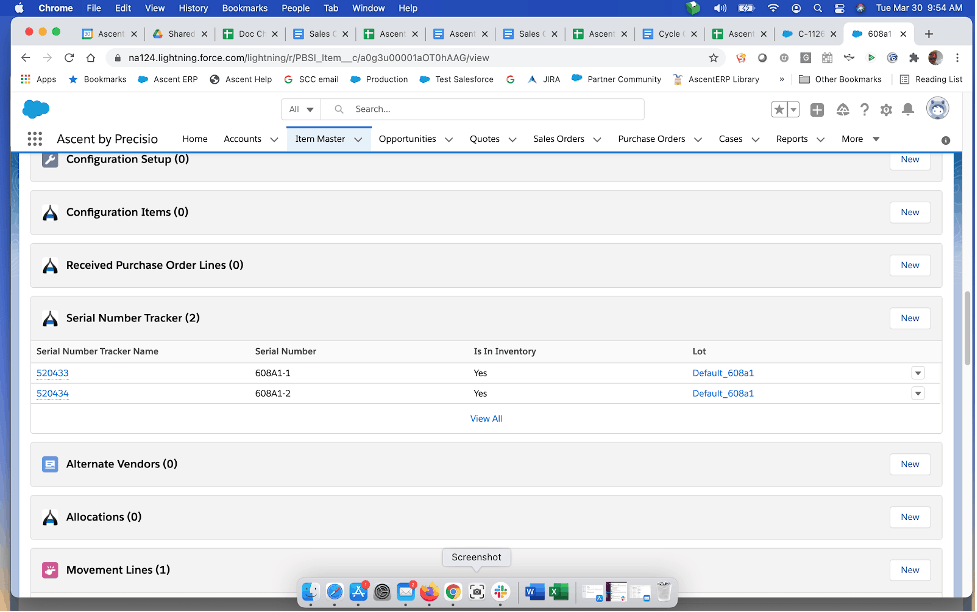
The count line would now look like this:
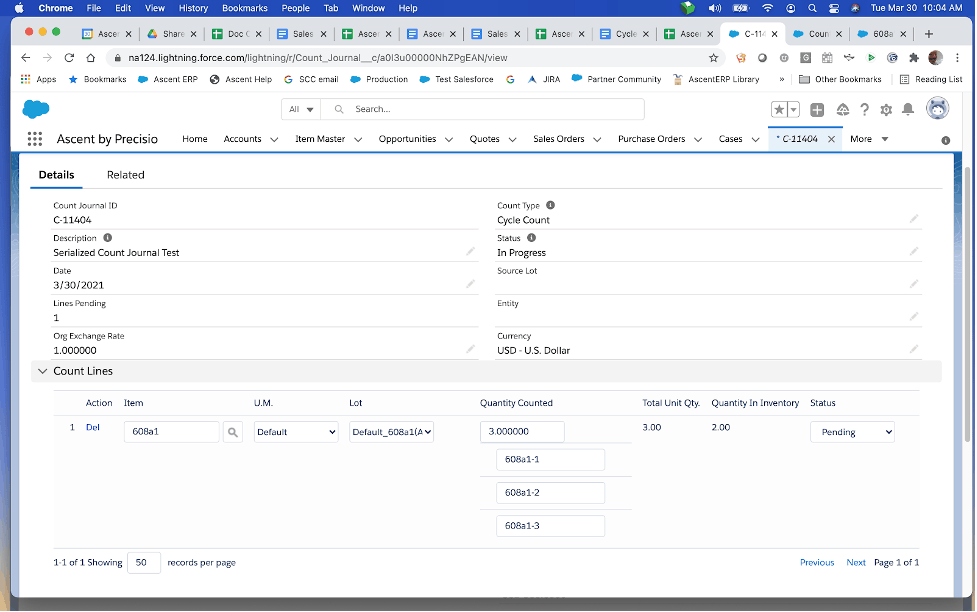
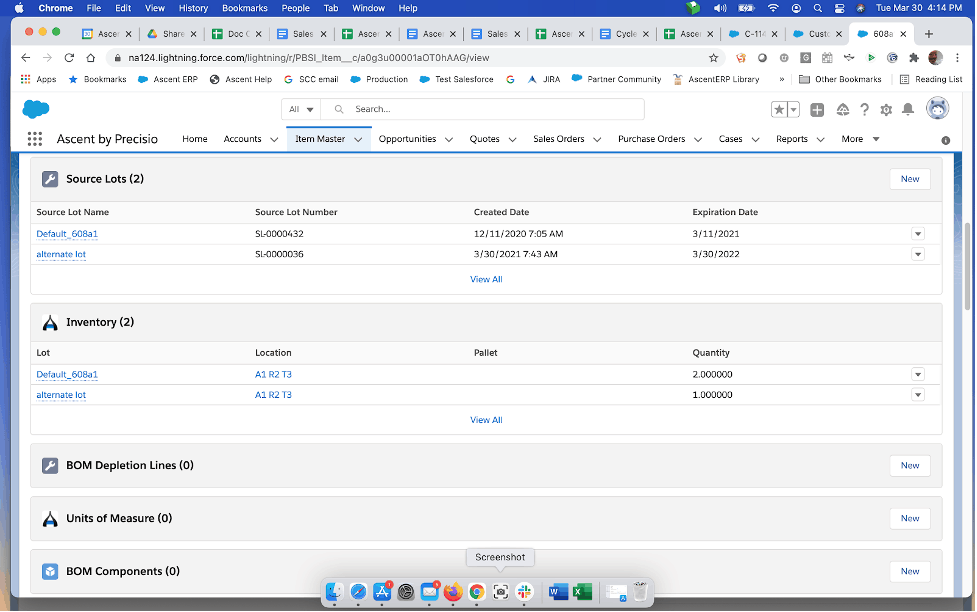
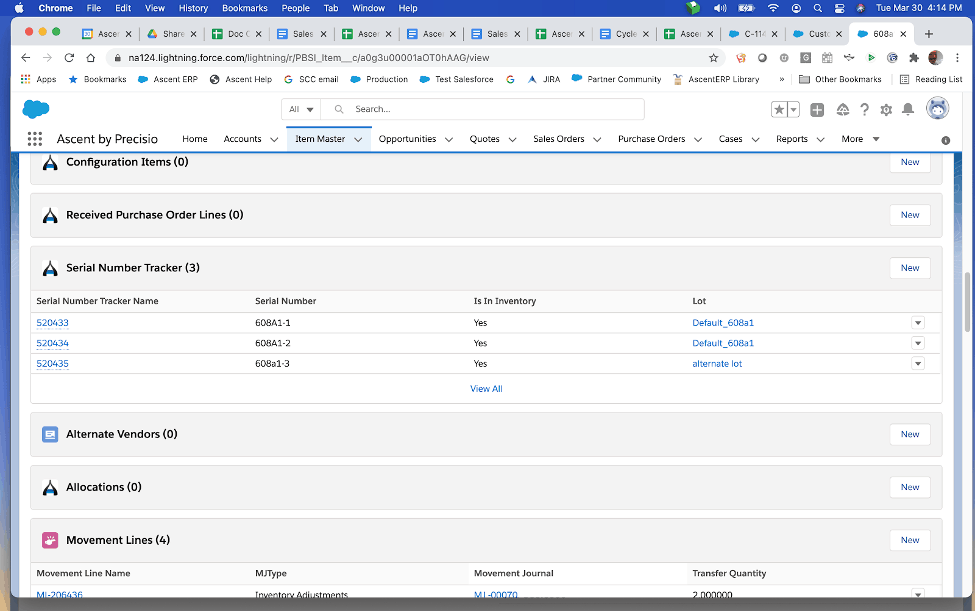
The first 2 serial numbers are in stock. The third one is not in stock, and was never previously in Ascent inventory. The example assumes that it was missed when initially receiving the material in stock.
For this example, we will use the Approve All Lines option, which is next to the Delete button. Hit the down arrow and select it:
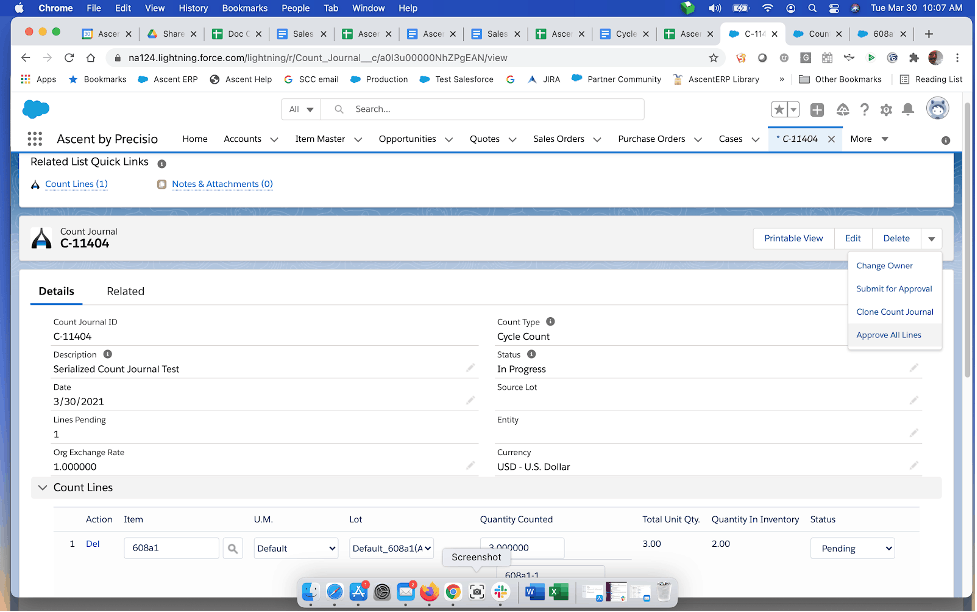
When you do that, you will receive this screen:
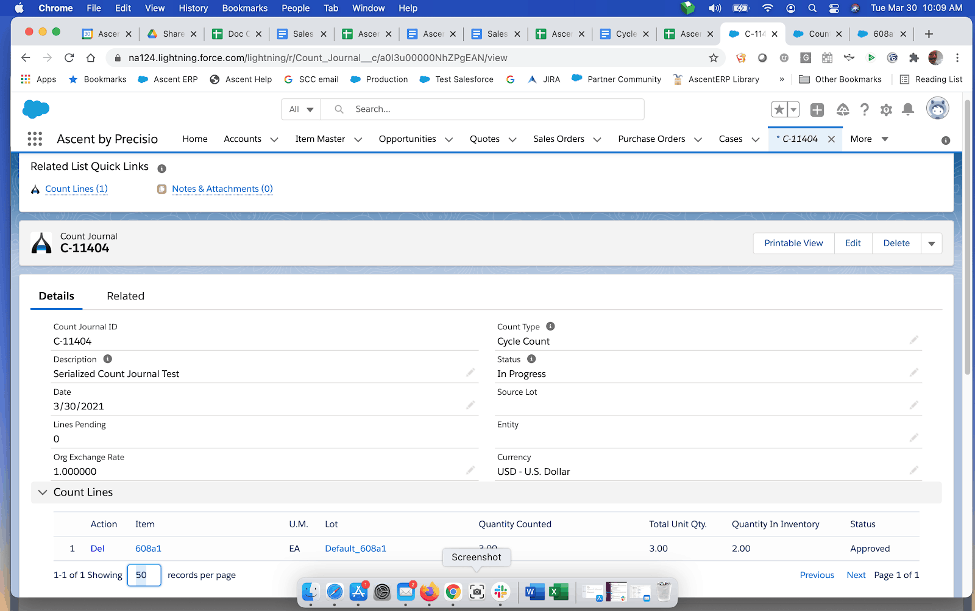
Now, let’s review the inventory and serial numbers for that item:
Inventory has been incremented by 1, and the newly entered serial number is now on file.
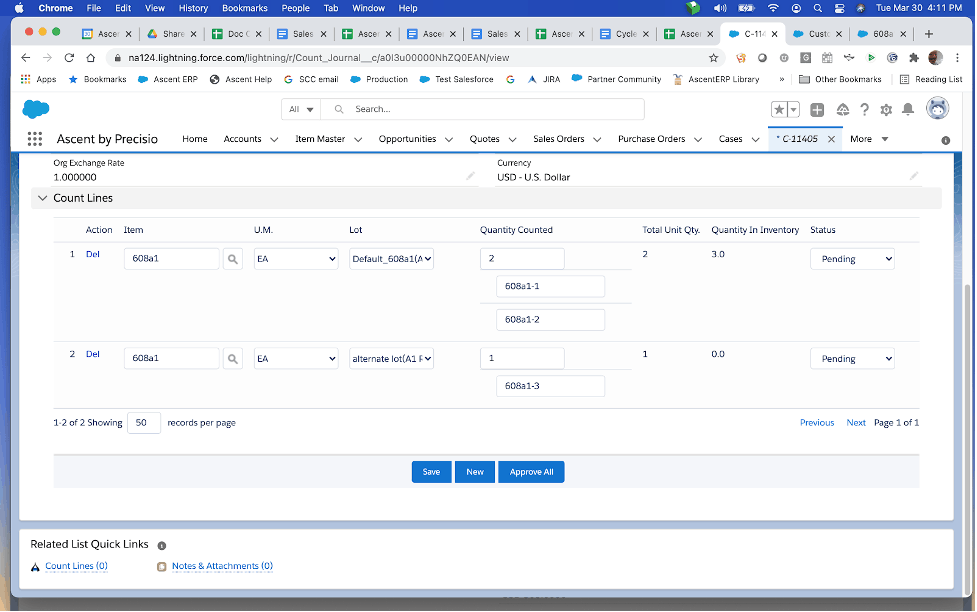
Count Journal Lines with Serialized Items moving from one location to another:
We’ll take the 3 serial numbers entered above and count one of them in a different location.
However, if lot tracking is turned on, you would have to create another lot. If lot tracking is not turned on, then Ascent would make you enter a location, not a lot.
Now, for this example, we created a new lot to illustrate this function:
If we change the status to Approved, we get this:
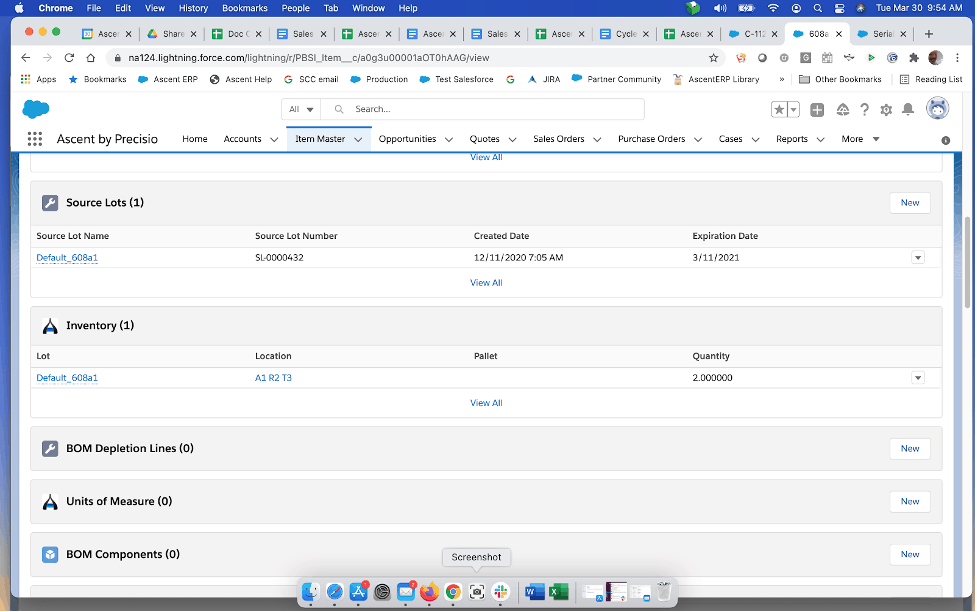
Let’s look at inventory and serial numbers now —> 2 in the original lot and 1 in the other lot.