Production Work Order – Allocations and Building
Overview and Process
Companies often have a requirement to reserve or allocate inventory that is to be used to build a production work. They may want to allocate the entire amount or maybe just a partial amount, based on shop capacity. In either case, by allocating the inventory on a production work order, you take that inventory out of the mix to be used for any other PWO, Work Order, Sales Order, and the like. It can only be used by that particular PWO. By performing the allocation, the material is moved from a source location to a WIP location. If one of the components is serialized, you not only must allocate the quantity of inventory for that item, but also the specific serial numbers to be used in the allocation.
Creating PWO: When a PWO is built, the WIP Location can be entered, which would be where the allocated material is moved to.
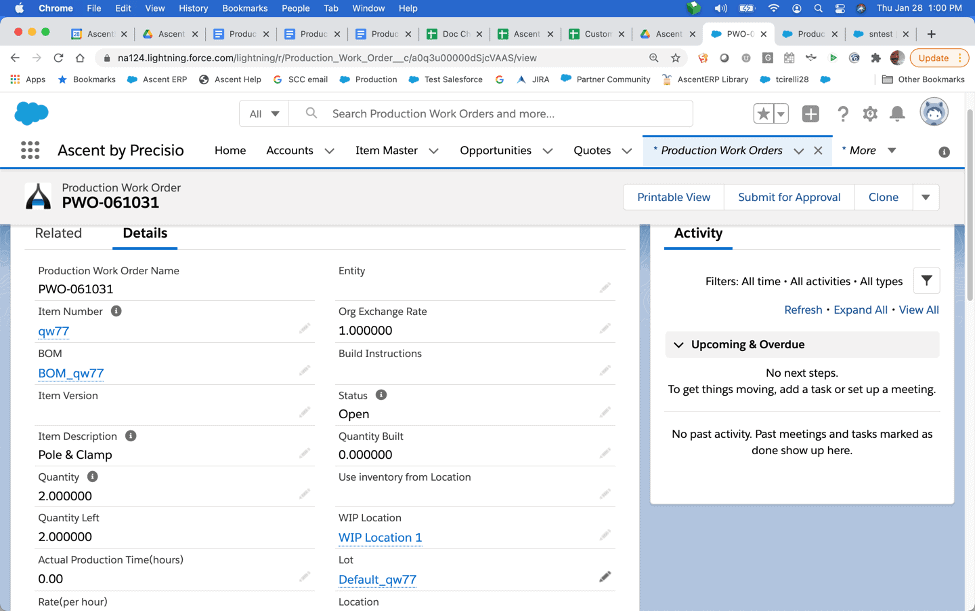
Buttons: Reserve or allocate inventory used to build a production work

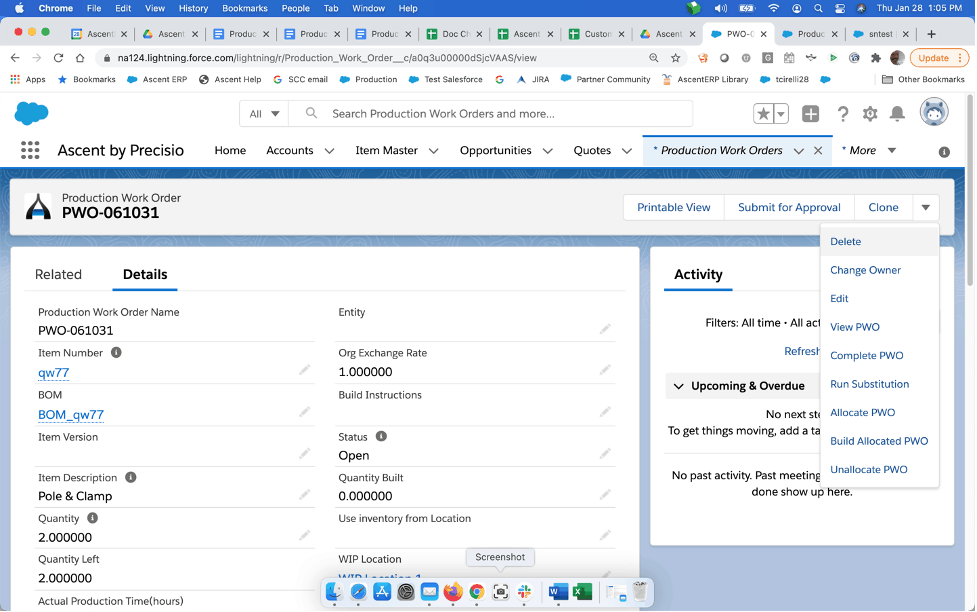
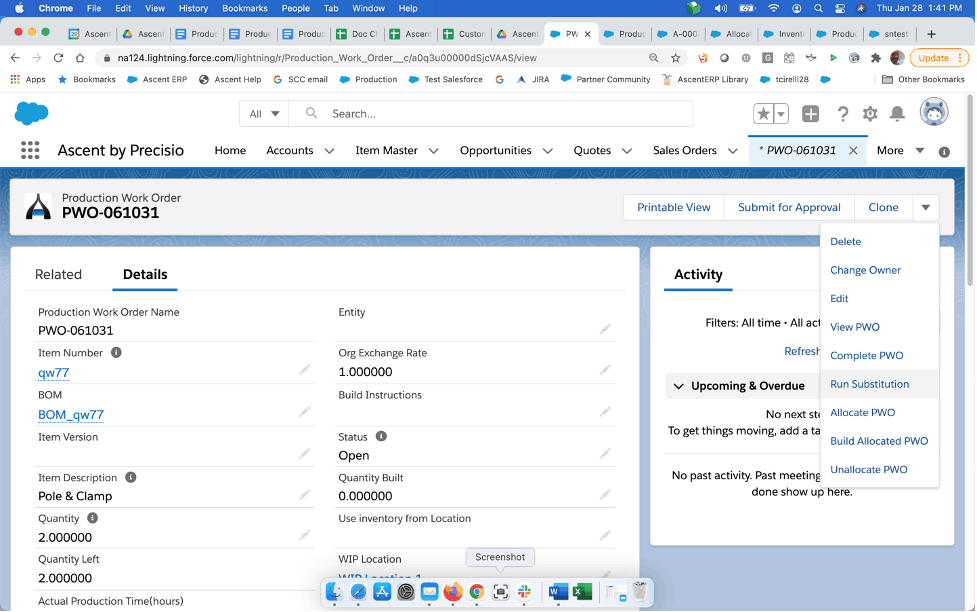
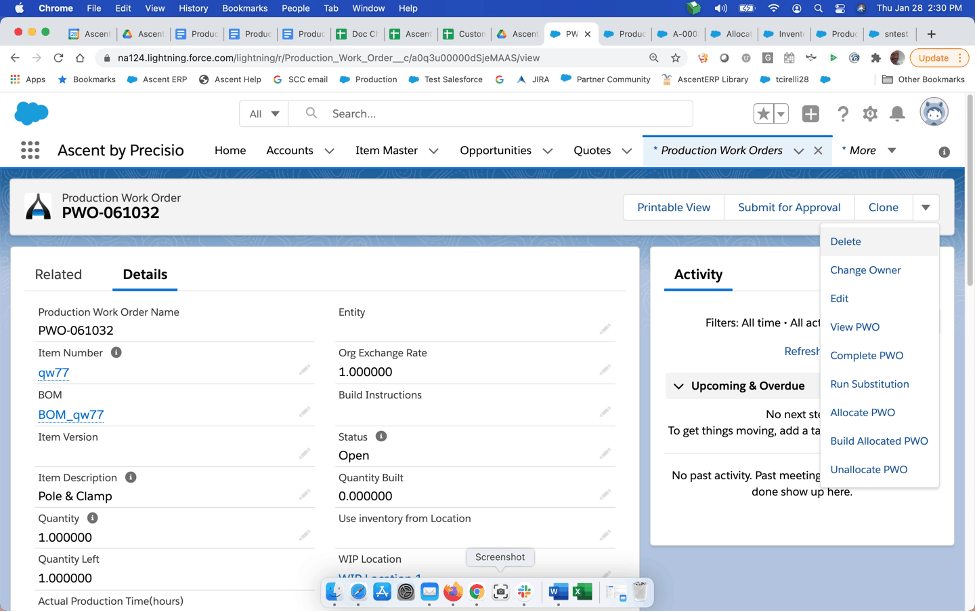
Allocate PWO: next, you would click on the down arrow next to the “Clone” button and select Allocate PWO.
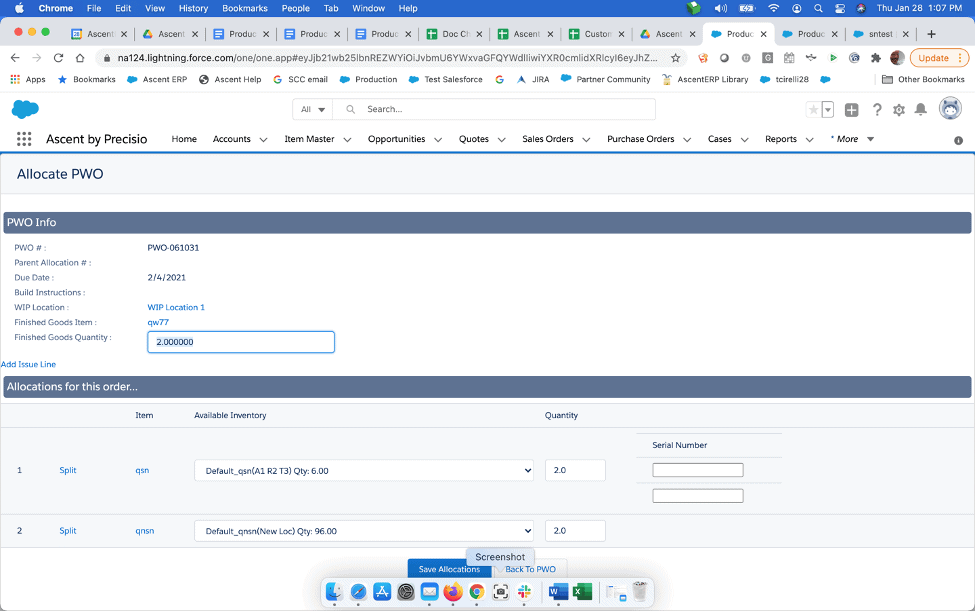
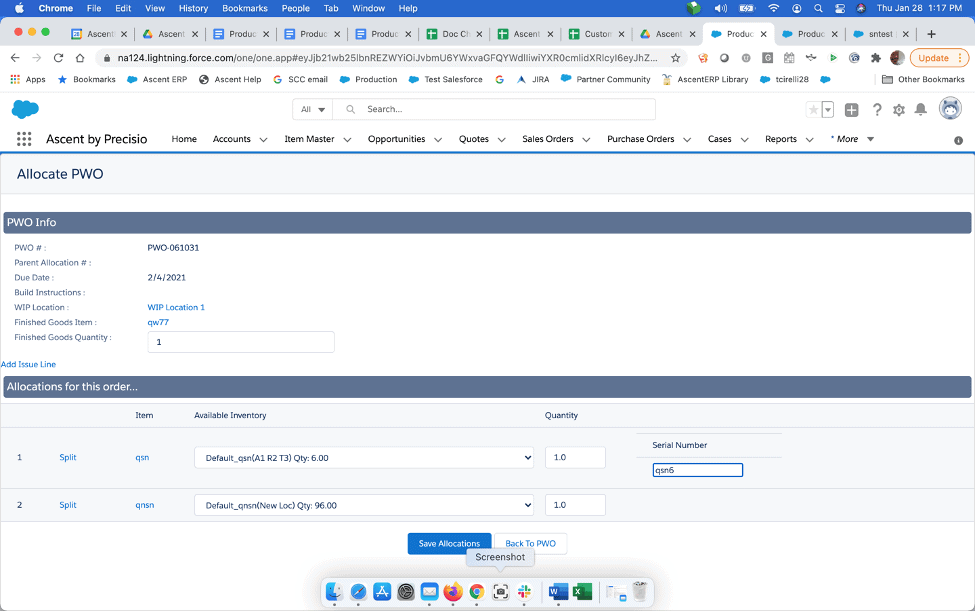
Initially, the screen displays whatever the Quantity Left is:
However, you can change the Finished Goods Quantity to allocate:
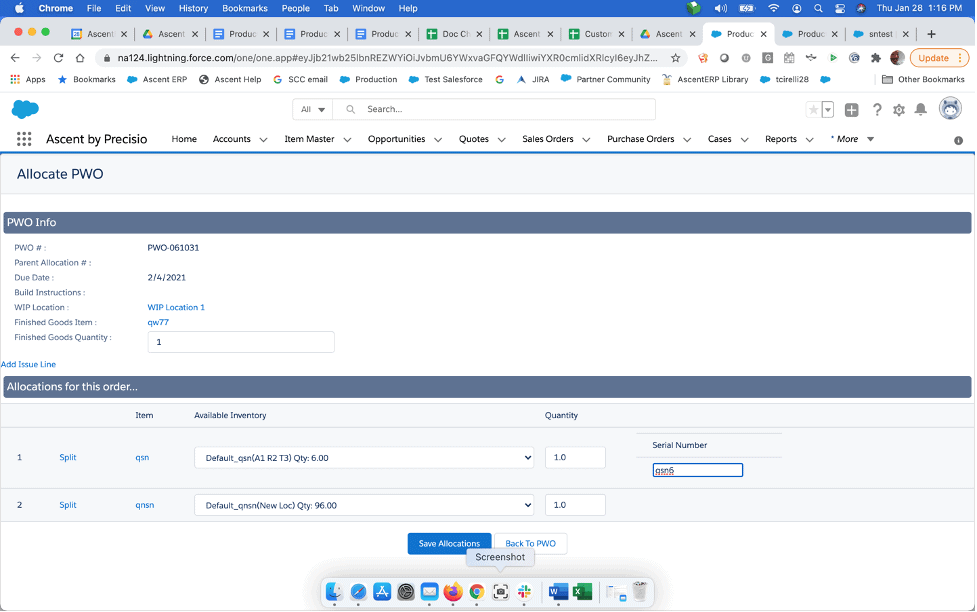
Once you are satisfied with the quantity allocated (note that you must reference a serial number if one of the items to be allocated is serialized) then hit “Save Allocations”.
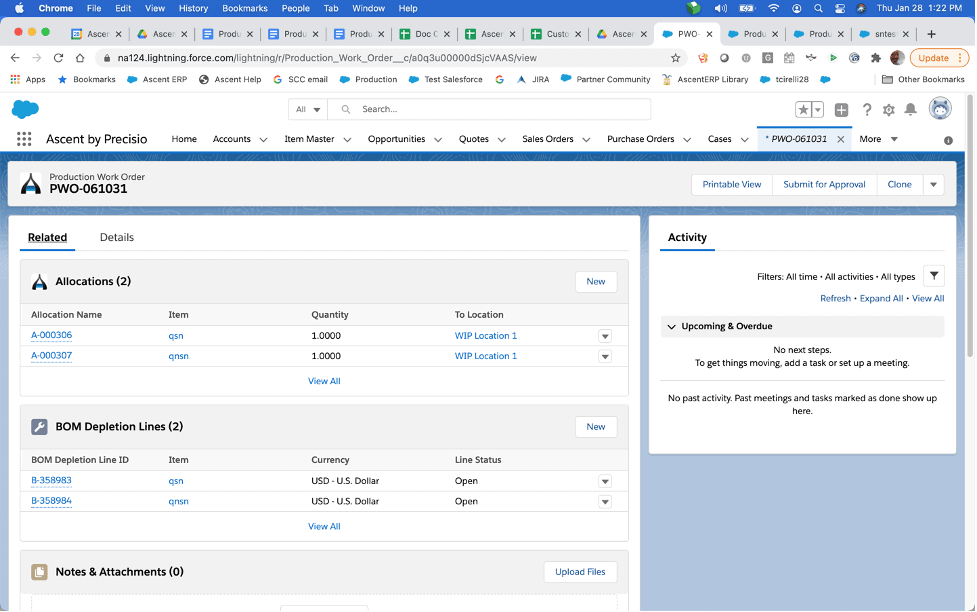
If you click “Related List” once you return to the PWO header screen, you can see the allocations applied to this PWO:
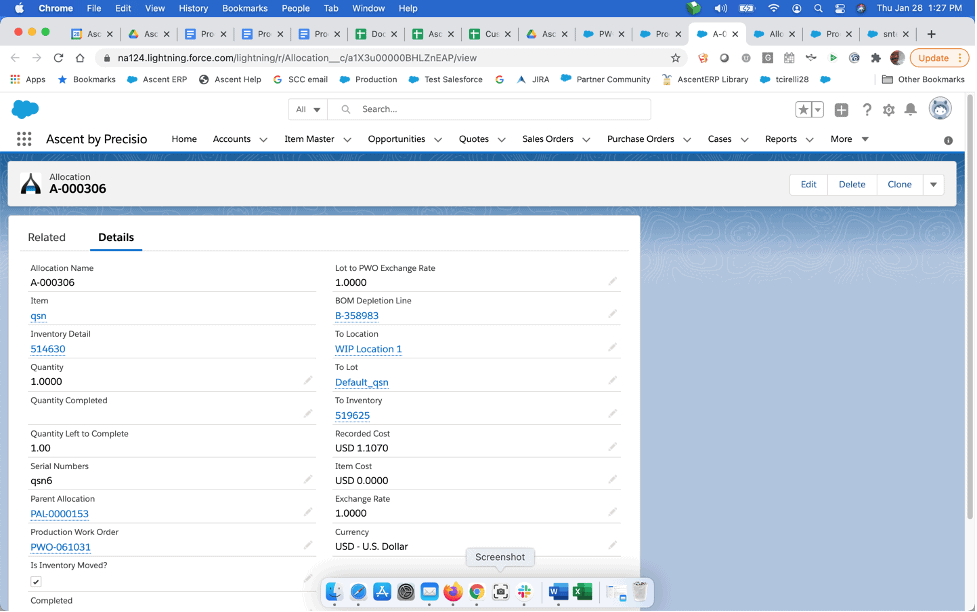
If you click on one of the allocation records, you can see more details, like the serial numbers being allocated:
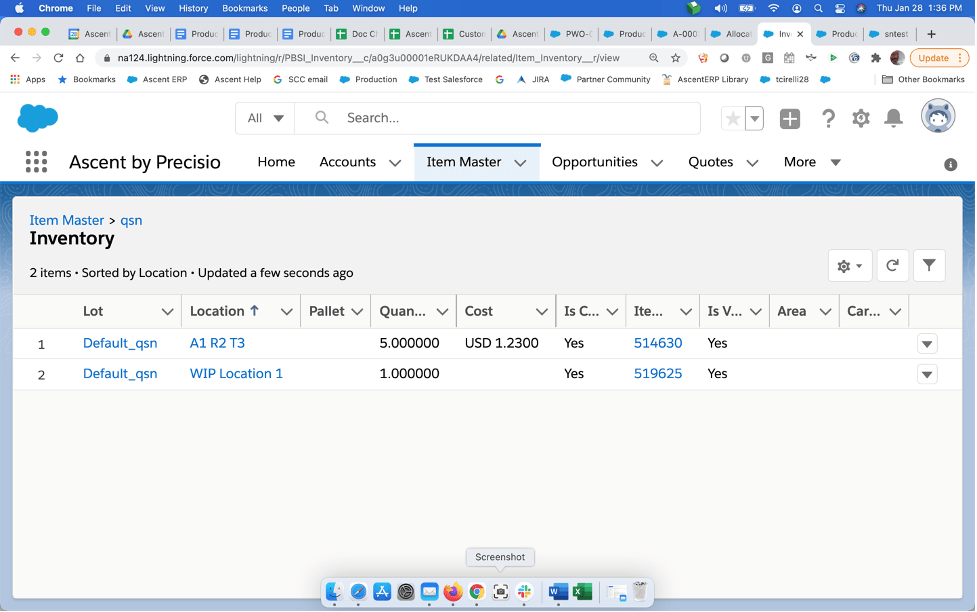
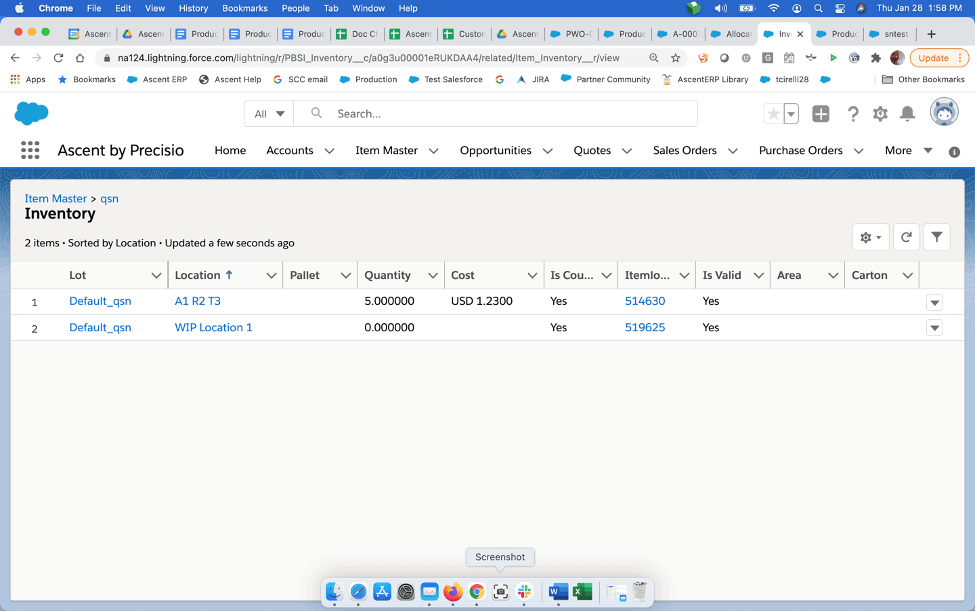
If you were to look at item qsn, and review the “Inventory” related list, you will see the allocation:
Build Allocated PWO – This function will allow the user to consume the quantities that have been allocated and complete the quantity which resulted in the allocations. You can click the down arrow next to the “Clone” button and then click “Build Allocated PWO”:
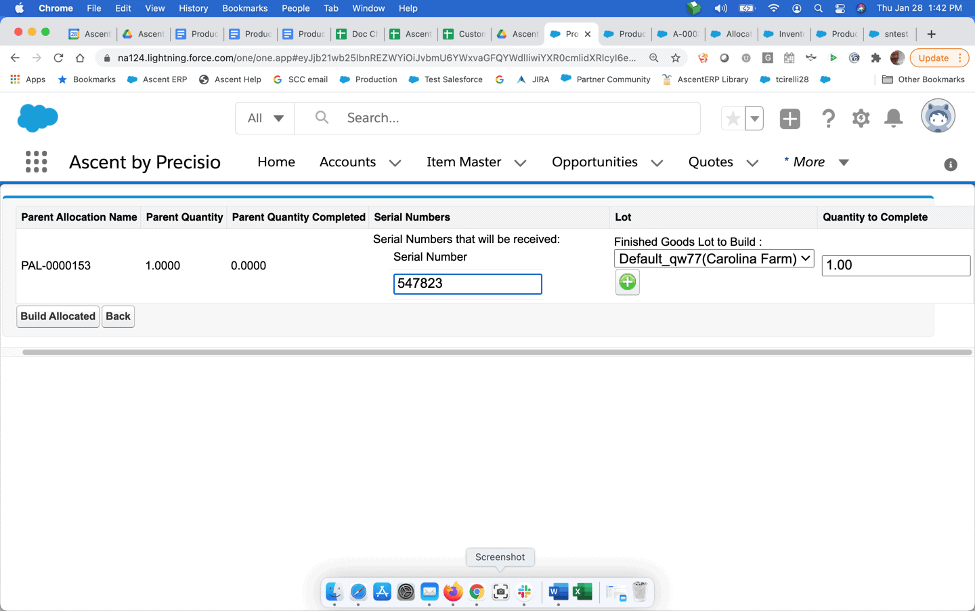
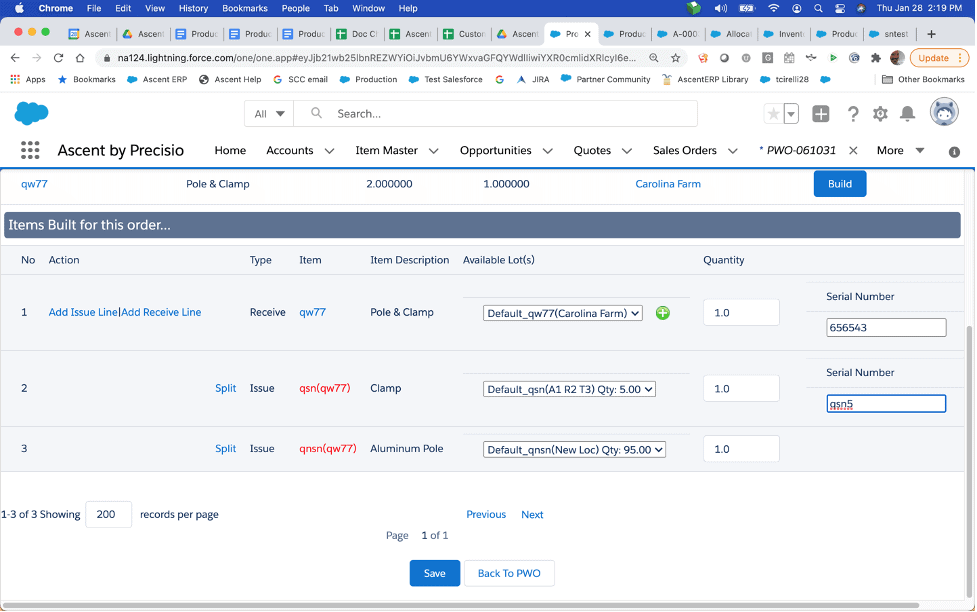
When this screen appears, it will show the current allocations, the Parent Quantity to be completed, and the Parent Quantity Completed. You will be prompted to enter the Serial Number(s) to be completed, the lot to complete the material to (or you can create a new lot on-the-fly by clicking the green circle with the plus sign in it), and the Quantity to Complete.
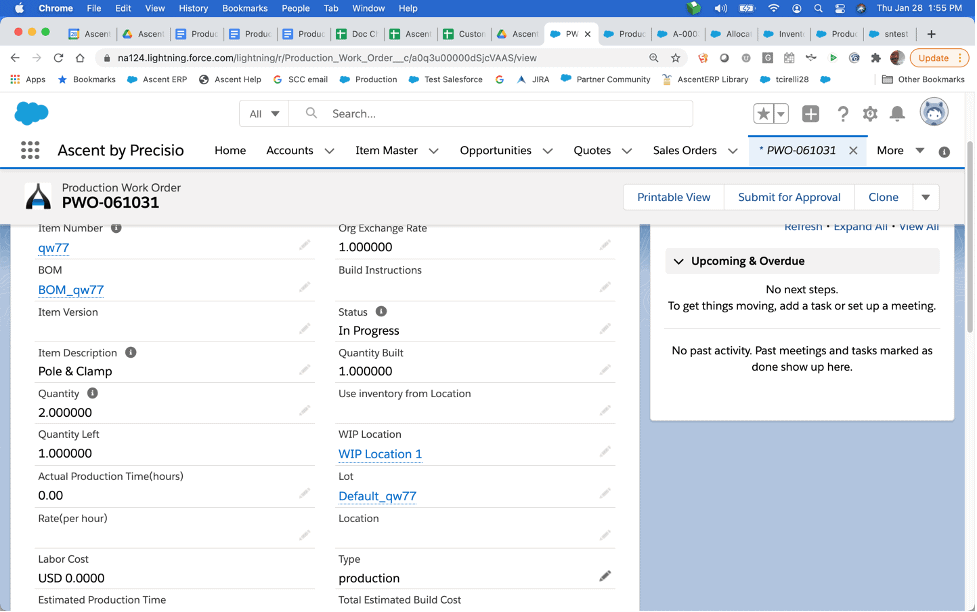
Once entered, then select Build Allocated. You will be taken back to the PWO header screen and will see the Quantity Completed and Quantity Left.
The inventory is no longer allocated, but deducted from inventory:
At this point, with a partially completed PWO, you can allocate the remaining quantity OR perform Complete PWO, and NOT allocate this PWO again, and just complete the remaining quantity.
Unallocate PWO – This function allows you to completely reverse the allocations on a PWO. Note that if any quantities have been completed, this function will be inactive. For a valid PWO, simply click on the down arrow next to the “Clone” button and select Unallocate PWO.
Once you select that function, the process will occur and you will be brought back to the PWO header screen. There will not be a confirming message.
