Sales Order – Staging
Overview and Process
Companies often have a requirement when getting ready to ship an order to move the material from its normal stocking location to another location, possibly one where other material for the same sales order could be moved. Others might move material that has been picked for that day’s orders to a location to prepare them for shipment. This is called staging. Once an order is staged, it can be packed in the normal manner, using Pack SO, and the material would be packed from the staging location.
Custom Setting: There exists a single custom setting that can affect staging. Ignore Exp Date when Staging – if this is enabled, then when staging a sales order, Ascent will not create a new staging lot if a staging lot already exists for this item and location, even though the expiration date is not the same as the potential new lot expiration date.
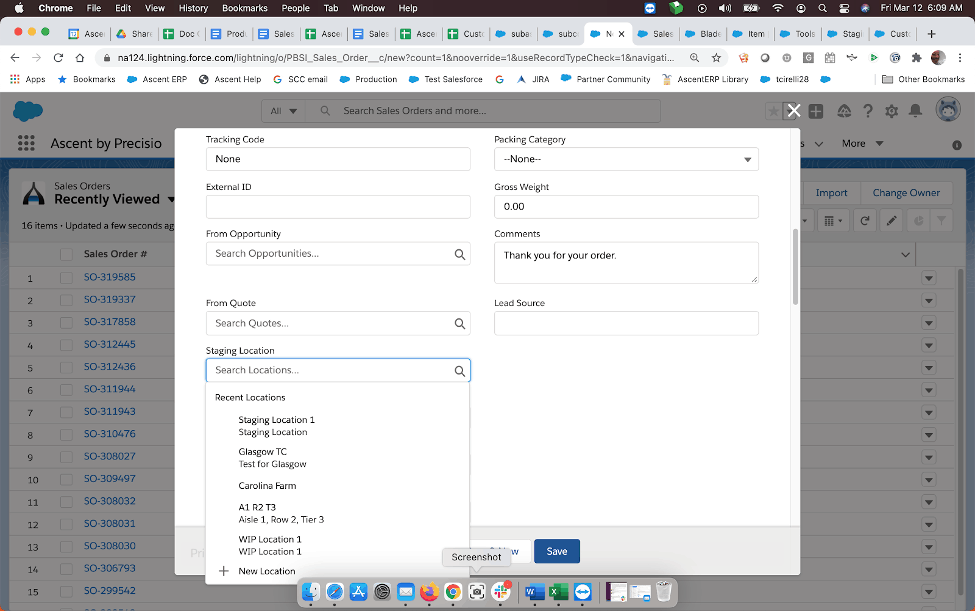
Creating Sales Order for Staging: When building a sales order, you can assign to which staging location the material will be staged to. The field Staging Location would be selected. Now, this is optional, in that a staging location can be selected when the staging process occurs. By entering it on the sales order header, you wouldn’t have to enter it during the staging process.
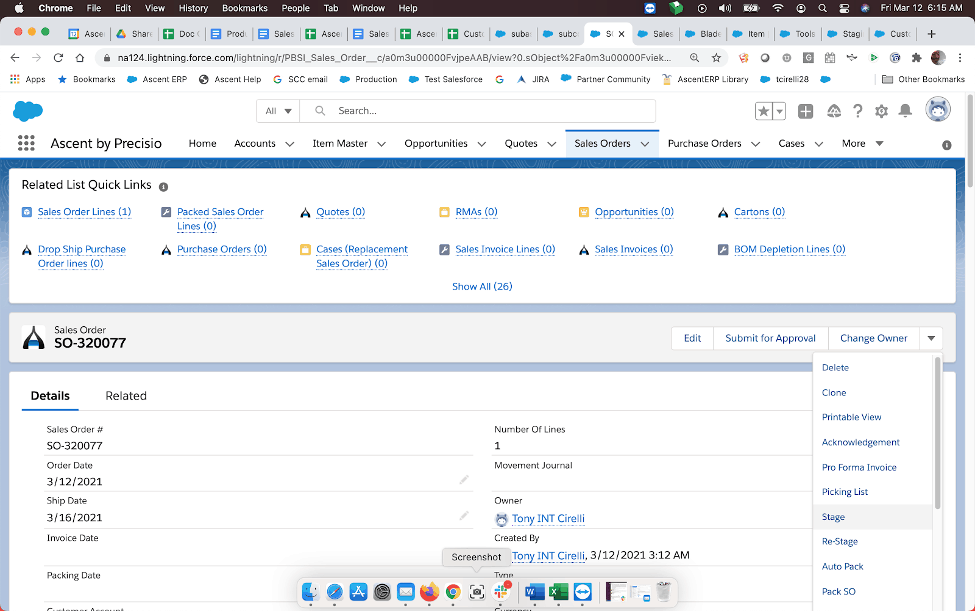
Staging: Next, you would click on the down arrow and select Stage:
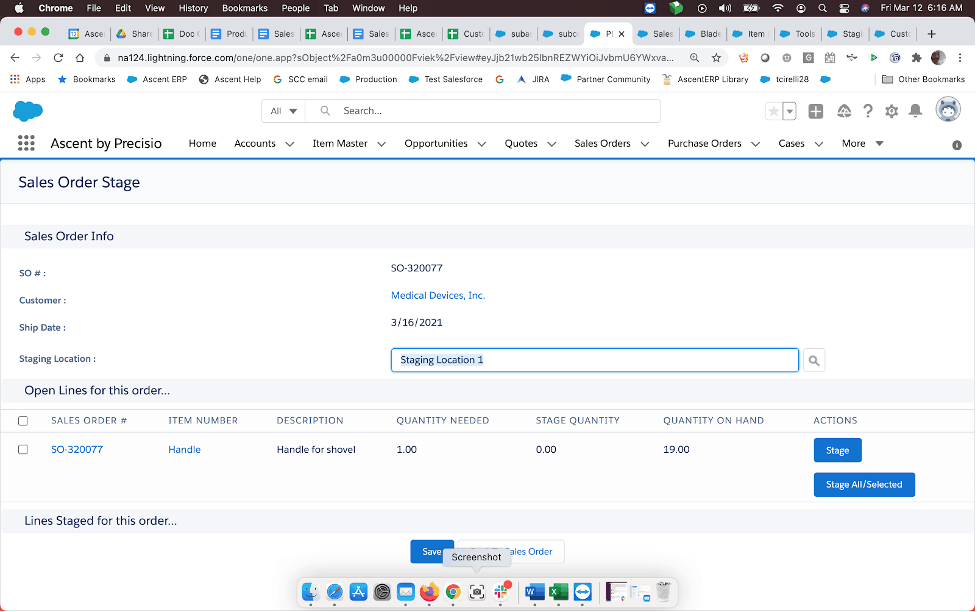
Note that the staging location entered on the SO is brought over to the staging screen. You can now press Stage under Actions, select the checkbox and press Stage All/Selected or just Stage All/Selected:
You can now select the lot to be staged, the quantity to be staged, enter Notes, and select a Reason Code from a picklist. Additionally, if any items being staged are serialized, you must also enter the serial numbers being staged. Boxes would appear to the right of the Notes field.
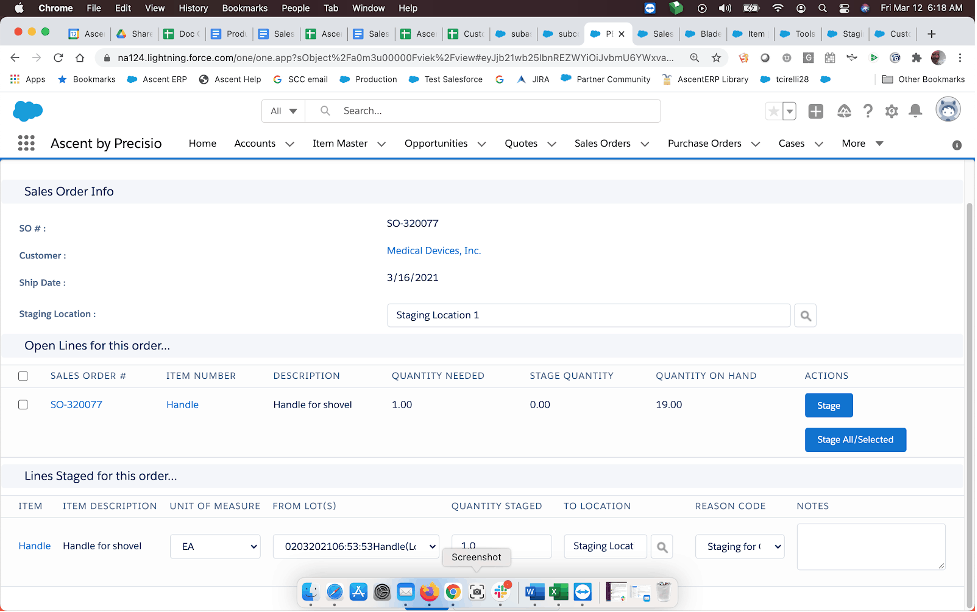
Once you are satisfied with the information entered, then hit “Save”. System will confirm the staging process was successful.
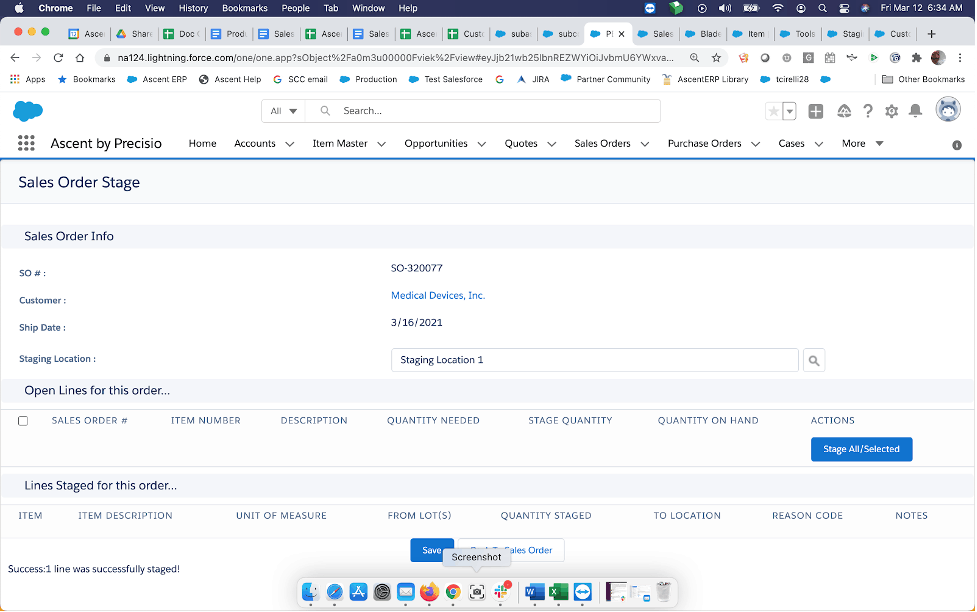
The Status and Stage of the sales order will also be changed to “Staged” and “Staged”.
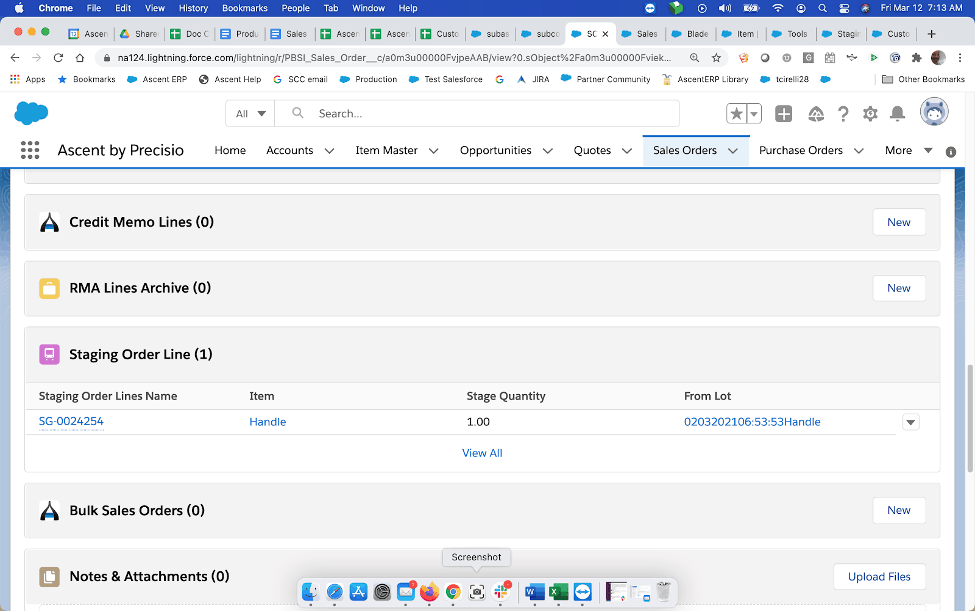
Ascent will create a new staging order line record:
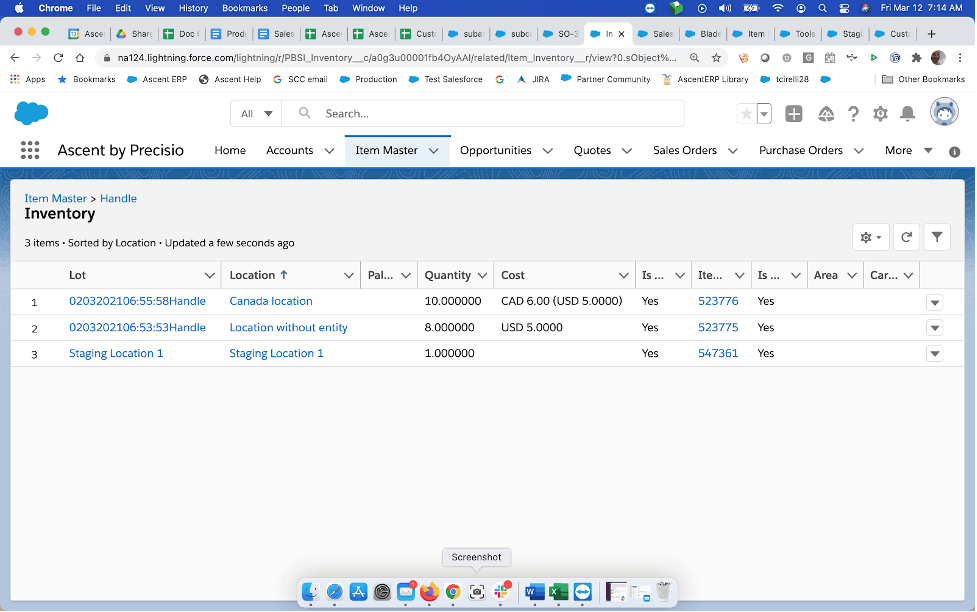
Inventory would also be updated with the movement:
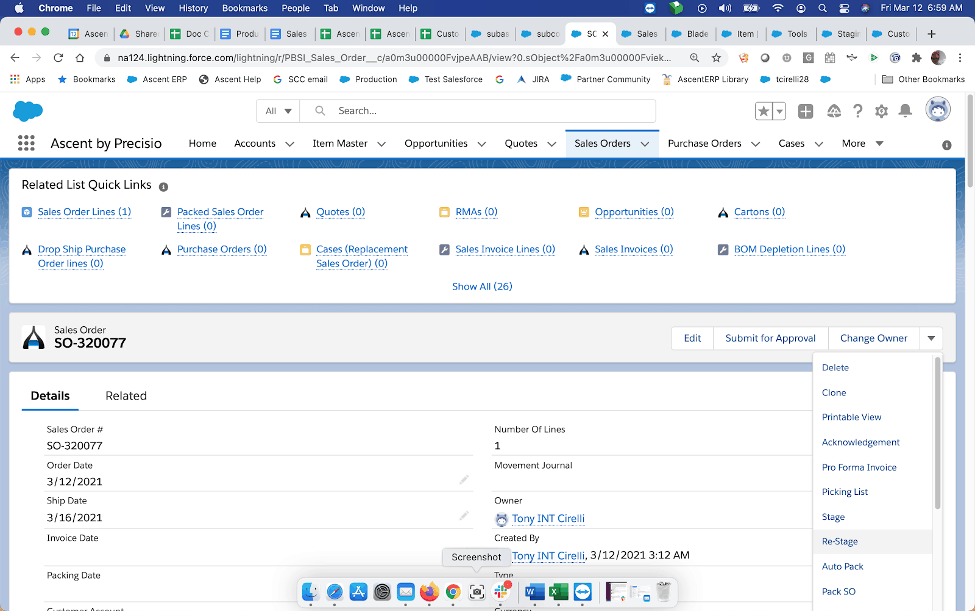
Re-staging: Some companies not only require material to be staged after picking from main stocking locations, but they also need to take that material and move it to another staging location. They may pull all orders for a certain time period and move them to an initial staging location, but then when an individual order is ready to be prepared for shipment, move that order’s material to a secondary staging location, possibly a packing station.
To record the re-staging, you would click on the down arrow and select Re-Stage:
The Re-Stage screen looks just like the Stage screen. In the example below, the Staging Location 1 initially appeared (coming from the sales order header). The Staging Location (which is actually the location to which these sales order lines are to be re-staged to) has been changed to Staging Location 4, such that material can be moved from one location to another. You would then click Re-Stage:
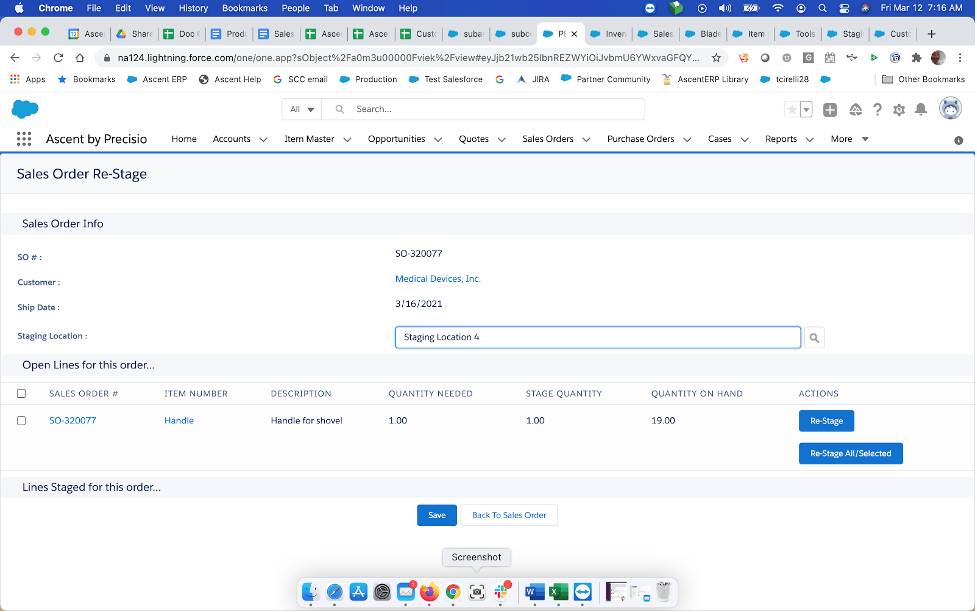
Ascent will then display the line(s) to be re-staged. It will also display items that have not yet been staged, however, you won’t be able to re-stage the un-staged line.
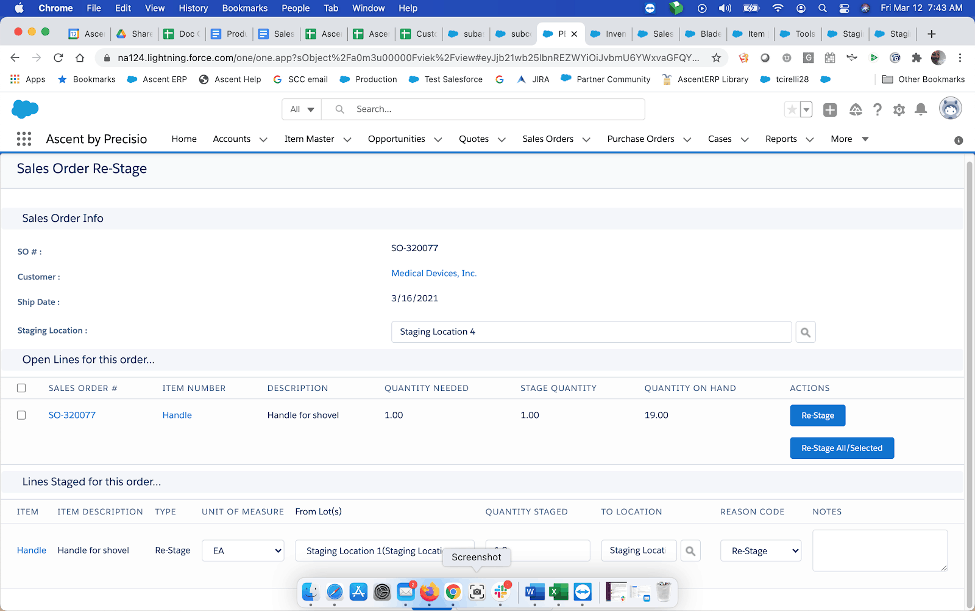
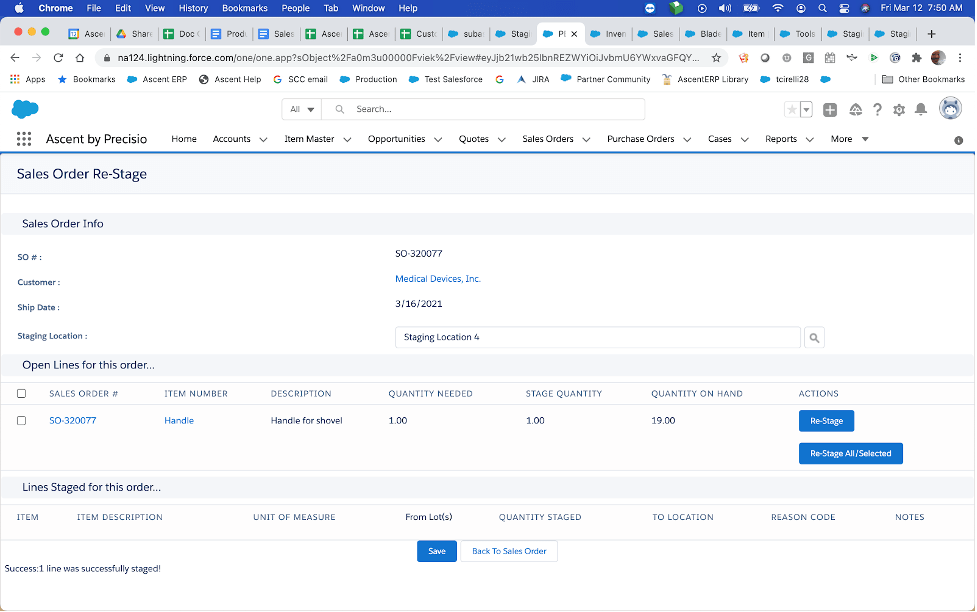
Ascent will now display the successful re-staging note.
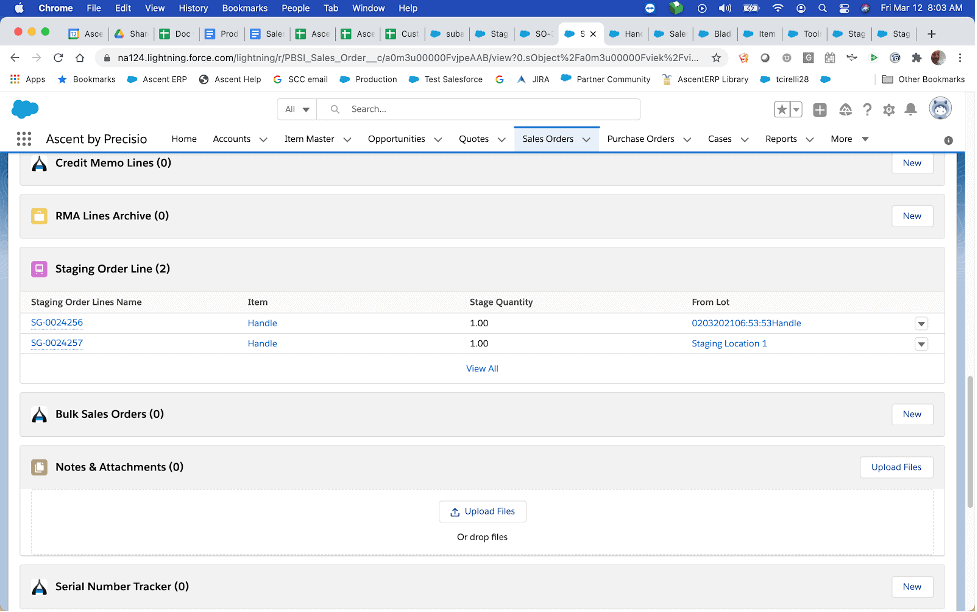
You can now view the stage and re-stage lines on the order under the Related Lists:
If you look at inventory, you will see the movement from one staging location to another:
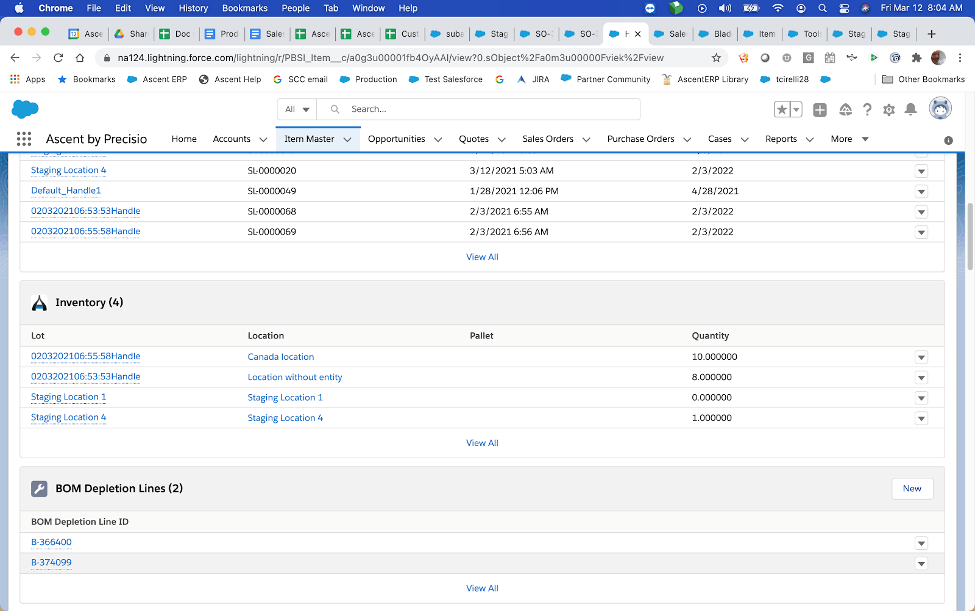
You can then proceed to pack the order as usual, but from the staging location(s). Please review the document Sales Orders – Picking and Packing for instructions on the process.
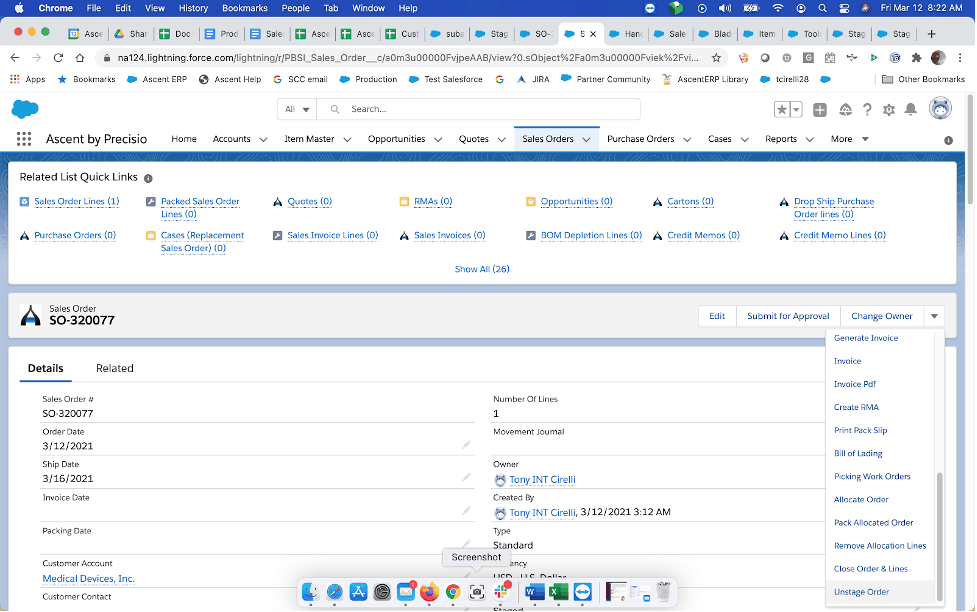
Unstaging a Sales Order: A Sales Order may have been staged prematurely, or the customer may have cancelled the order after it has been staged. To unstage it, you would click on the down arrow and select Unstage Order:
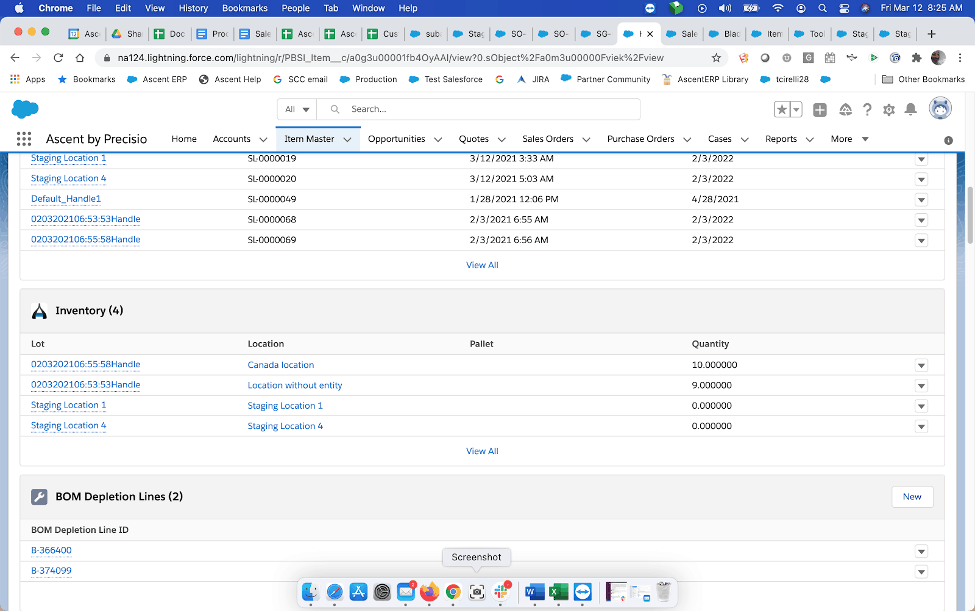
When checking inventory, you will see the material is now moved from Staging Location 4 back to the original stocking location.
Important: when unstaging a sales order, you cannot unstage any packed lines.
