Purchase Order – Contract Manufacturing
Overview and Set-Up
A contract manufacturing order is one where a company cannot manufacture the item, but has the components available to send to the manufacturer for assembly. The item(s) on the PO must have a BOM. As a result of setting up the PO and completing it, the item(s) on the PO will have inventory incremented and the assembly being received/completed will have inventory incremented.
This type of PO can be created two (2) ways:
- Manually create the CMPO (Contract Manufacturing Purchase Order)
- Can be automatically created through the use of Master Planner. In order to do this, the item master must be set up in a certain way, which will be explained later in this note.
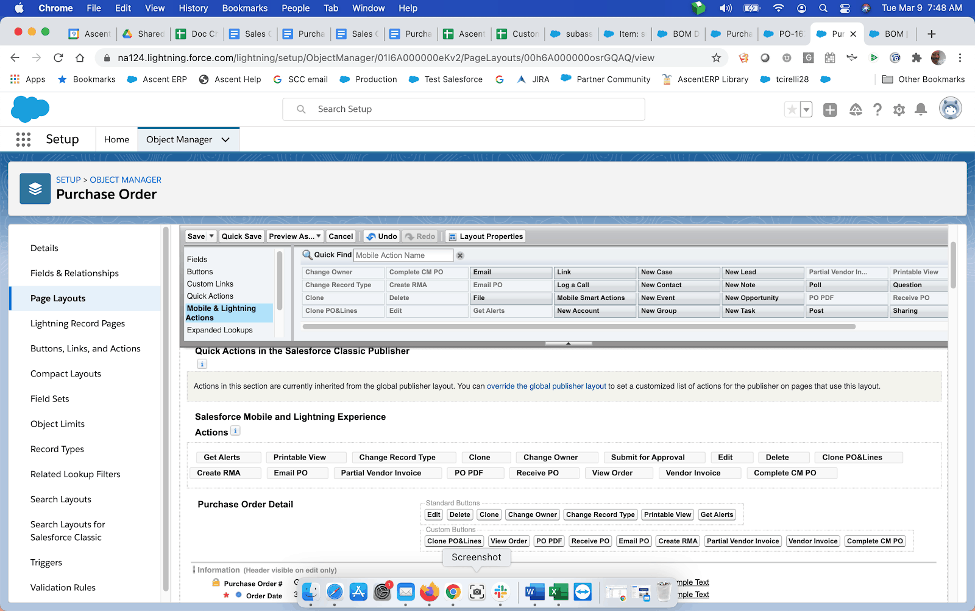
Page Layout Requirement: There is a button which must be added to the Salesforce Mobile and Lightning Experience Actions (and if using Classic, to Purchase Order Details Custom Buttons) for the purchase order object called Complete CMPO. By default, it is not there. In order to add that, please ask your system administrator to add that button or contact Ascent Solutions for assistance.
Item Master Setup:
The item must be set up as Item Type = “BOM”, BOM-Type = “BOM-non Phantom”, and if you wish to have Master Planner create Contract Mfg POs for it, Suggest PO for Master Planner = “Yes”, Default to CM PO? = “Yes”, and must have a Default Vendor assigned.
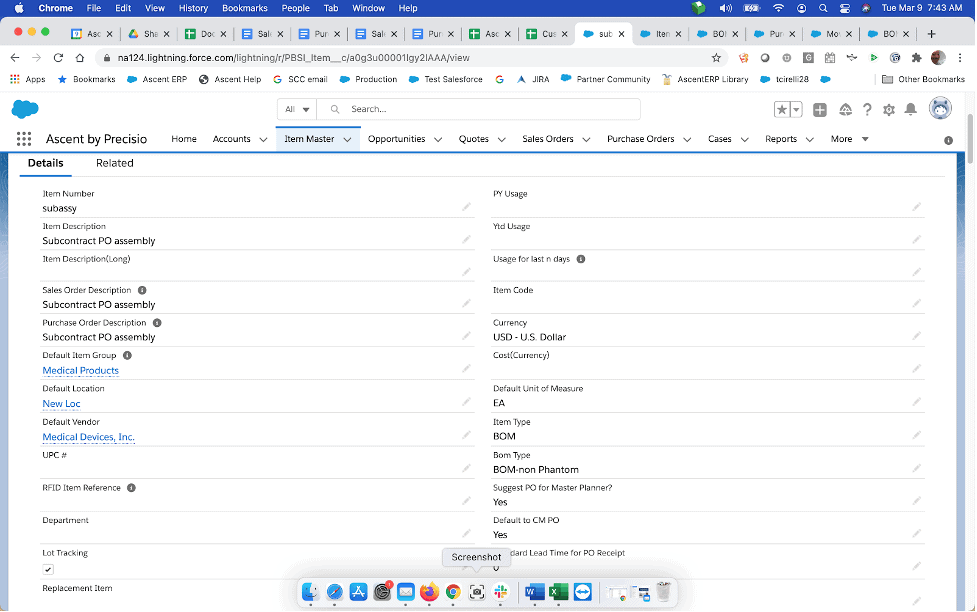
Important: if you do not intend for a BOM-non Phantom item to be always subcontracted out and have a CMPO created via Master Planner, then set Suggest PO for Master Planner = blank and as a result, Default to CM PO? Will be blank.
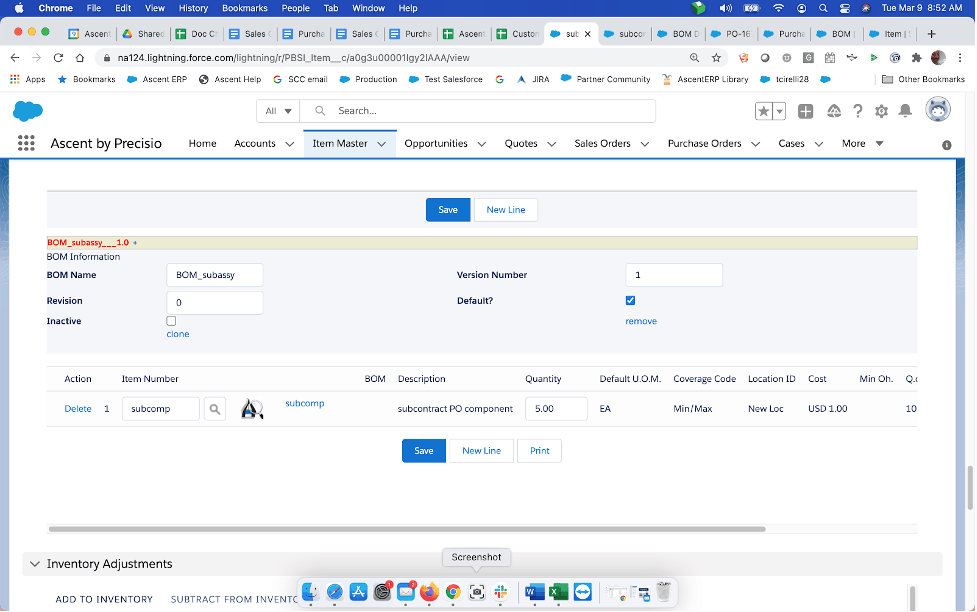
You will additionally need to create a bill of material for this contract PO item. The process to create it is exactly the same as is noted on the Bill of Materials documentation. You only need the item number and the Quantity. Here is a screenshot of a created BOM:
Purchase Order Creation:
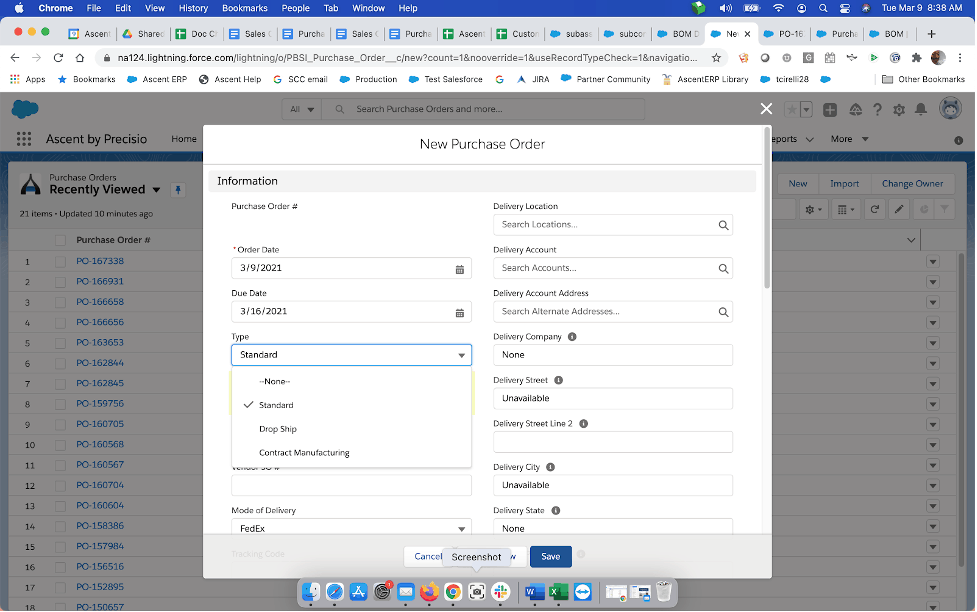
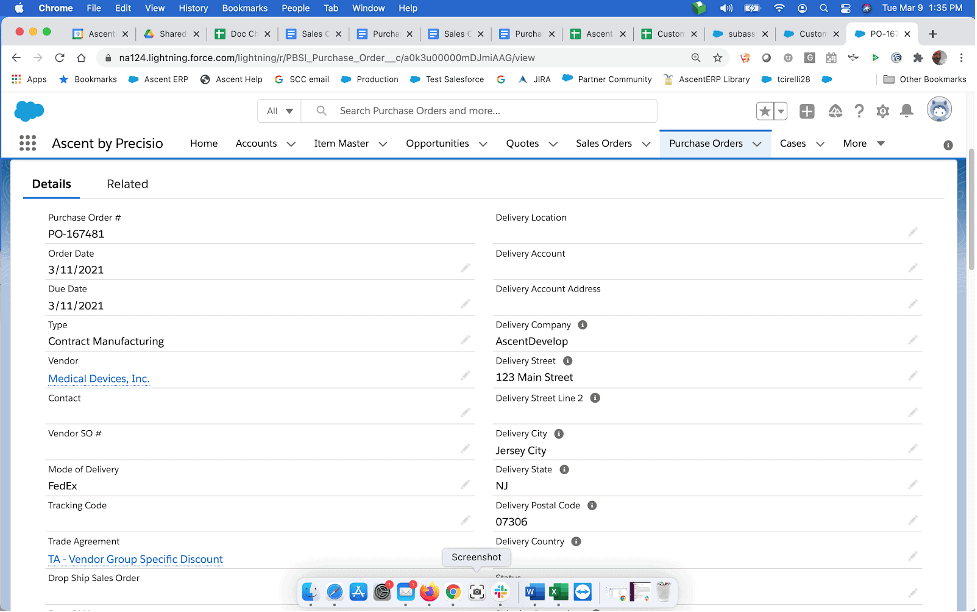
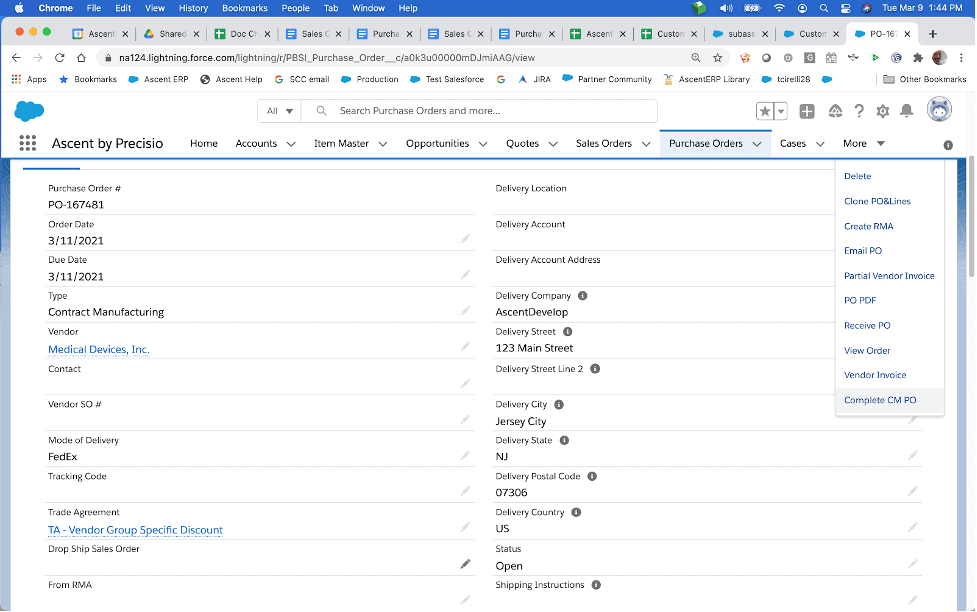
Purchase Order Header: Creating the CMPO header is similar to creating a standard PO header, so for details on that, please refer to Purchase Orders – Creation document. But there is one major difference, and that is the “Type” field. It must be set to “Contract Manufacturing”. In addition, the only other field required is the Vendor.
When you are satisfied with the purchase order header information, you can hit “Save” and the Purchase Order number is assigned.
Purchase Order Lines:
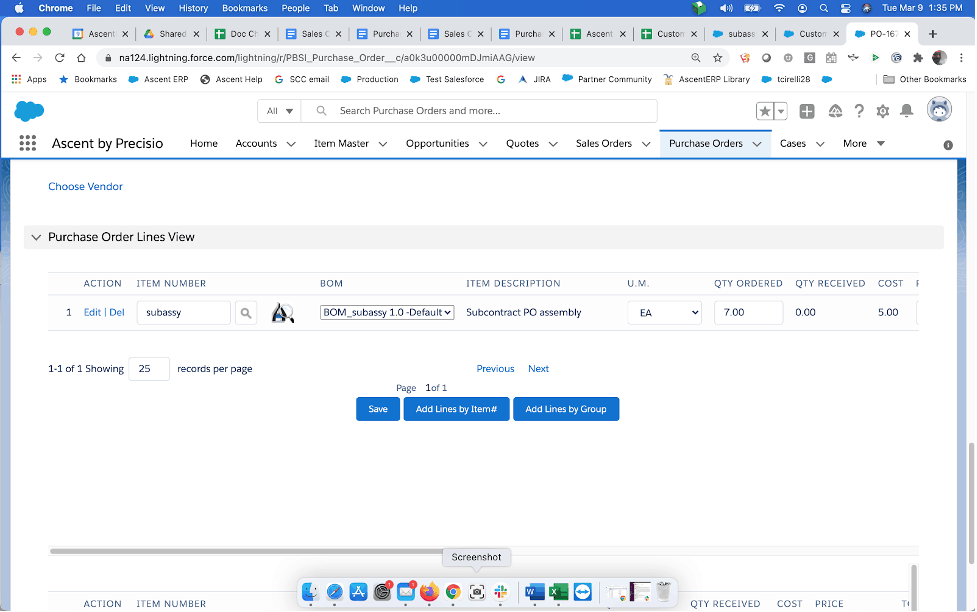
Creating a CMPO line is exactly the same as creating a standard PO line. You need to have an item and a quantity.
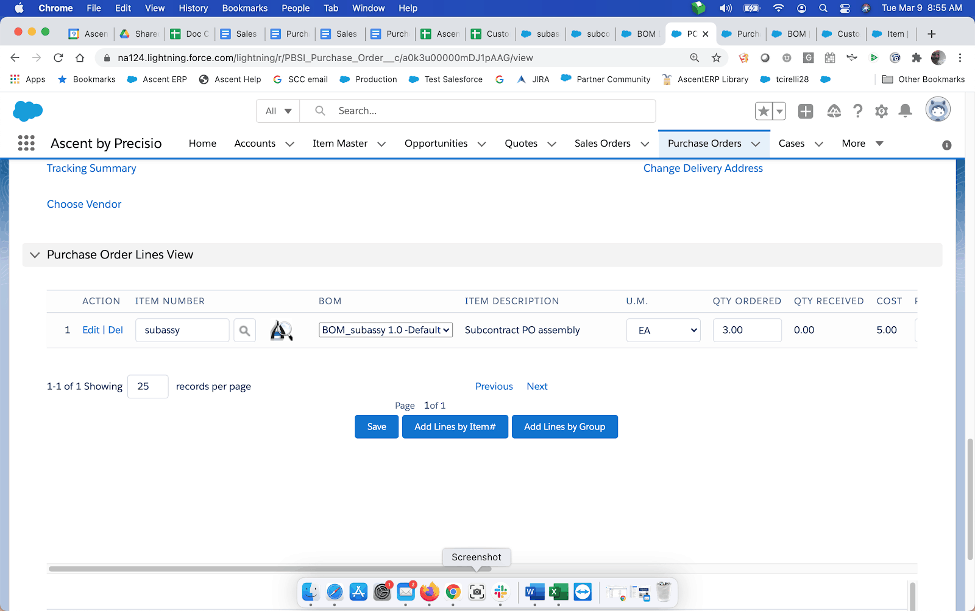
Note: you may have multiple lines on a CMPO. You are not limited to one, as in our example.
Creating a Contract Manufacturing PO using Master Planner:
Master Planner is a demand planning tool. Once executed, the system will look at all of the requirements for the item and suggest a CM PO (assuming the item has Default to CM PO? Set to “Yes”.
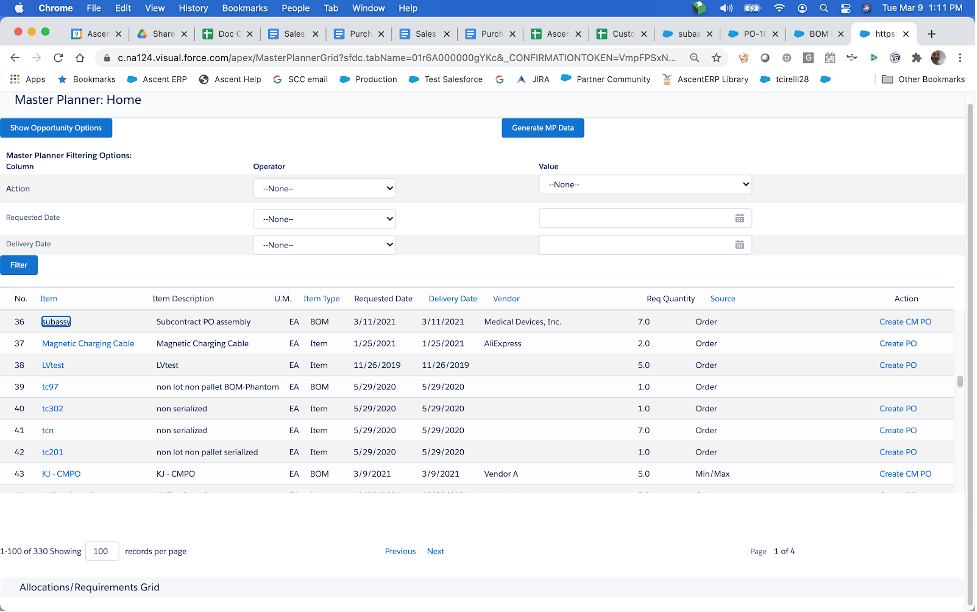
In order for Ascent to create the CM PO, you must click on Create CM PO under the Action heading, and this screen will appear:
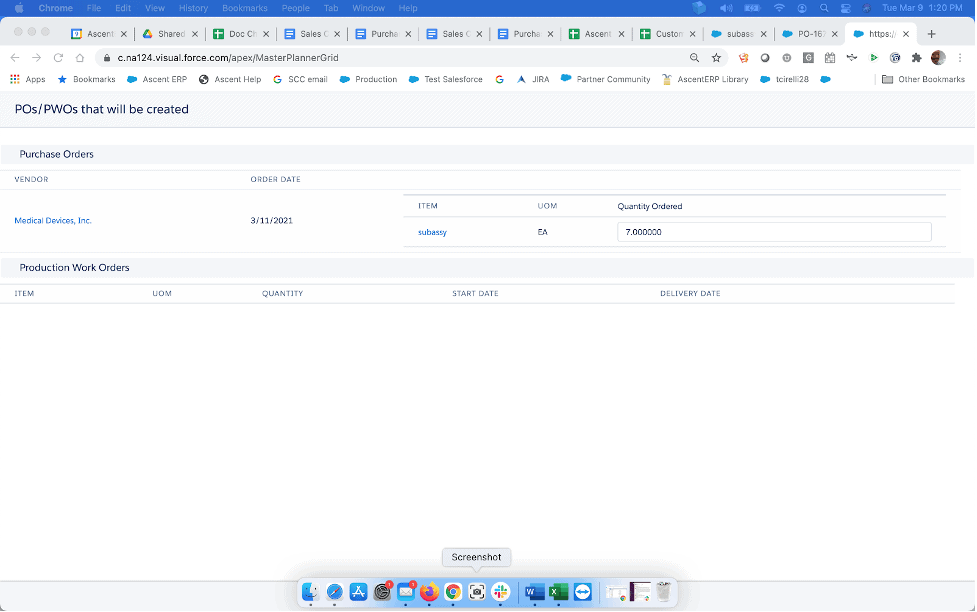
Because the Custom “Setting Edit Po/Pwos before creation on MP” is checked (TRUE), Ascent will give you a chance to look at what it intends to create before creating it. You can change the Quantity Ordered or accept it as is by clicking on the button “Approve Qty for PWO/PO”. The system will then create a CM PO. If that custom setting wasn’t checked, then the system would create the CM PO once you clicked on Create CM PO on the Master Planner screen.
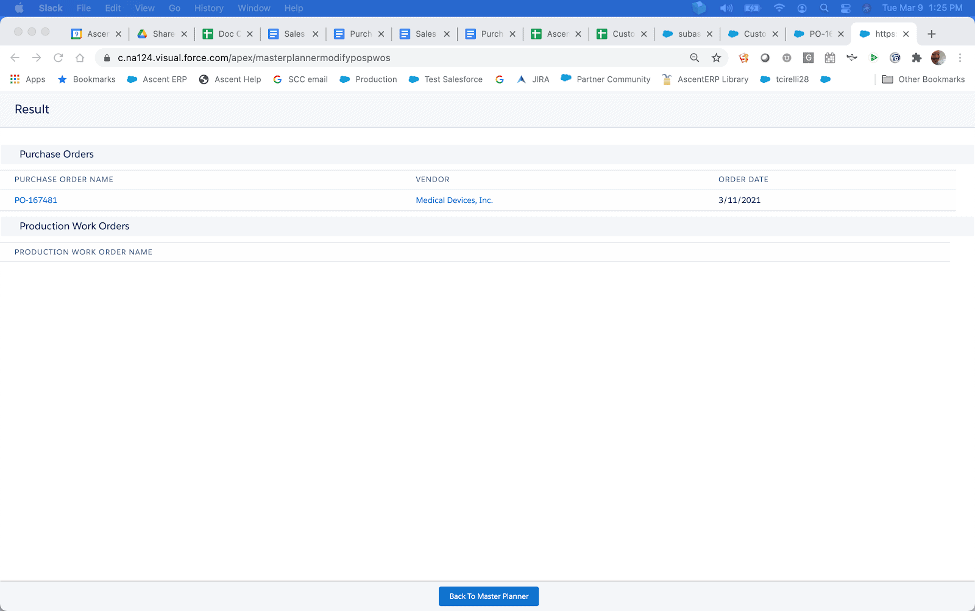
You can view the CMPO that was created:
Completing the PO to record completion of CMPO:
Completing the CMPO must be one all at once. There are no partial completions. Go to the right side of the PO screen and click the down arrow next to the Change Owner button. Then, click Complete CMPO.
You will then be given a choice of how to select CMPO lines to be completed:
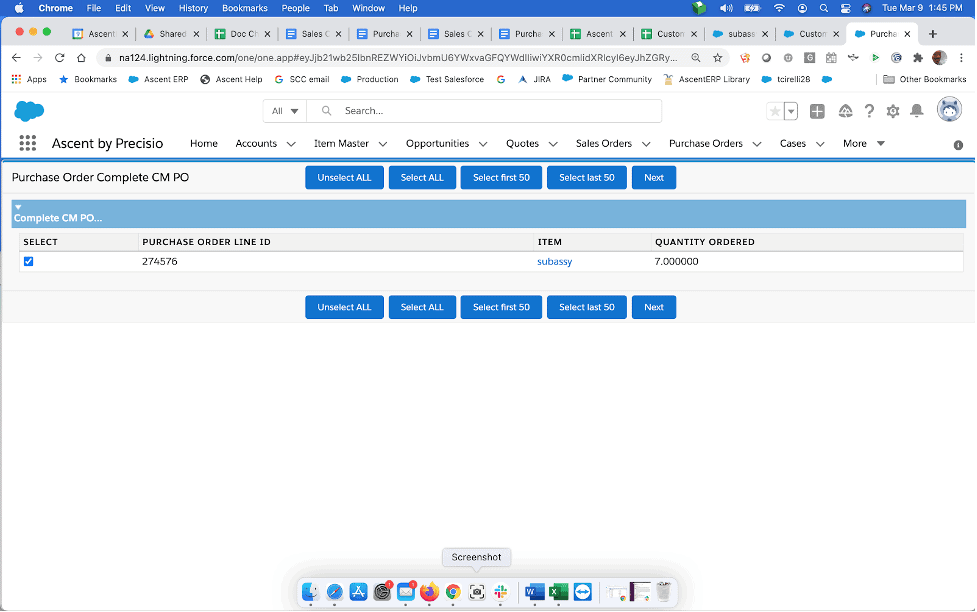
For this example, we’ve checked the Select box. Then, hit Next:
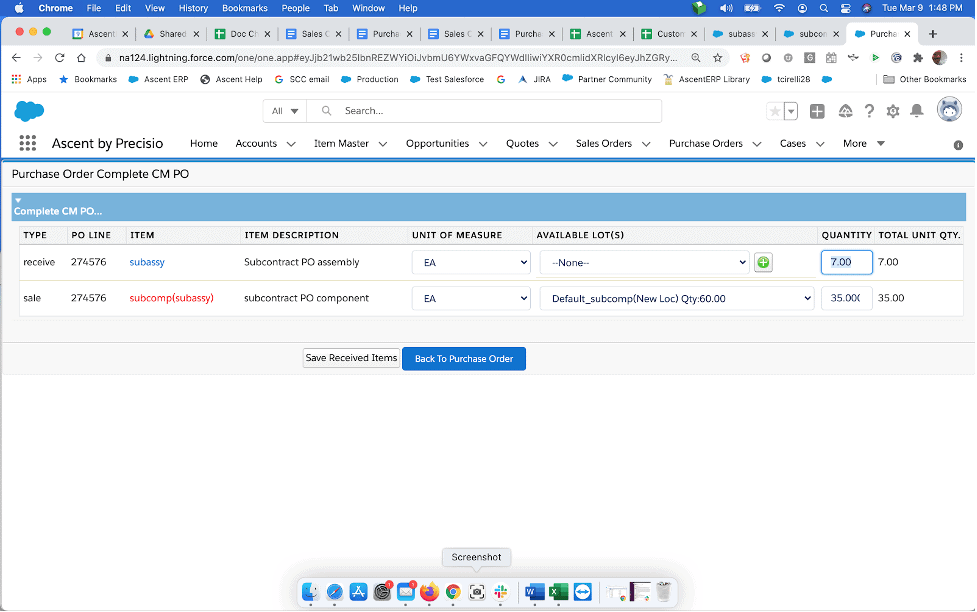
You see that we need to create a new lot. If we hit the green circle with the “+” in it, we can do that.
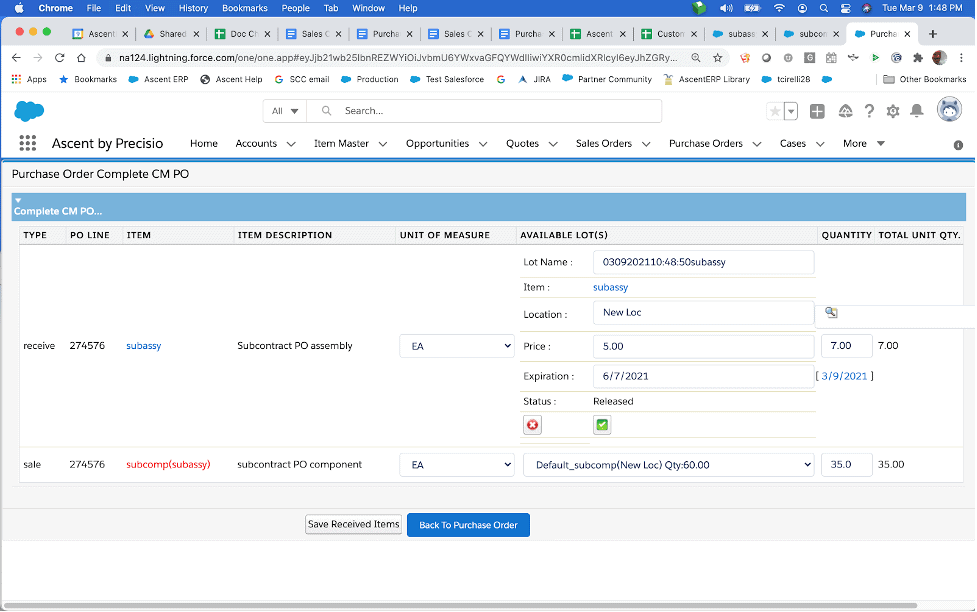
We’ll utilize the derived Ascent lot number, then hit the square green box with the check mark inside:
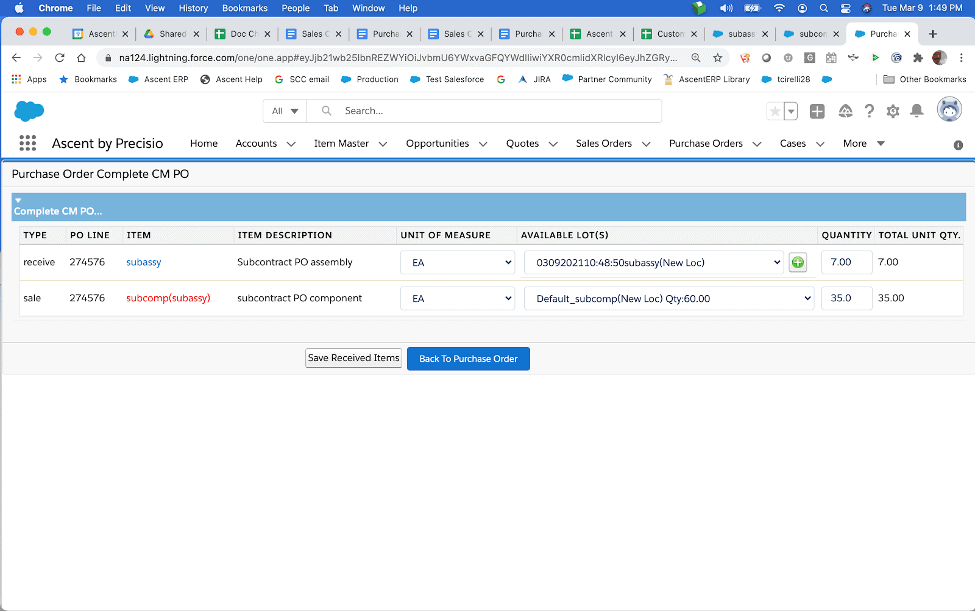
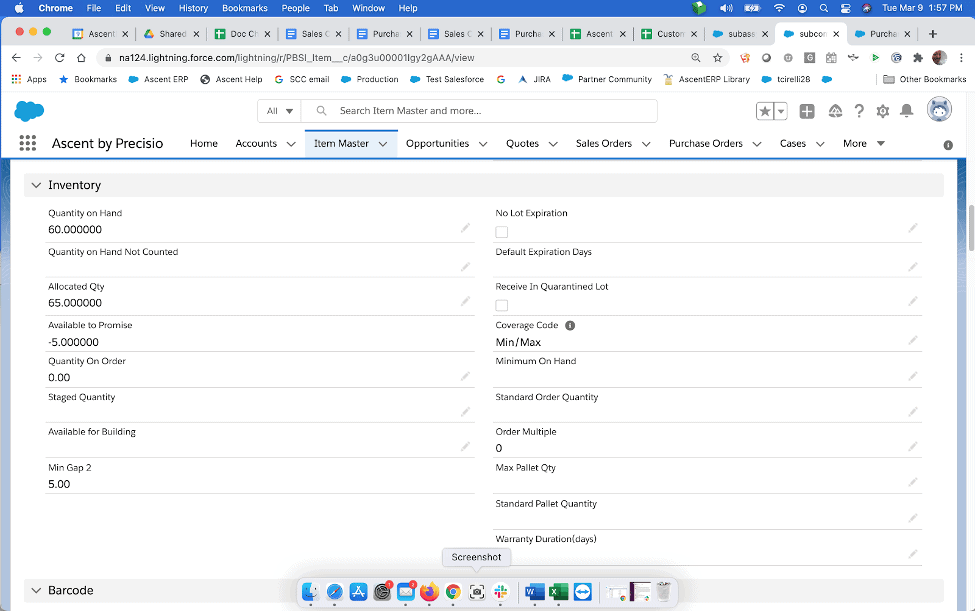
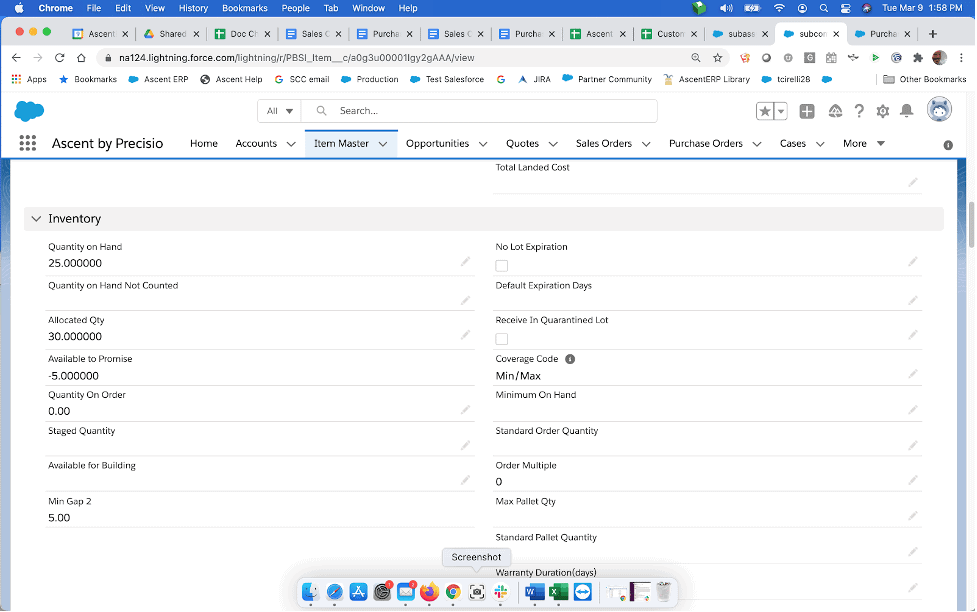
Then, hit Save Received Items to record the completion of this CMPO. The system will then perceive the item which is on the CMPO Line, and will deduct inventory from the component. The CMPO item before and after:
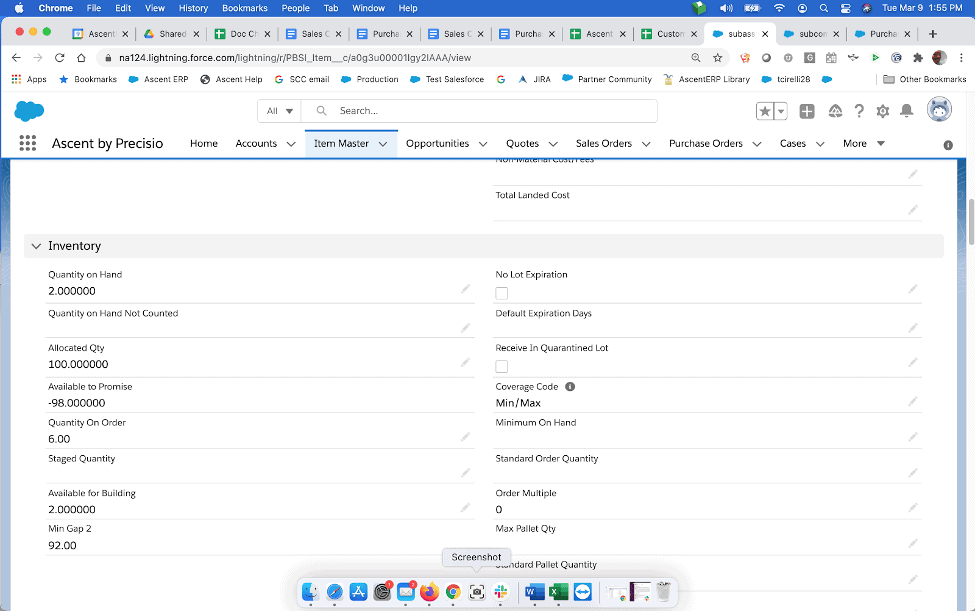
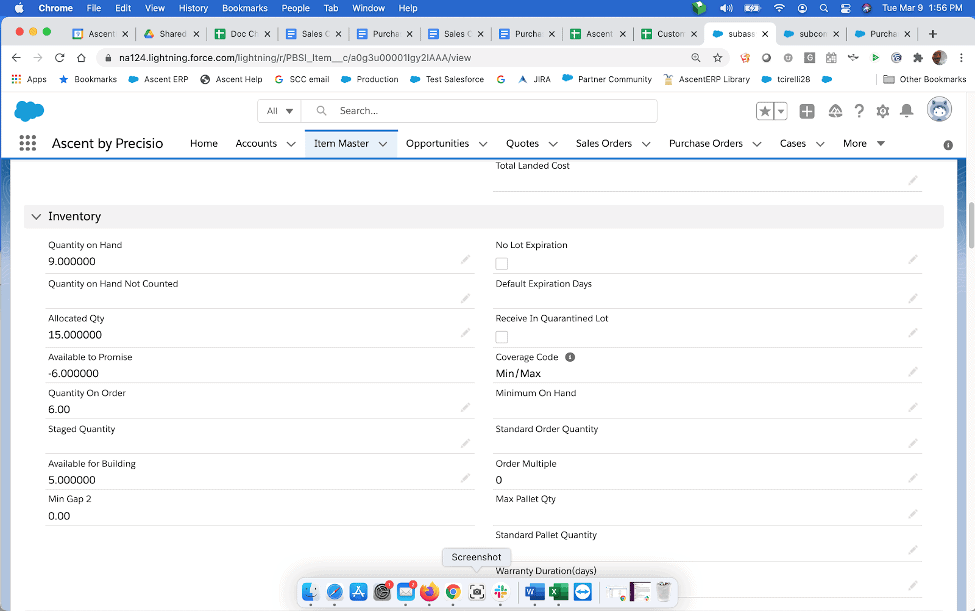
The component before and after: