Purchase Order – Receipts
Overview and Process
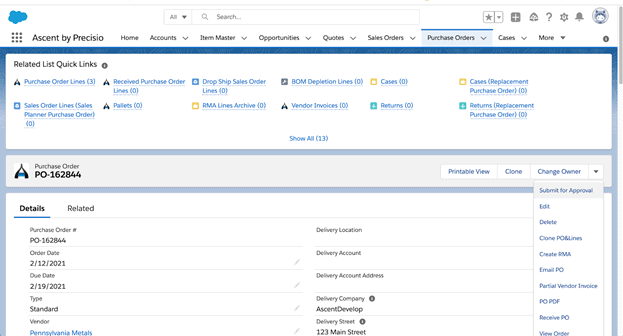
To access the Receive PO function, click on the down arrow next to the Change Owner button:
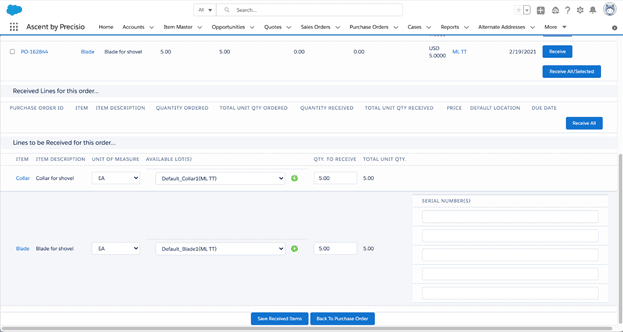
This screen will appear, which displays the purchase order lines to be received.
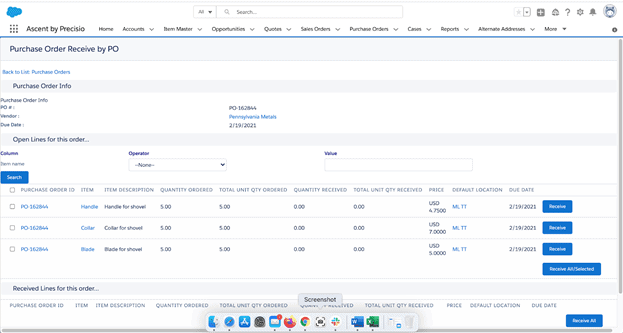
There are many options on how to receive purchase order lines:
- Check the box next to “PURCHASE ORDER ID”,which will select all lines to be received. Then, you would need to select “Receive All/Selected” to receive those lines.
2. Check one or more boxes next to the “PURCHASE ORDER ID”, which will select those lines for receipt. Then, you will need to select “Receive All/Selected” to receive those lines.
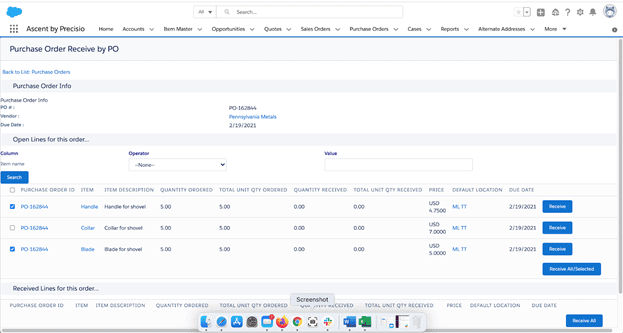
3. Select an individual line to be received by clicking on the button to the right of the line called “Receive”.
4. Do not check any boxes nor select the “Receive” button, but select the “Receive All/Selected”, which will allow you to receive all lines.
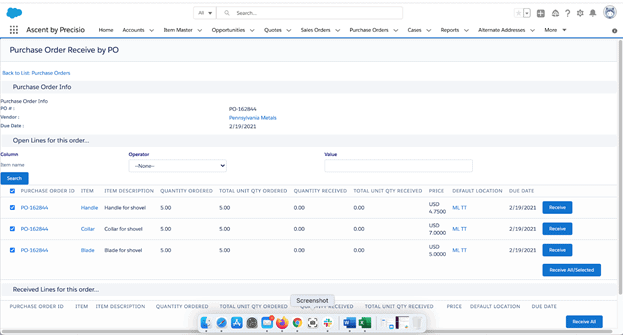
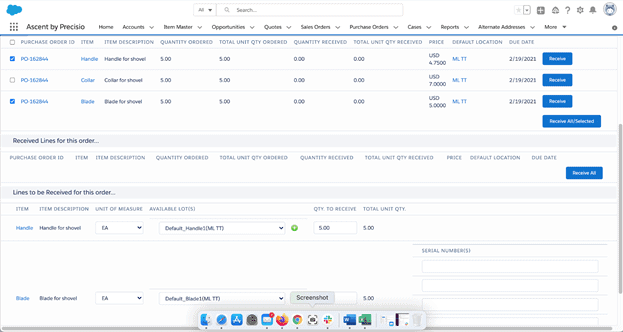
The actual receiving the material into stock is the same, no matter which technique you choose. For our example, we’ll receive 2 of the lines, however, we’ll change the quantity to receive one of the lines, as well as creating a new lot for one of the lines. You can receive existing lots, but for this document, we’ll create a new lot. Here’s what we’ll use:
First, let’s create a new receiving lot for the first line. To do this, click the green circle with the “+” inside it next to the field “AVAILABLE LOT(S)”. When you do that, you see the Expiration Date, which could be derived from the item master field Default Expiration Days added to today’s date, manually keyed it, or defaulted to the receipt date plus 90 days.
The Lot Name will initially be derived as the mmddyyyyhh:mm:ssitemname, which is this month (mm), this (dd), this year (yyyy), the current hour (hh:) the current minute (mm:), the current second (ss), followed by the item name. Of course, this can be overridden and manually keyed in.
Typically, a PO receipt would receive against a vendor’s lot name, to make lot recall easier. The item name is filled in for you from the PO line, the location would typically be the default location from the item master, unless the “Delivery Location” field on the purchase order object is filled in, in which case, that value would populate this field. Qty to Receive is self-explanatory, and is filled in for you, but can be manually changed. Purchase Price comes from the PO line. Lot Status can be “Released”, which is the default, or “Quarantined”.
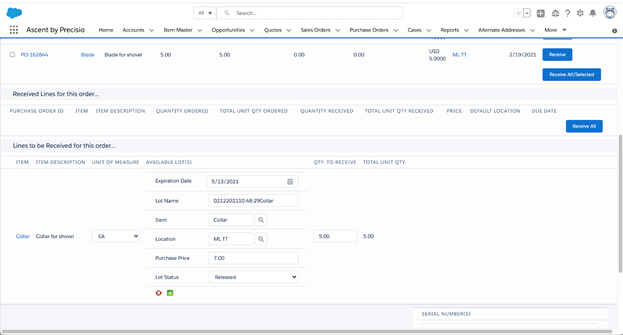
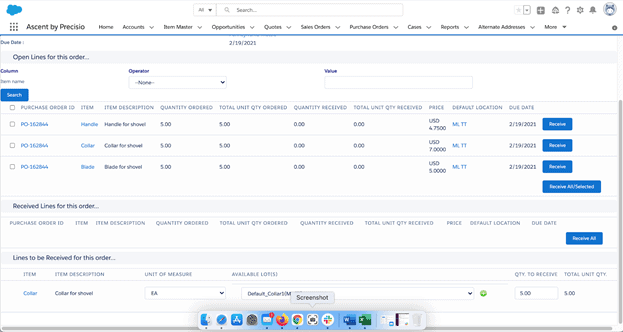
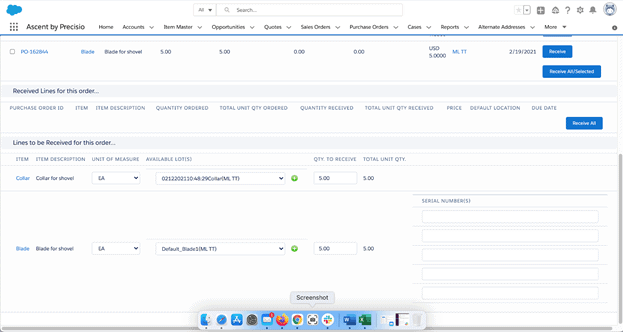
To accept the new lot, you can click the green box with the check mark in it. If you are not happy with the new lot, hit the red circle with the “x” inside it. Clicking the green box gives you this:
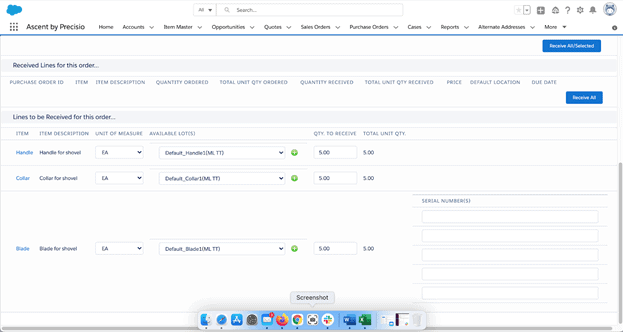
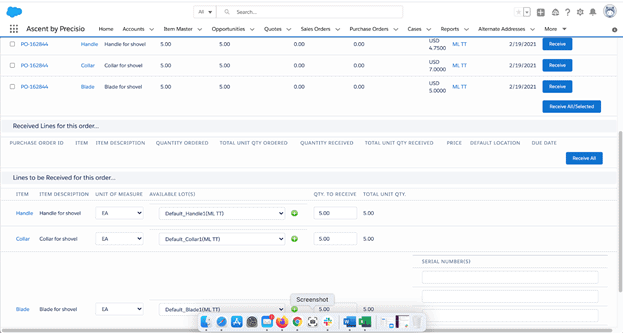
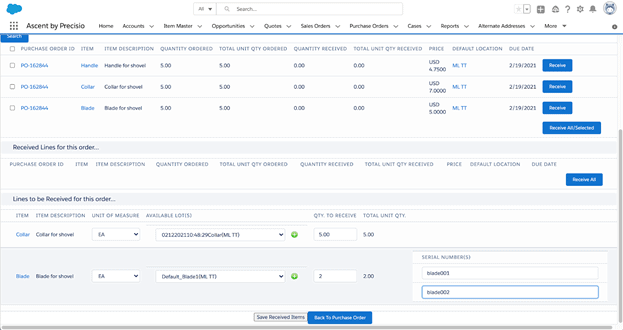
On the first line, we’ll accept the quantity of 5, but on the second line, we’ll change the QTY TO RECEIVE from 5 to 2, leaving a quantity of 3 open. Notice that five SERIAL NUMBER(S) boxes appeared, since that line is serialized, and there is one box per serial number.
By changing the QTY TO RECEIVE, the number of boxes reduces to 2. Then you can enter the serial numbers received:
Once satisfied with the data entered, select ‘Save Received Items”. Once done, the following screen will appear:
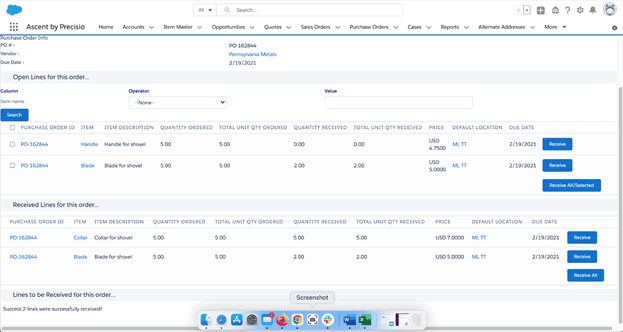
The Received Lines for this order section shows the lines received, what was ordered, and what was received. It also confirms the number of lines just received. Hit “Back to Purchase Order” to go back to the Purchase Order screen. Once there, you can view the related lists for Purchase Order Lines, Received Purchase Order Lines, and the rest. We’ll look at those two.
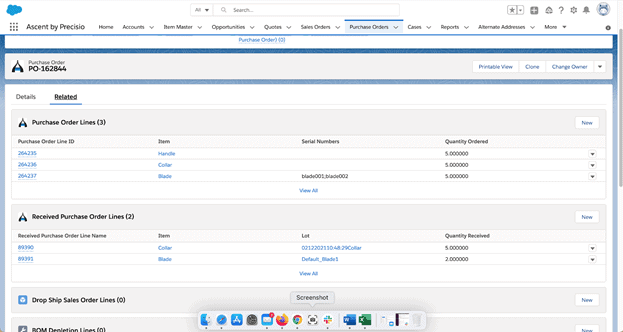
On Purchase Order Lines, you can see, if any, the serial numbers that have been received. Of course, your systems administrator can change what fields appear from the purchase order lines object here.
On Received Purchase Order Lines, you can see the lot that this specific receipt was received at. Additionally, your systems administrator can display whatever fields you wish to see, such as the location where you put the material.