Sales Order – Drop Shipping
Overview and Set-Up
Drop shipments are possible as a result of functionality that resides on the item master, sales order, and purchase order. Drop shipments occur when you don’t have adequate stock to ship products to your customers, and have a supplier who can supply the product to your customer. A purchase order gets created with the delivery address equal to the customer’s address.
Item Master Setup:
There are two fields on the item master that must be filled in when you intend to utilize Ascent’s drop shipping functionality:
- Default Vendor -Since a purchase order is created as a result of the drop shipment process, this would be the vendor who you would send the purchase order to, and who would ship the product to your customer.
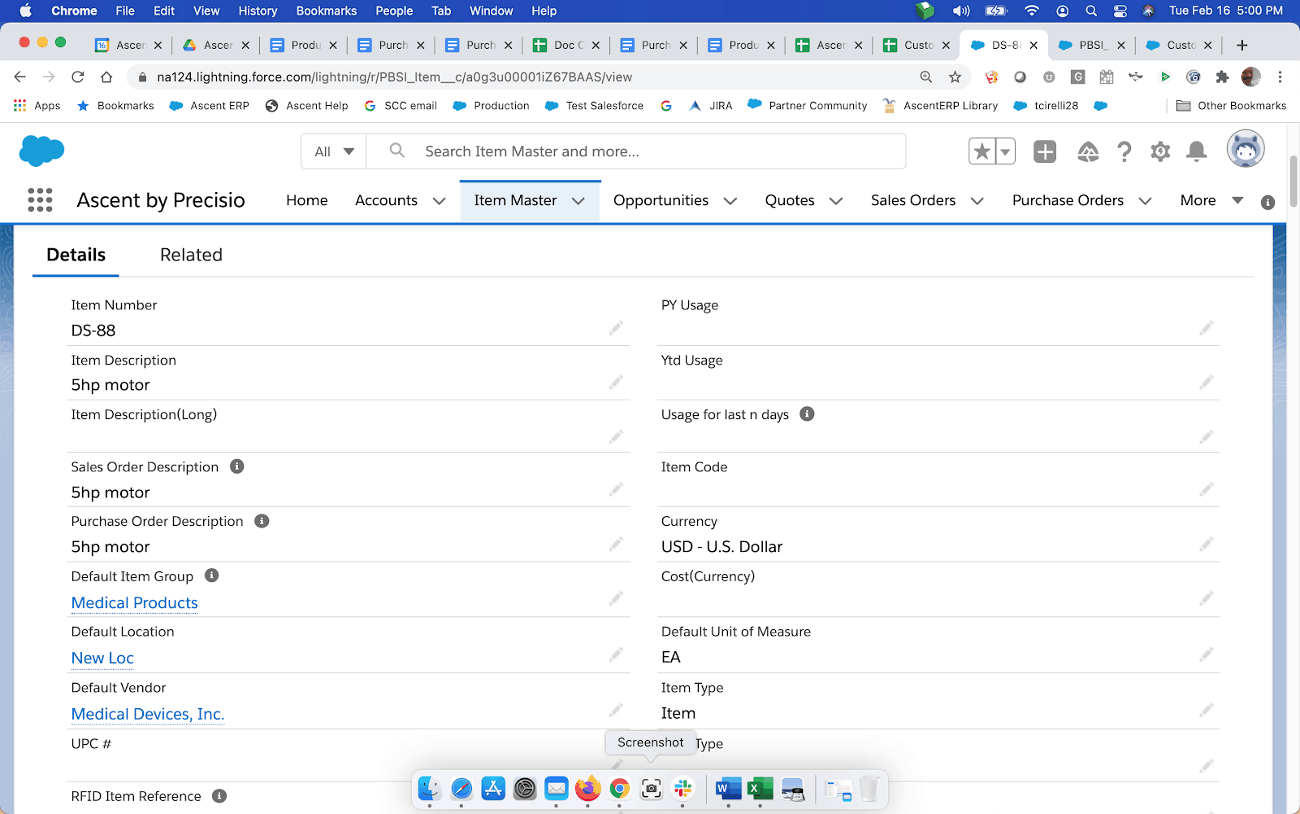
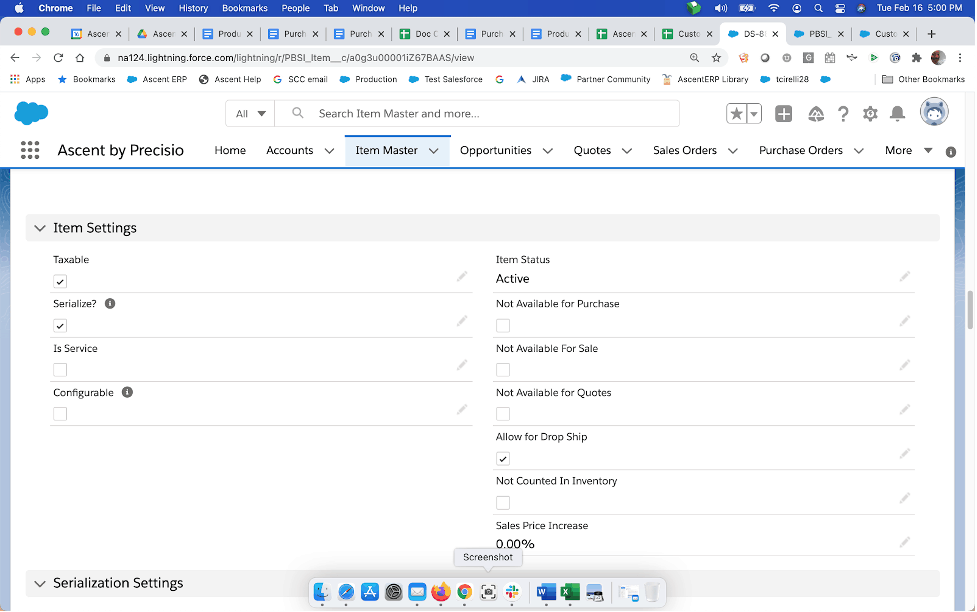
- Allow for Drop Ship – If this field is checked, then when you pack out a sales order, a button will appear in the packing process on the “Open Lines for this order” screen called Drop Ship. By clicking this button, you are initiating the purchase order creation process.
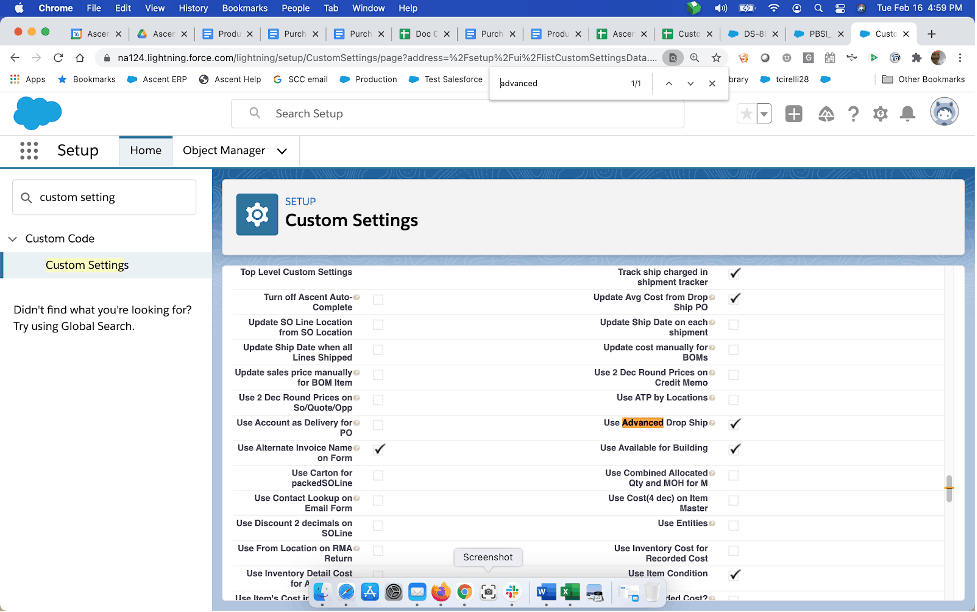
Custom Setting:
There is a custom setting called “Use Advanced Drop Ship”:
- If you choose this option, then you will be allowed to receive each drop ship line in the same manner as you would if receiving a non-drop shipment purchase order. You can record what inventory has been shipped by the vendor to your customer including serial numbers, if items are serialized. You can also record partial shipments on a single PO line, as well as receiving individual PO lines at different times. Movement lines showing inventory coming into your ownership and immediately leaving your ownership will be generated, allowing financial transactions to be generated, if you are using any of the financial package integrations offered by Ascent. Additionally, after the receipt is recorded, a packed sales order line is created on the originating sales order, indicating that material has been shipped to your client.
- If you do not choose this option, then the purchase order that is created cannot be partially received, and a single line cannot be individually received, whether fully or partially. The entire purchase order can only be “Completed”, meaning all material has been received by the client. The purchase order is marked “Complete”, and packed sales order lines are created for each PO line completed. No serial number recording is permitted.
Using Advanced Drop Ship gives you much more functionality and tracking:
Sales Order Creation:
Sales Order Header:
The sales order can be considered to be in two parts. One is the header, a single record, which consists of information pertinent to the entire order, like customer, address information, order date, and contact information, among other data. The other would be the sales order lines. There can be multiple sales order lines. Some of the lines may be eligible to be drop shipped, while others may not be eligible.
To create a sales order, you must click on the Sales Order tab. When you click on the “New” button, you will get this screen:
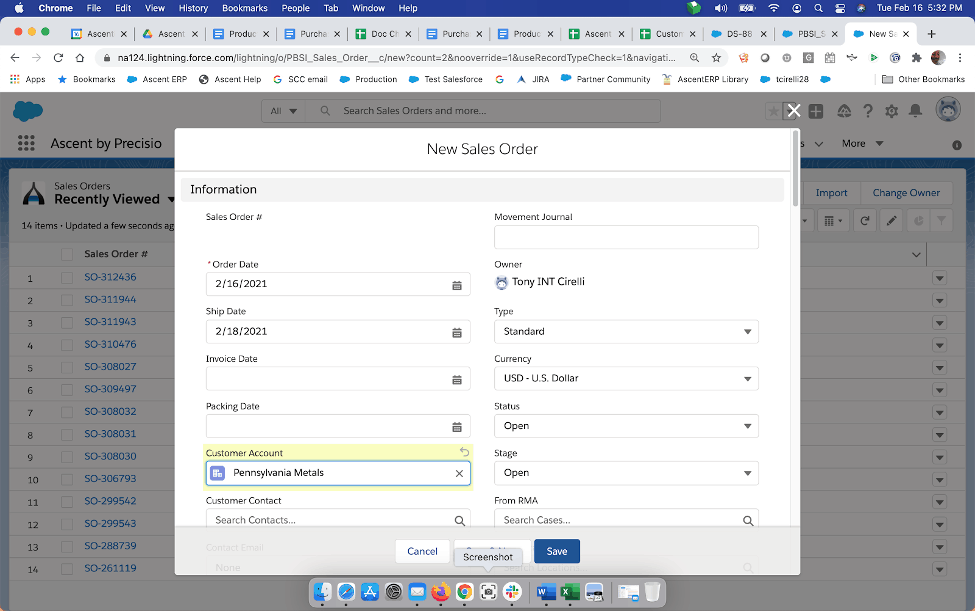
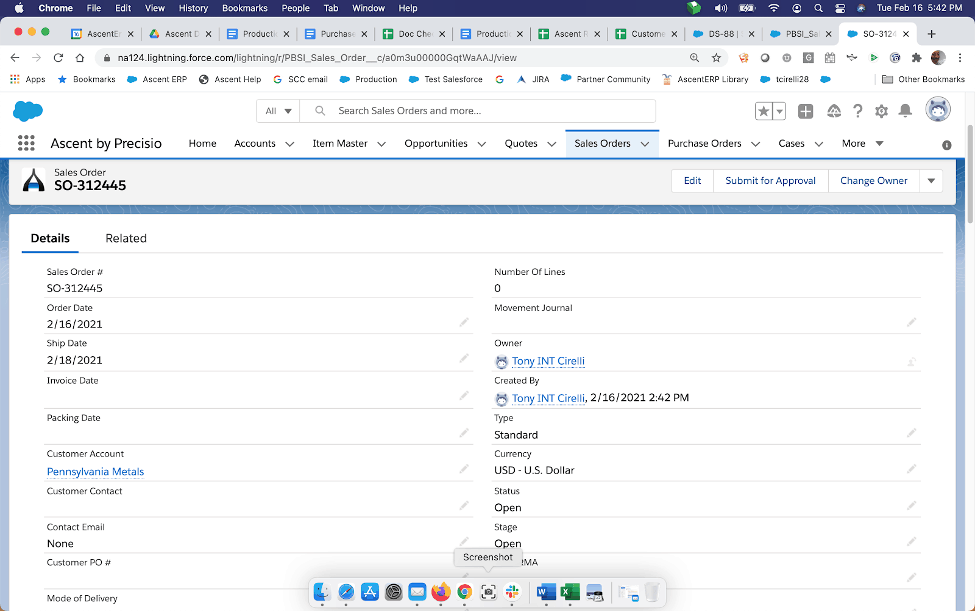
The only field which is required to enter is the Customer Account. When you are satisfied with the sales order header information, you can hit “Save” and the Sales Order number is assigned.
Sales Order Lines:
The sales order line creation will be discussed in greater detail in other documents, but for this document’s purpose, we’ll demonstrate a single sales order (SO) creation. Once a SO header has been created, you can scroll down to Sales Order Lines View and hit Add Lines by Item. Once the prompted line appears, you only have to select the item number and enter the Quantity Needed.
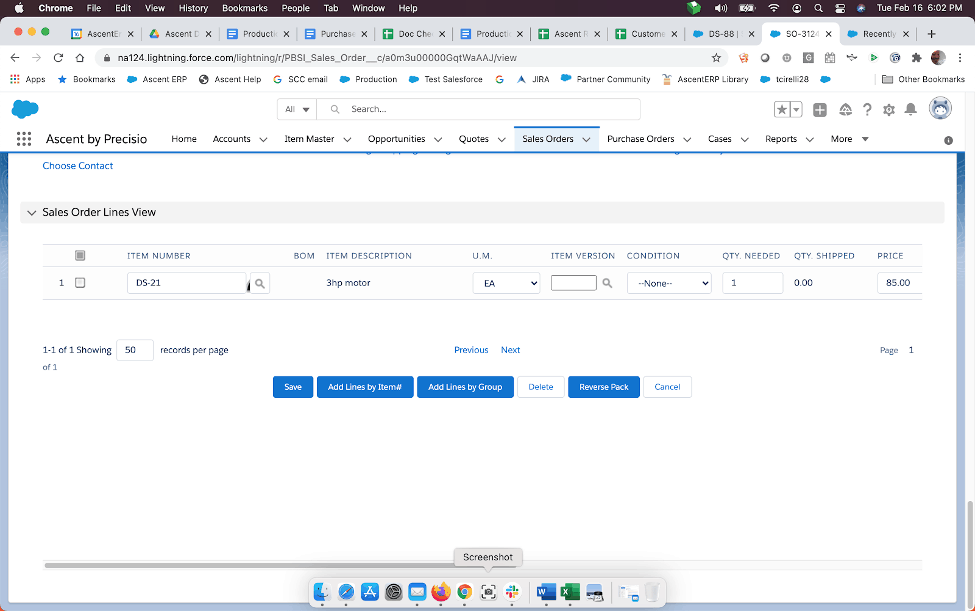
Once satisfied with the entry, hit “Save”. You now have a sales order ready to be drop shipped (assuming the item you chose is drop shippable).
Packing out the Sales Order to initiate the drop ship process when Use Advanced Drop Ship? is blank:
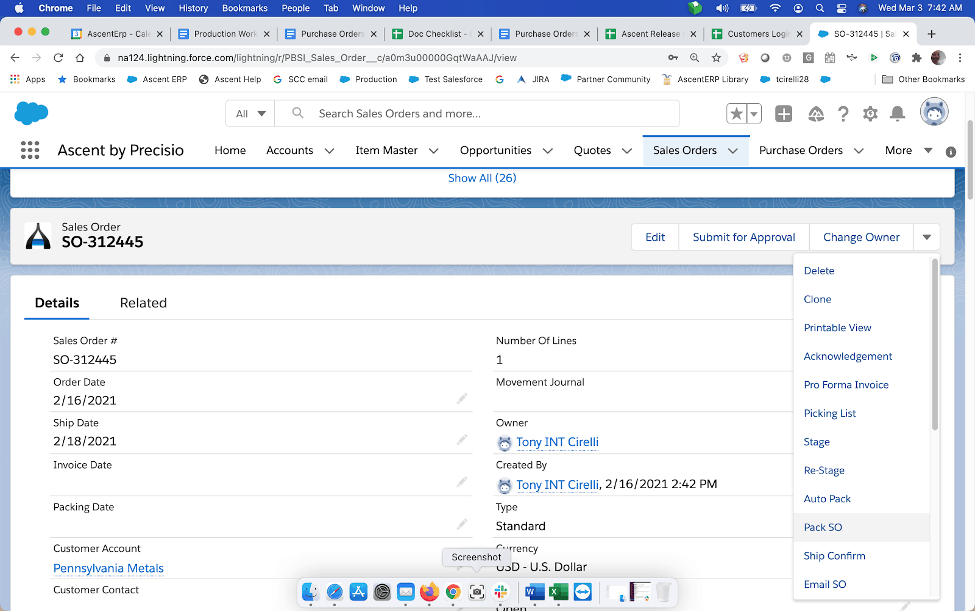
Once a sales order has been created, and you wish to ship material to the customer, you would execute the Pack SO option by clicking the down arrow next to “Change Owner” and then clicking Pack SO.
Important note: the custom setting Use Advanced Drop Ship? Is BLANK, meaning not activated.
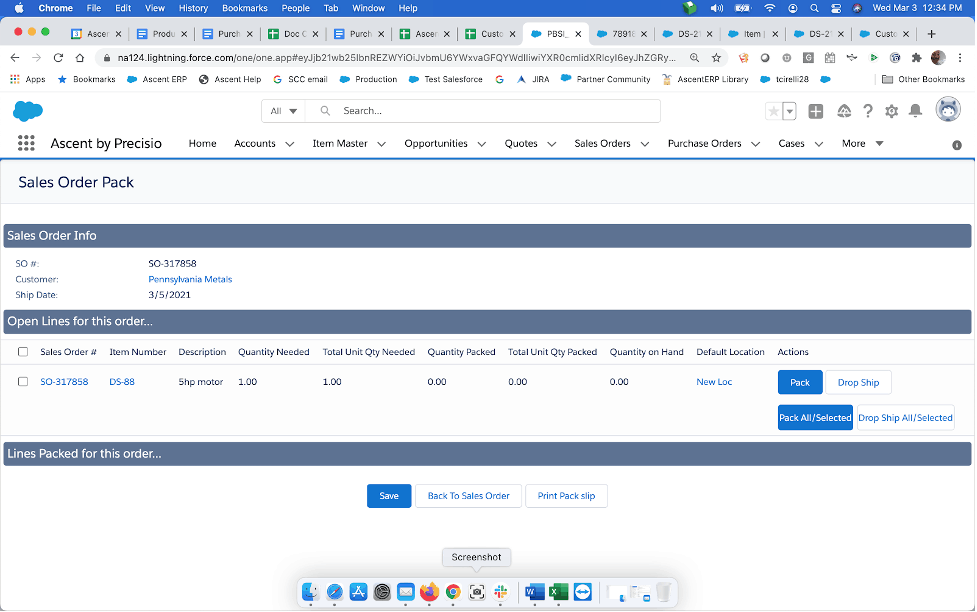
This screen will appear. You can see that the Quantity on Hand equals zero. However, because the item on the sales order line is eligible for drop shipping, an additional button appears next to the Pack button called Drop Ship.
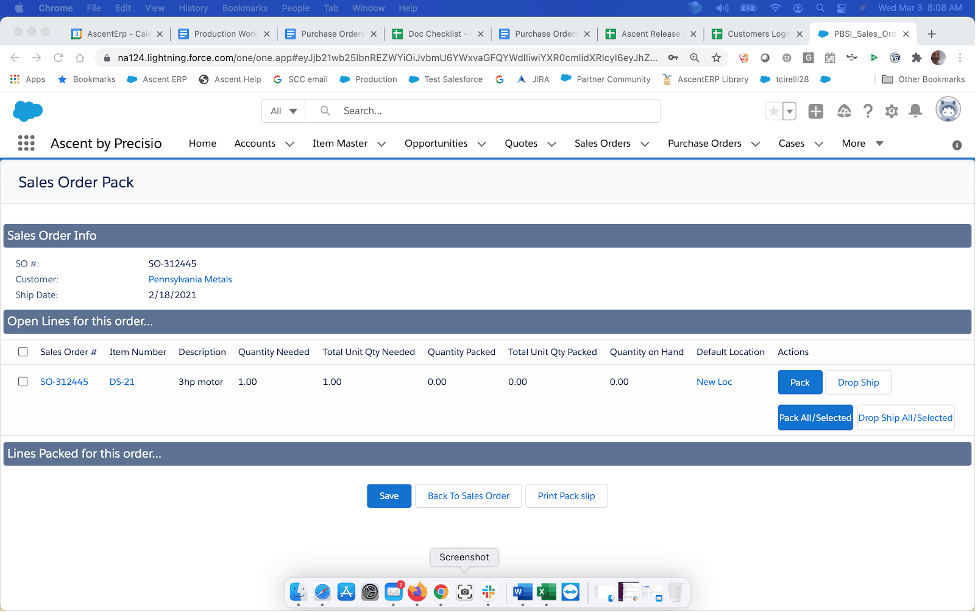
At this point, you can click on the Drop Ship button, or click the checkbox next to the Sales Order # and then click ‘Drop Ship All / Selected’. If you had multiple lines on the order that you wished to drop ship, you could either click the checkboxes next to the lines you wished to drop ship and then click ‘Drop Ship All / Selected’, or, if all the lines on the sales order were eligible to be drop shipped and you wish to drop ship all of them, click ‘Drop Ship All / Selected’, which will select all the lines for drop shipping.
For this example, we will click on the Drop Ship button on the sales order line:
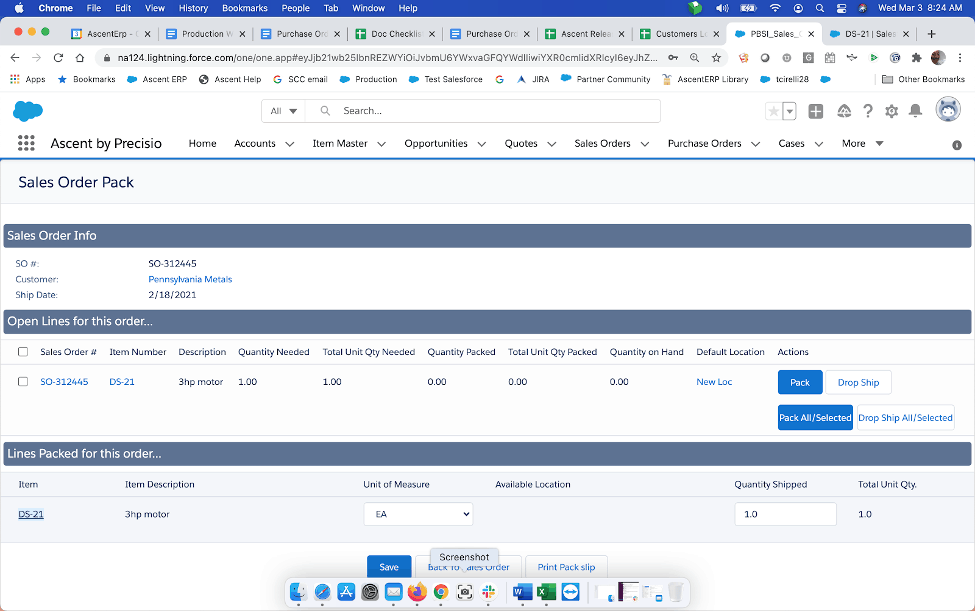
Notice that the Available Location field is blank. That is because this line is being prepared to be puto a drop ship PO. Once you click Save, this screen will appear:
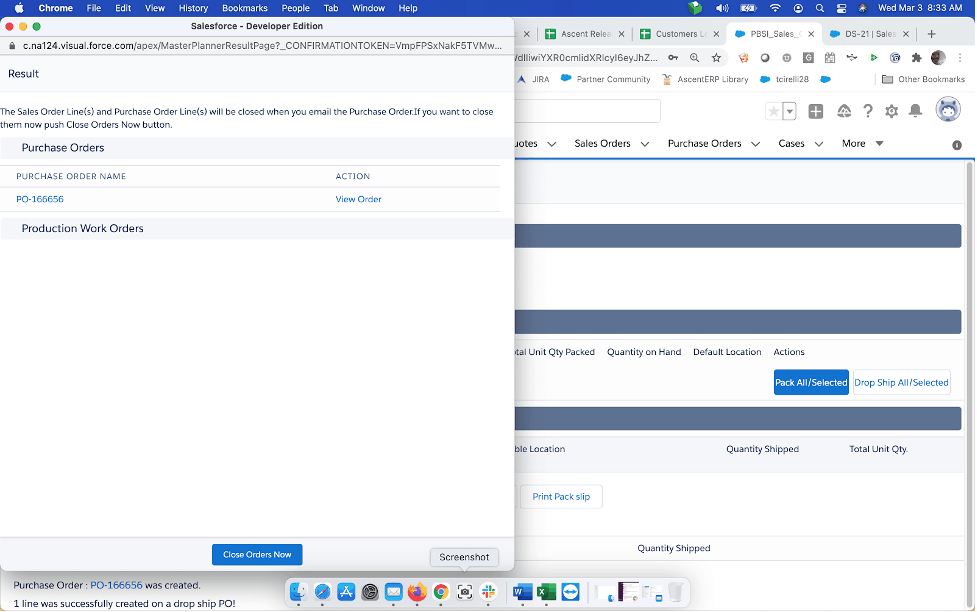
Since the custom setting at the time of performing this function is ‘Do Not Complete on Email PO’ is blank, the system is now telling you that if you email the purchase order, the PO will be completed and closed, indicating that the PO line will be closed and the SO Line will be closed. We will not close the order now.
This message appeared:
- Purchase Order : PO-166656 was created.
- 1 line was successfully created on a drop ship PO!
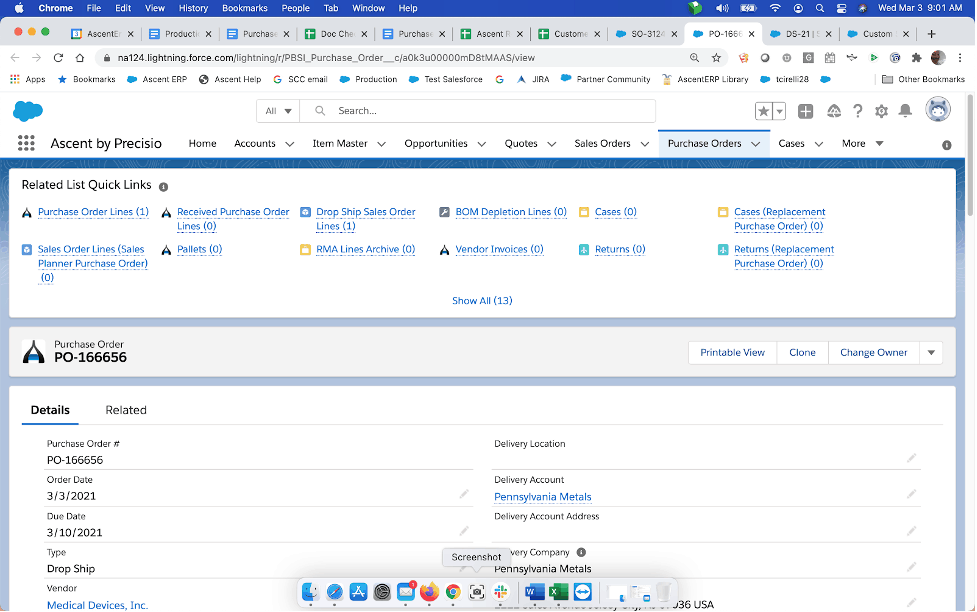
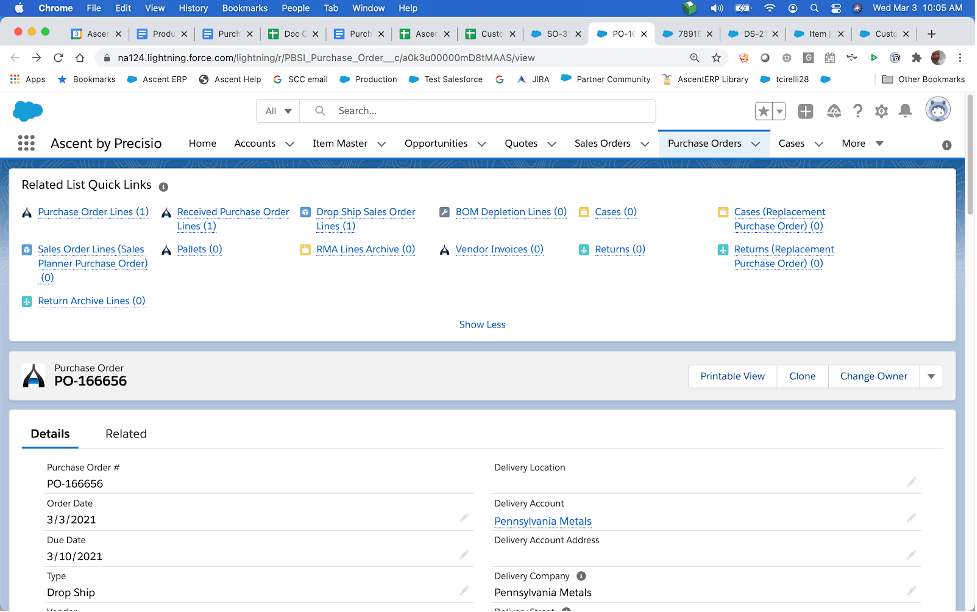
It indicates that a new PO was created. Here is a display of that PO. Notice the vendor – that is the default vendor on the item master for the item from the sales order. The Type of PO is Drop Ship. The Delivery Account and associated address is from the customer account on the sales order. Ascent indicates to the vendor to ship the material directly to the customer. The PO also contains the Drop Ship Sales Order number, SO-312445.

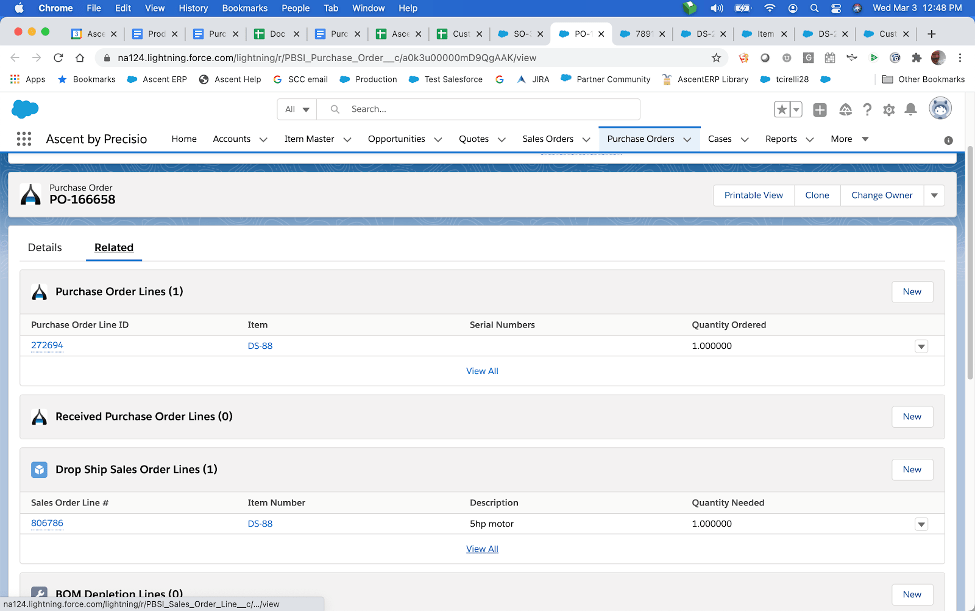
At the top of the PO display, you will see a related list for Drop Ship Sales Order Lines.
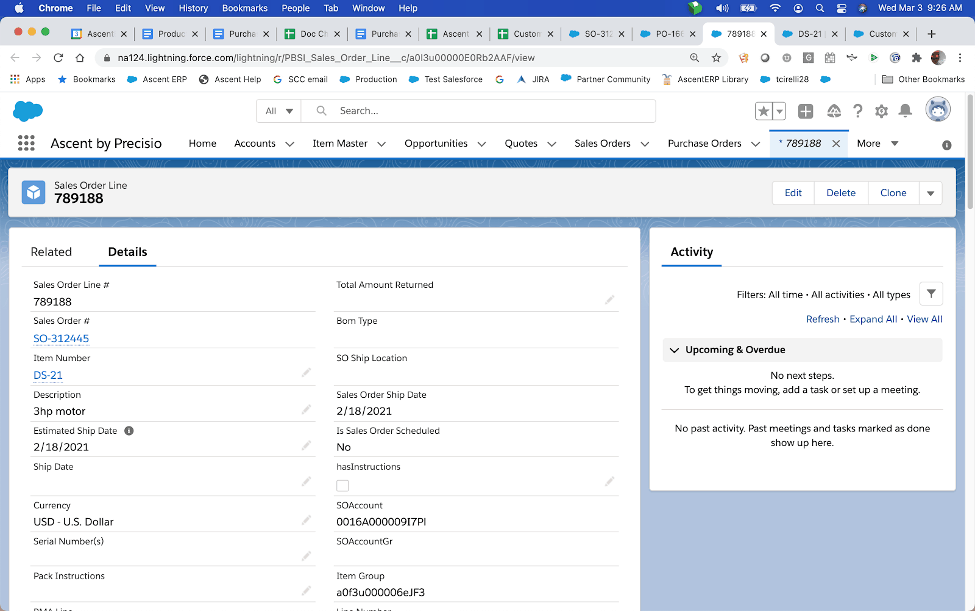
If you click on Related, and scroll down, you’ll see that a new record has been created called the Drop Ship Sales Order Line. It displays the Sales Order Line #.

If you right click on the Sales Order Line # and Open in New Tab, you will then see the details behind the sales order line. Notice that the Sales Order # is the one that initiated the drop ship process.
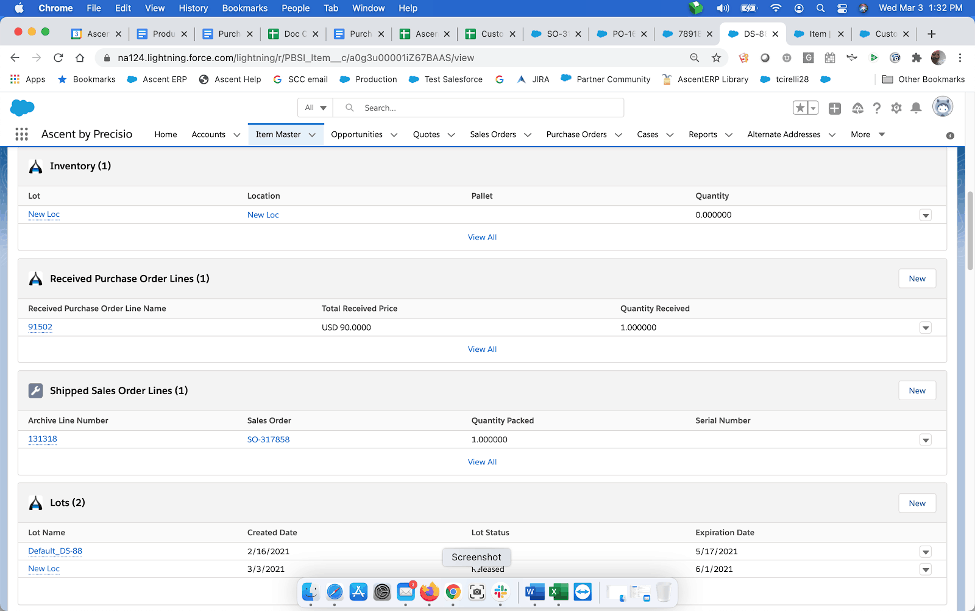
If we now look at the item master in question, we’ll see a number of related lists available for review:
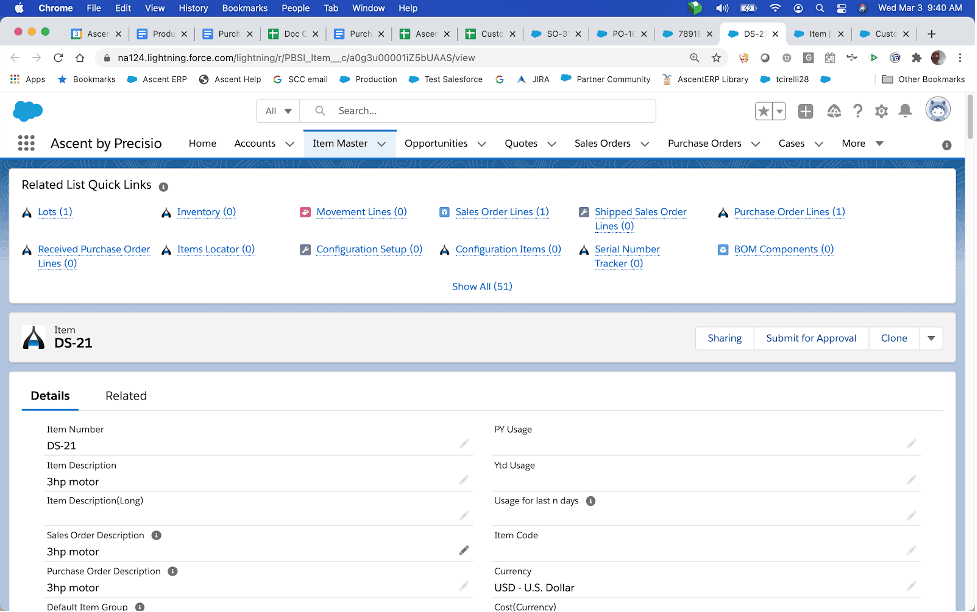
Since this is a brand new item created for this document, there are no inventory records, no item locator records, no serial number records, but there is a purchase order line (the drop ship PO line), and a sales order line (the one from the sales order we used to illustrate the drop ship process). There are also no movement lines yet for this item.
Since this drop ship purchase order was created with the custom setting Use Advanced Drop Ship? Set to blank, we have only one (1) option when we want to indicate that the item has been received by the client / shipped to the client by the vendor.
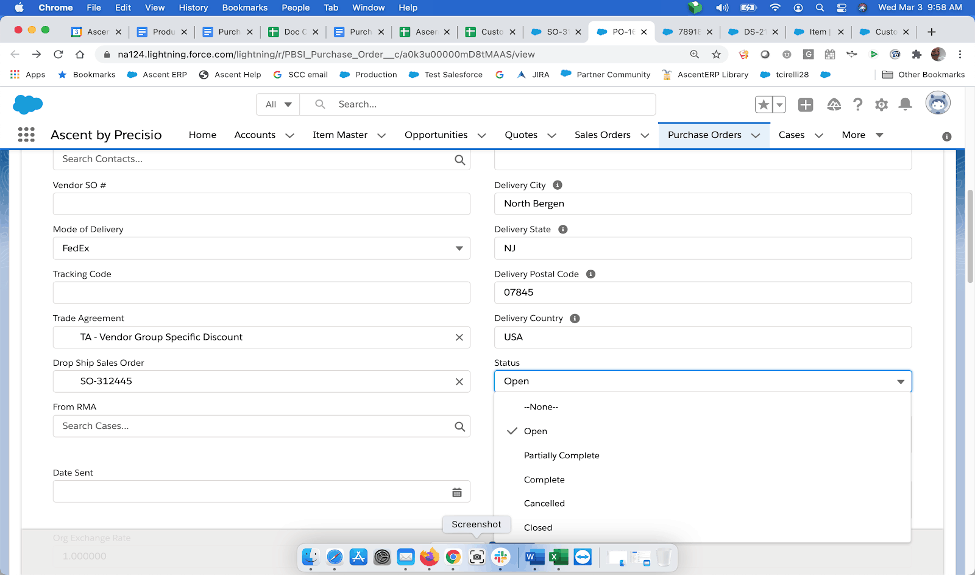
Let’s go to the purchase order. There is a field called Status. In order to record completion of this drop ship PO, you must select the Complete option. Then, hit Save.
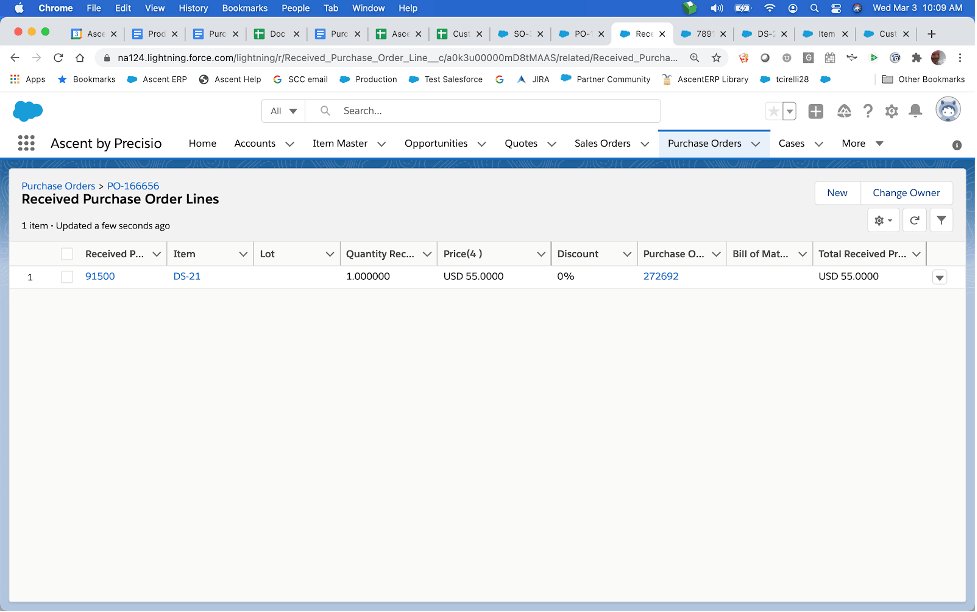
You’ll now see that a Received Purchase Order Line has been created:
Here is a related list record for Received Purchase Order Lines, showing Quantity Received of 1:
If we go to the Sales Order, we’ll see these related lists and associated values:
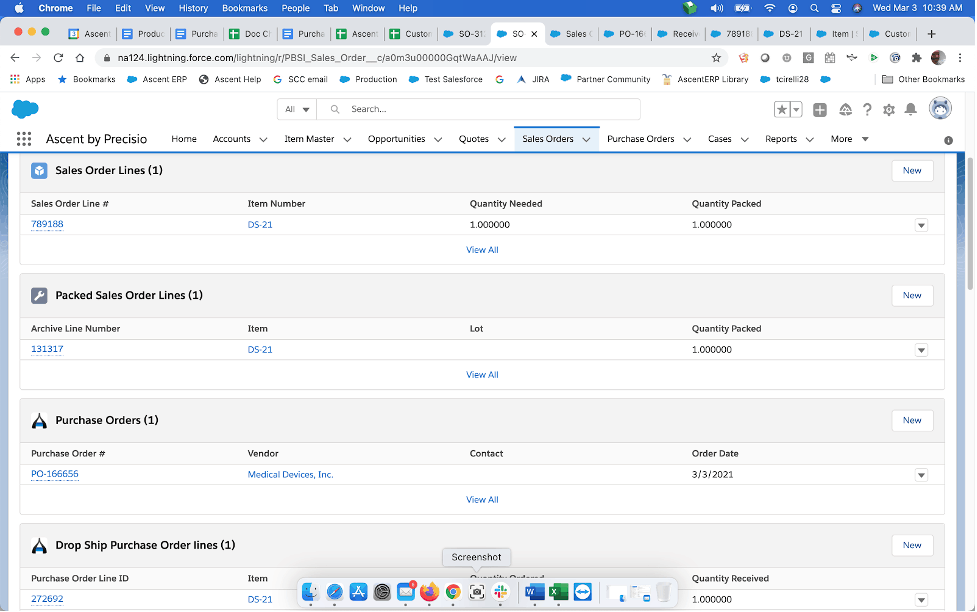
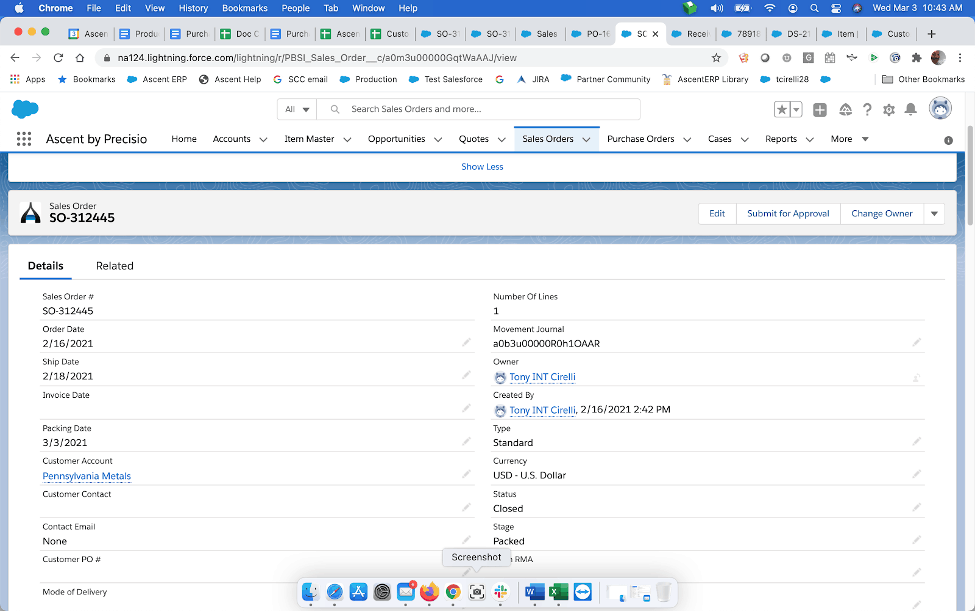
Sales Order Line shows Quantity Packed=1. Packed Sales Order Line shows Quantity Packed=1. Drop Ship Purchase Order Line shows Quantity Received=1. Sales Order shows Status=Closed, Stage=Packed.
Looking at the Item Master, and viewing the Related Lists, we see no Movement Lines (because no inventory was tracked when Use Advanced Drop Ship? = BLANK). Sales Order Lines show Quantity Packed = 1. Shipped Sales Order Lines show Quantity Packed = 1. Purchase Order Lines show Quantity Received = 1, and Received Purchase Order Lines show Quantity Received = 1.
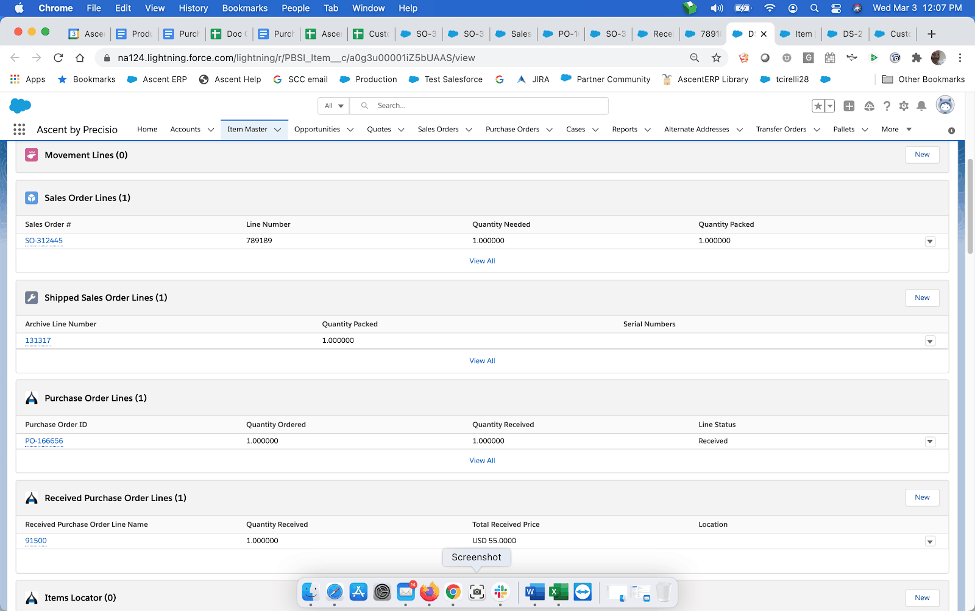
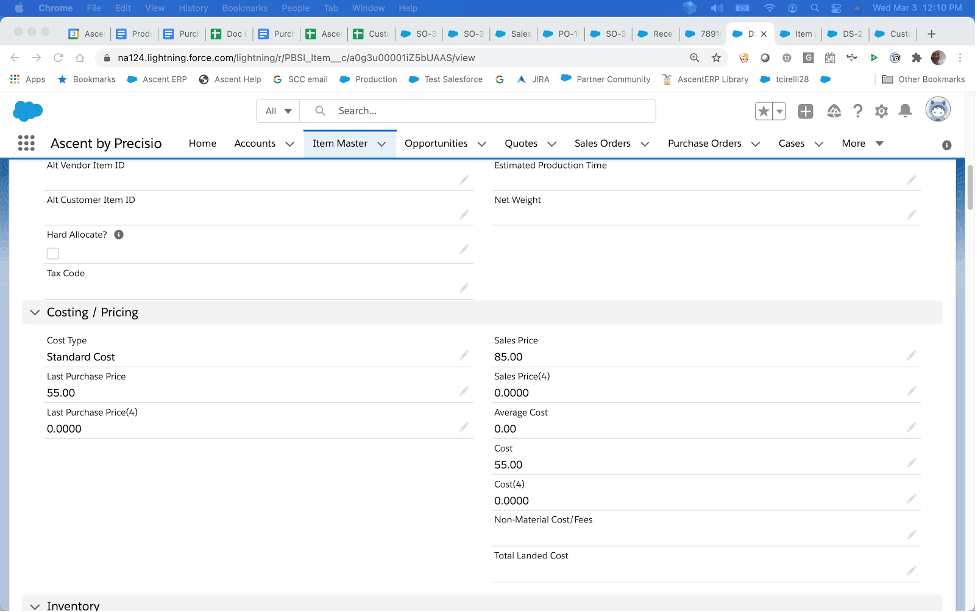
Looking at the Item Master, you also see that the Last Purchase Price is $55.00.
Packing out the Sales Order to initiate the drop ship process when Use Advanced Drop Ship? is TRUE, meaning it has been checked:
Once a sales order has been created, and you wish to ship material to the customer, you would execute the Pack SO option by clicking the down arrow next to “Change Owner” and then clicking Pack SO.
Important note: the custom setting Use Advanced Drop Ship? Is TRUE, or checked, meaning it is activated.

This screen will appear. You can see that the Quantity on Hand equals zero. However, because the item on the sales order line is eligible for drop shipping, an additional button appears next to the Pack button called Drop Ship.
At this point, you can click on the Drop Ship button, or click the checkbox next to the Sales Order # and then click ‘Drop Ship All / Selected’. If you had multiple lines on the order that you wished to drop ship, you could either click the checkboxes next to the lines you wished to drop ship and then click ‘Drop Ship All / Selected’, or, if all the lines on the sales order were eligible to be drop shipped and you wish to drop ship all of them, just click ‘Drop Ship All / Selected’, which will select all the lines for drop shipping.
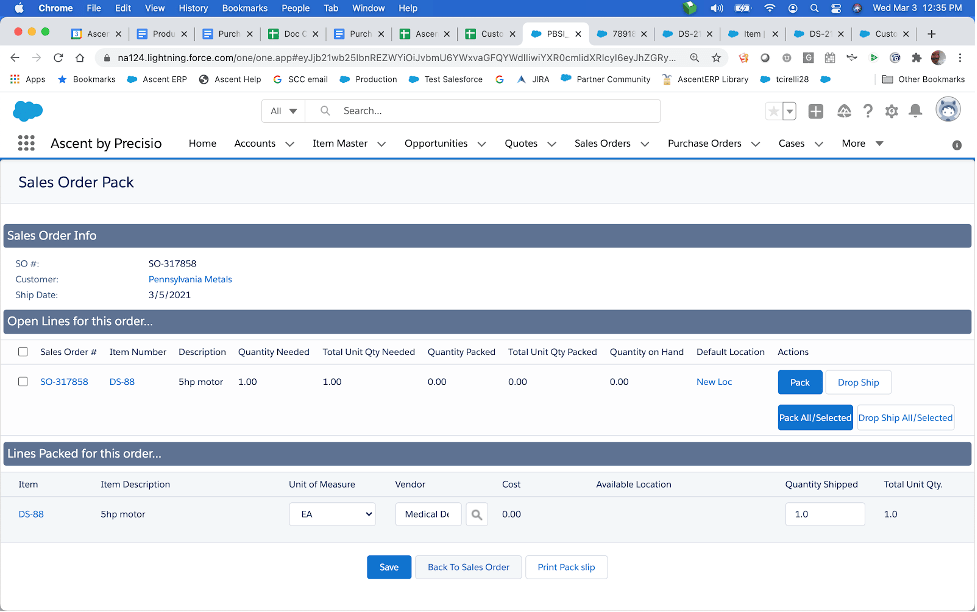
Notice that the Available Location field is blank. That is because this line is being prepared to be put on a drop ship PO. Also, the Default Vendor from the Item Master is displayed. Optionally, you can change this value. Once you click Save, this screen will appear:
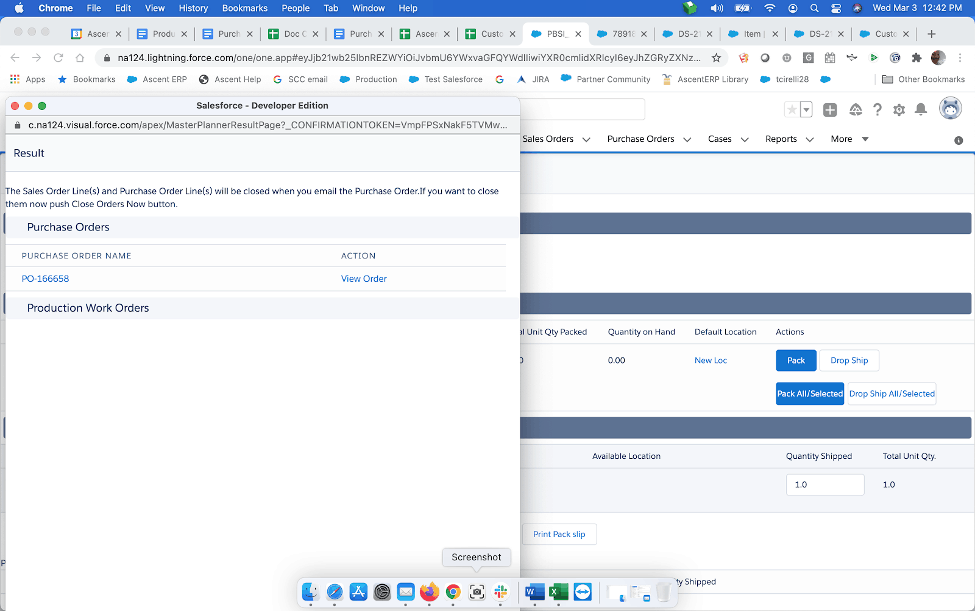
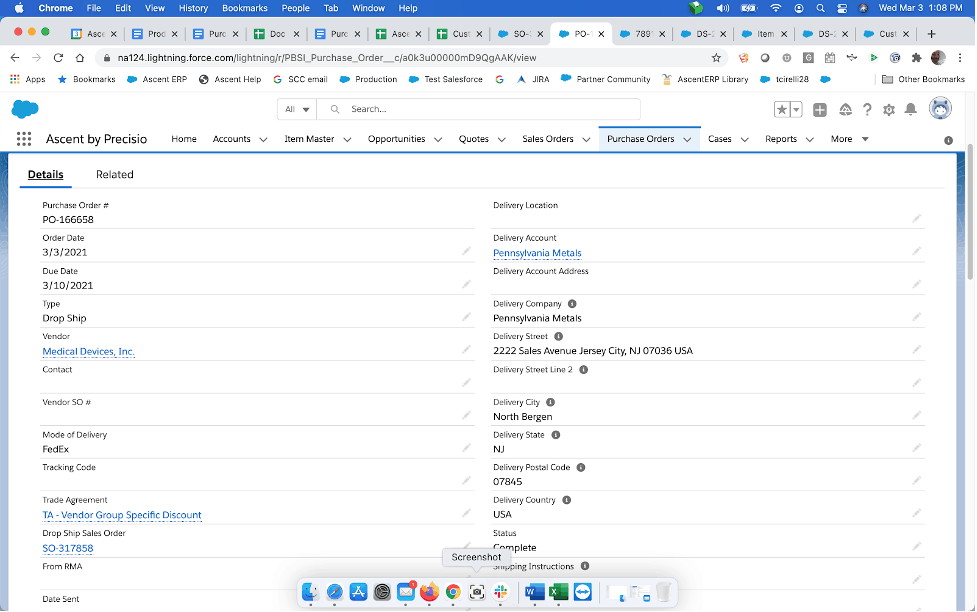
Your newly created PO is PO-166658. Here are the related lists for this new PO:
The PO header looks like this:
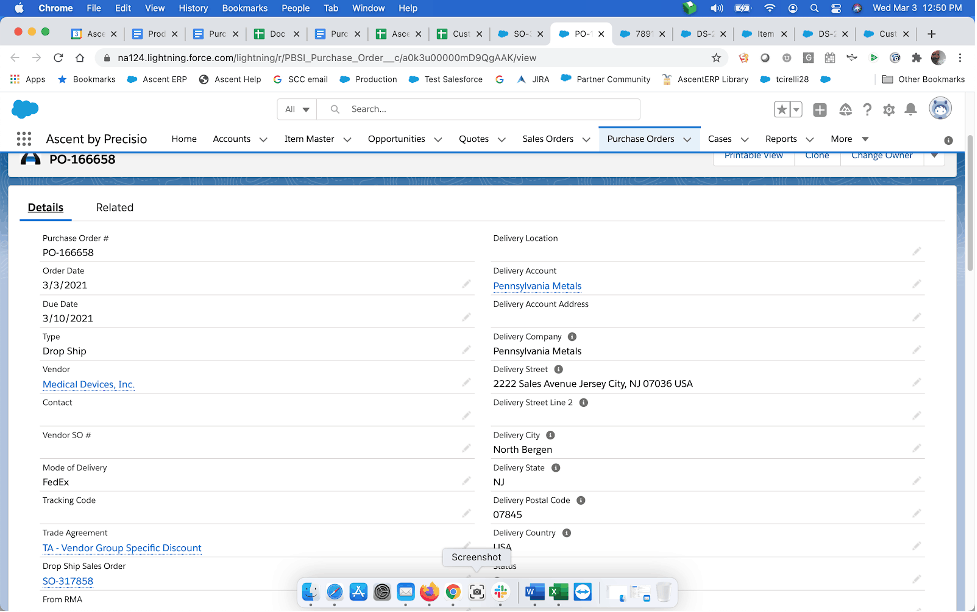
The Delivery Account and associated address comes from the Sales Order account. The Drop Ship Sales Order number also appears.
Since the custom setting Use Advanced Drop Ship? has been activated, the process to record the shipment receipt of material differs from when this setting is NOT activated. You would perform the same process as if you were receiving a standard PO. Next to the Change Owner button is a down arrow, which when clicked, reveals some options.
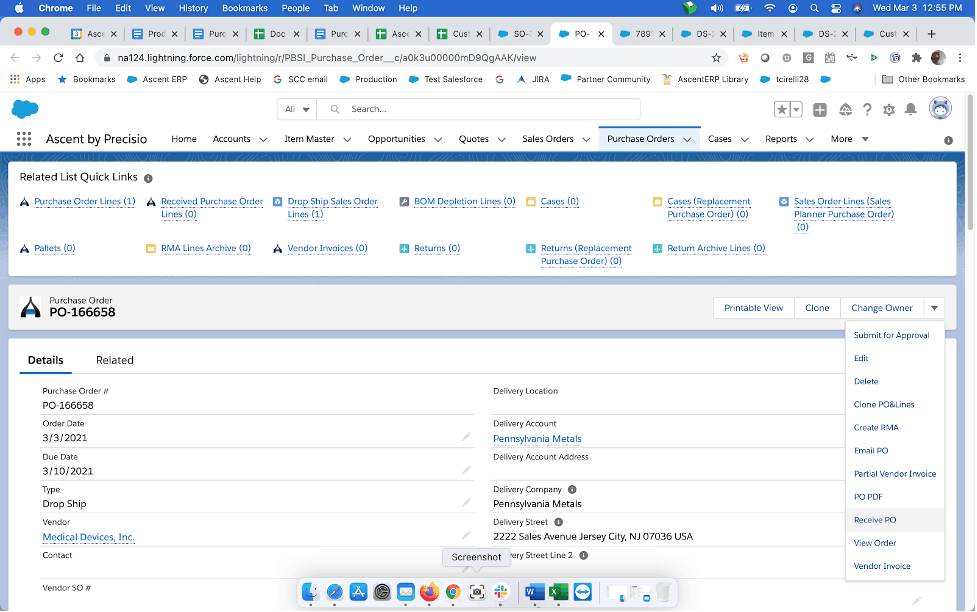
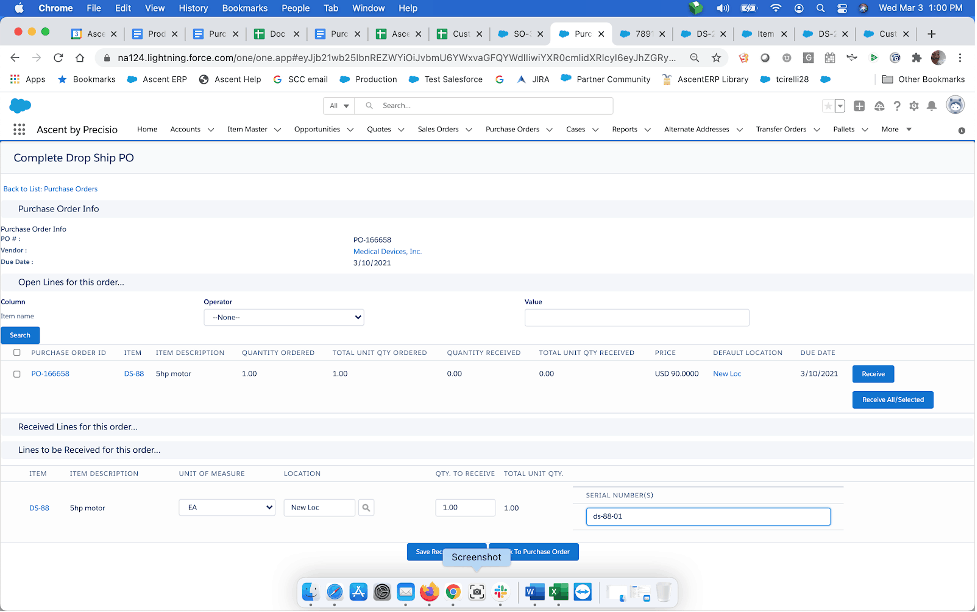
Click the Receive PO option, and this screen will appear:
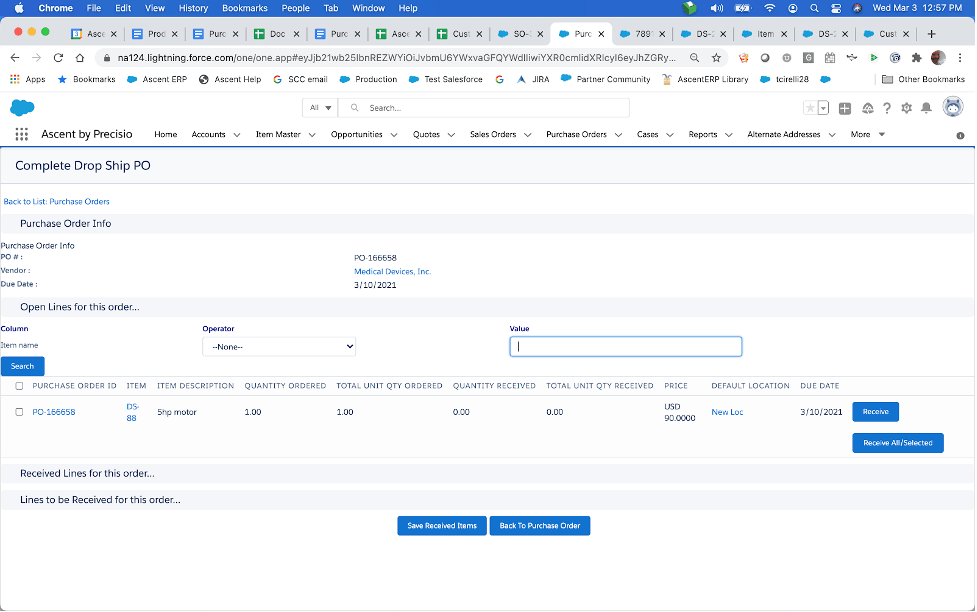
Simply hit Receive on the PO Line, and you will see the Lines to be Received for this order. The Default Location from the Item Master appears, Qty to Receive (which can be modified if you are doing a partial receipt), and since this is a serialized item, enter the serial#. Then hit Save Receive Items:
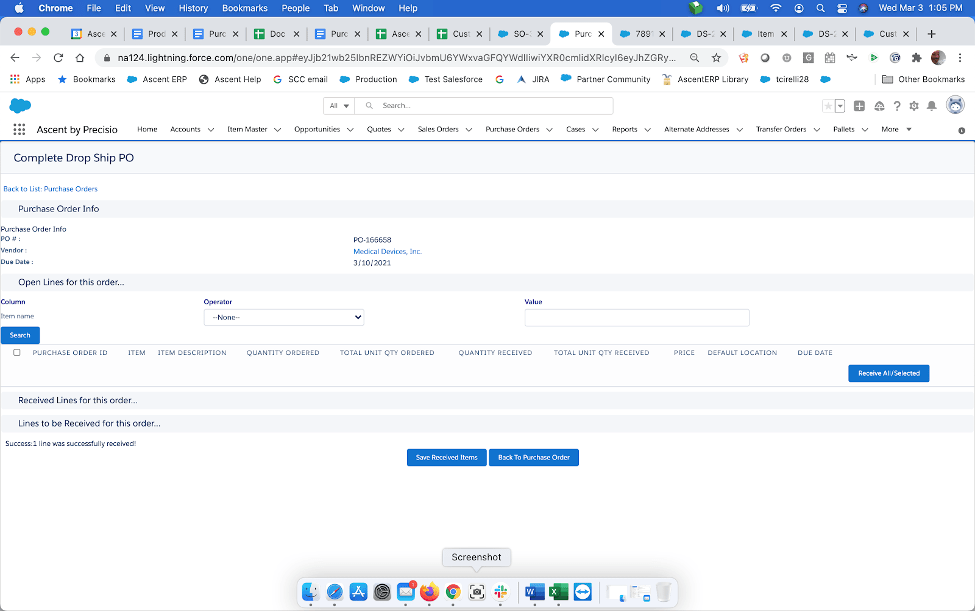
The screen is then cleared, indicating that this item has been received.
If you click Back to Purchase Order, you’ll see these Related Lists, which indicate receiving is complete.
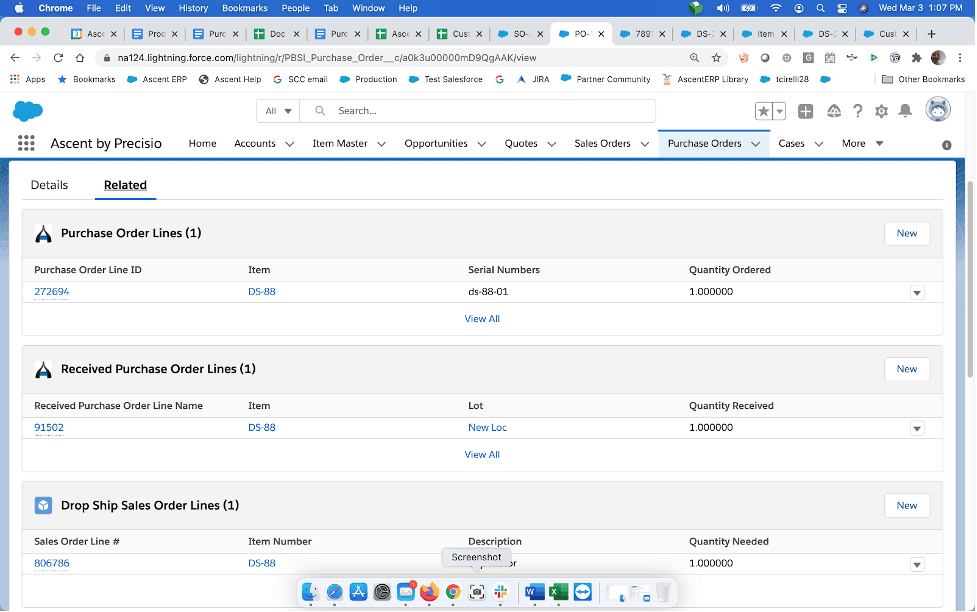
The PO is now complete.
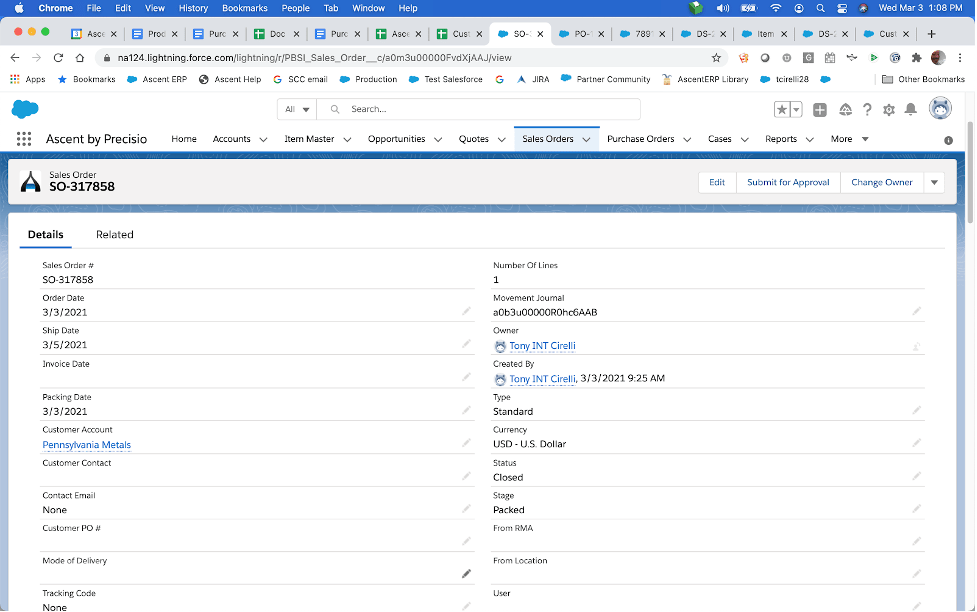
The Sales Order is now Closed and Packed:
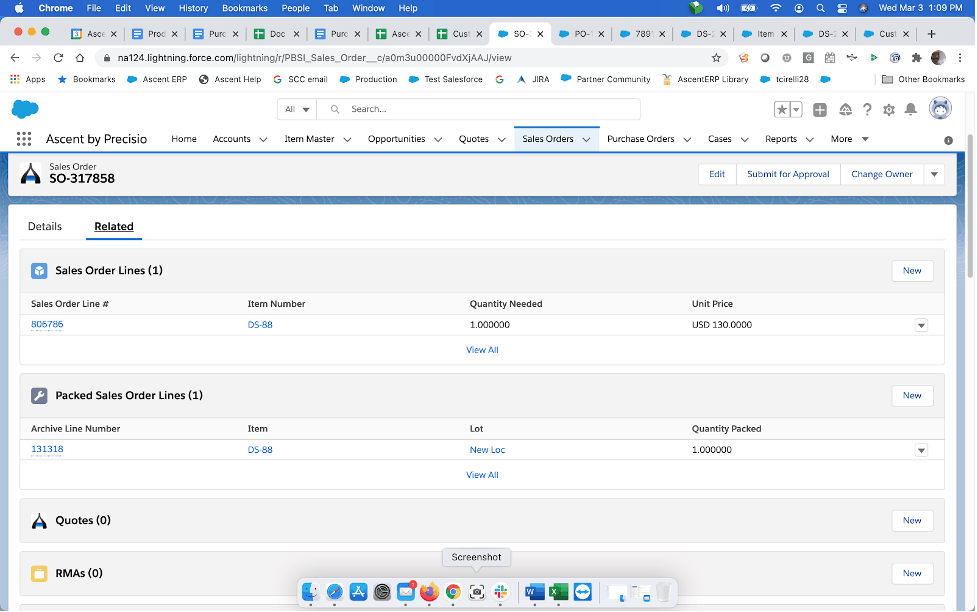
The related lists on the Sales order show that the SO Line is fully received and the Packed Sales Order Line has been created.
Not only is the process to record receipt of material at the customer site different, but the effect on the Item Master is different. Item History shows that the Receive PO process puts the quantity into inventory (Original Value = 0, New Value = 1) and a millisecond later, removes the quantity from inventory (Original Value = 1, New Value = 0). In between, the Last Purchase Price was recorded. You can view the two movement lines, one which is the Goods Receipt for Purchase Order (puts the quantity into inventory) and the second one is the Goods Issue for Sale – Stock Item (takes the quantity out of inventory). Since we are using Advanced Drop Ship, a serial number record is also created, however, since it now resides at the client site, Is In Inventory = No, and this record also indicates the client to which it was shipped.
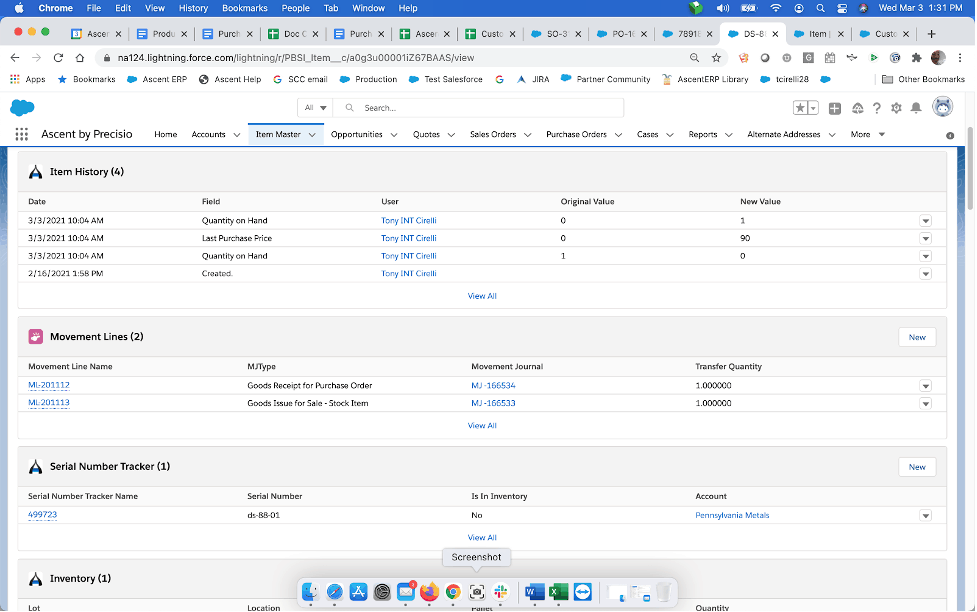
Other related list lines show that an Inventory record was created, however, there is no quantity in inventory. The Received Purchase Order Lines shows a Quantity Received = 1. A new Shipped Sales Order Line record is created, and an additional Lot record is created, this for the Default Location, since this process moves inventory in and out of the Default Location in order to record the shipment.