Production Work Order – Complete PWO
Overview and Process
To access the Complete PWO function, click on the down arrow next to the “Clone” button to expose multiple options. You would click “Complete PWO”. Please note that this will work for those PWOs that are not allocated.

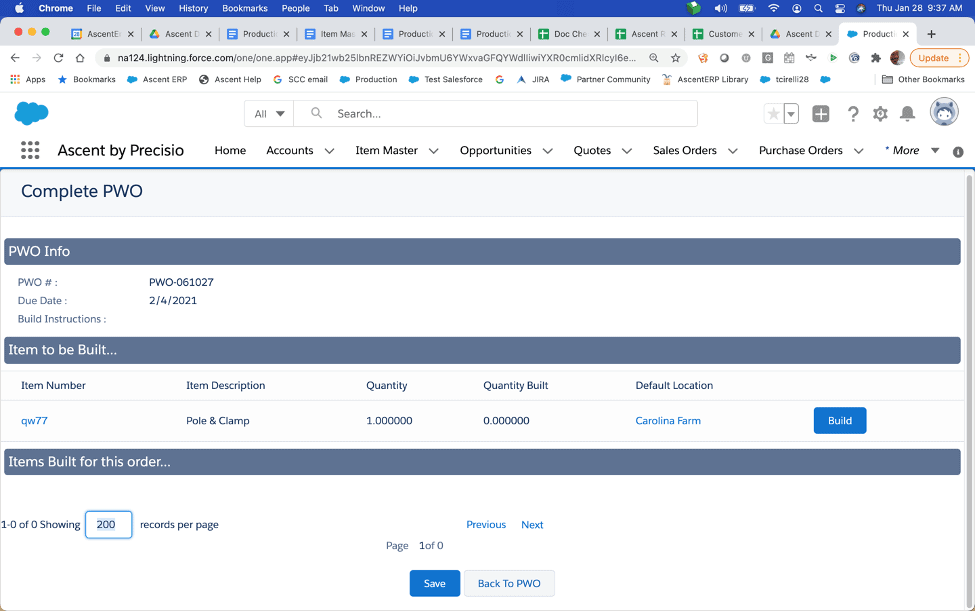
Here is the Complete PWO screen. It will display the PWO#, Due Date, any Build Instructions, and the Item to be Built, which then shows the Item Number, Item Description, Quantity, Quantity Built, and Default Location. The Default Location comes from the item master object.
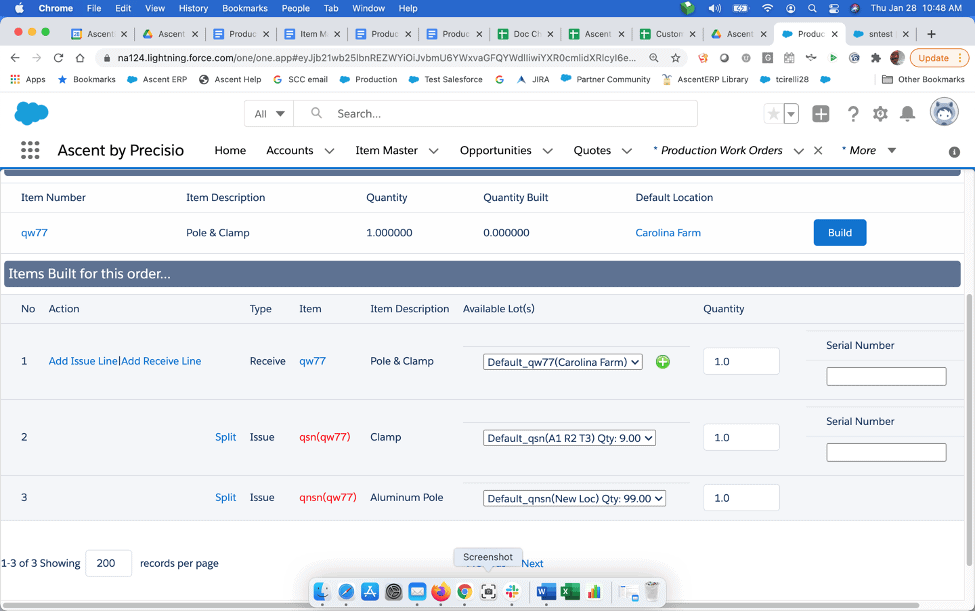
To complete a quantity, click on the “Build” button on the Items to be Built line:
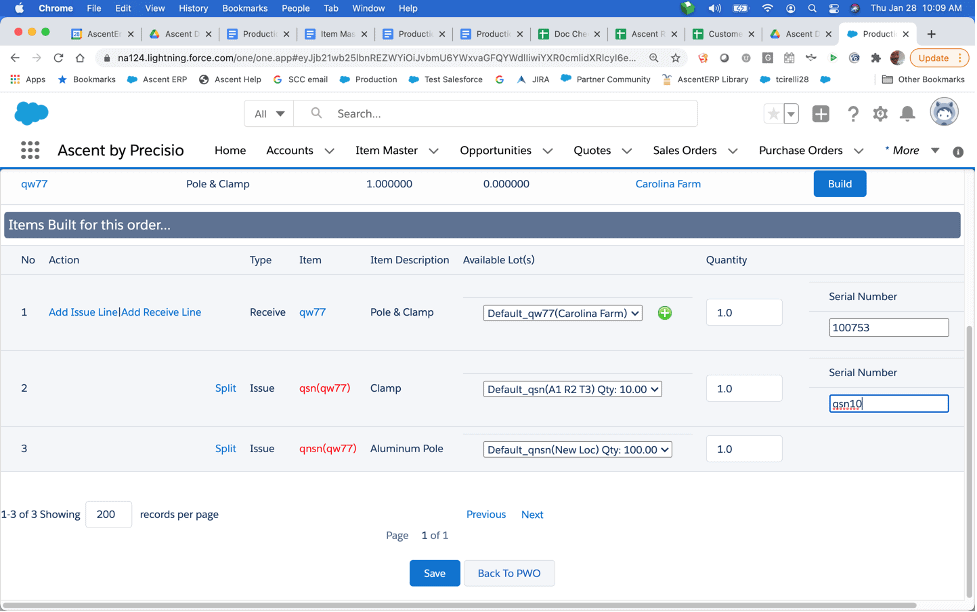
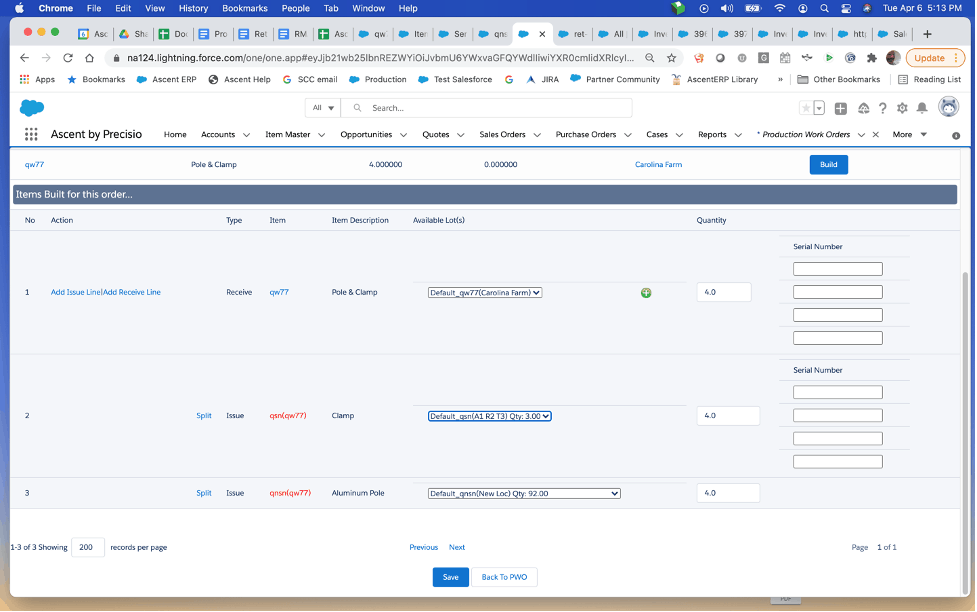
This screen shows the item being built, the description, what lots are available for the completed quantity to be sent to (or, by clicking on the green circle with the plus sign inside, and create a new lot), the Quantity to complete, and if serialized, the serial number(s) completed. In addition, any components that are to be consumed by this build are referenced, along with what available lot(s) can be deducted from inventory. If a component is serialized, those being consumed must be referenced here.
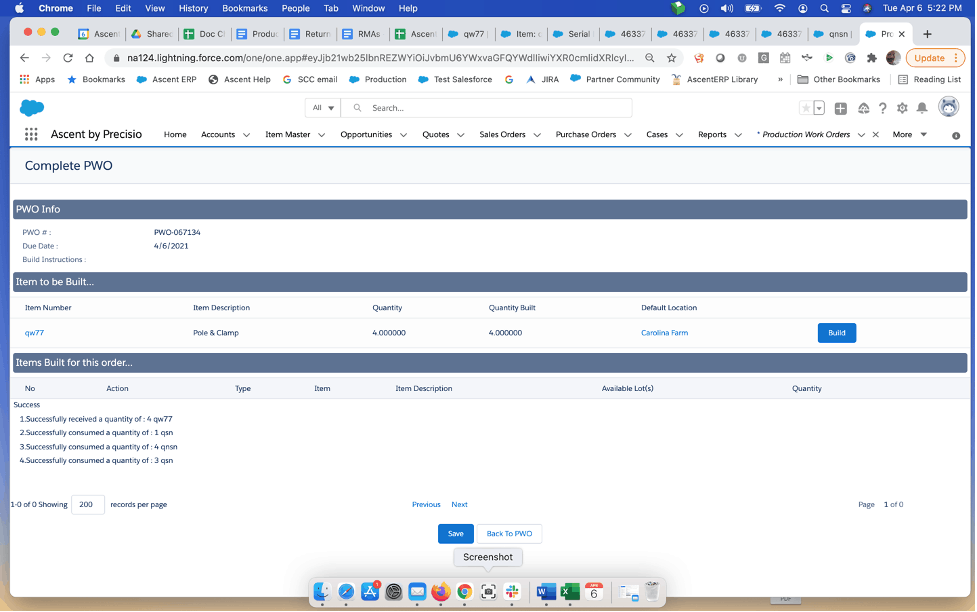
Once you hit Save, this screen will confirm the activity performed:
Ascent receives the quantity built into inventory and consumes the quantities deducted for the components from inventory.
An additional feature of Complete PWO is the ability to add an additional component to the PWO’s BOM Depletion Lines, basically creating a custom BOM for this PWO. To do this, click the Add Issue Line, and then select the item to be additionally consumed, the quantity, select the location, and enter the serial number.
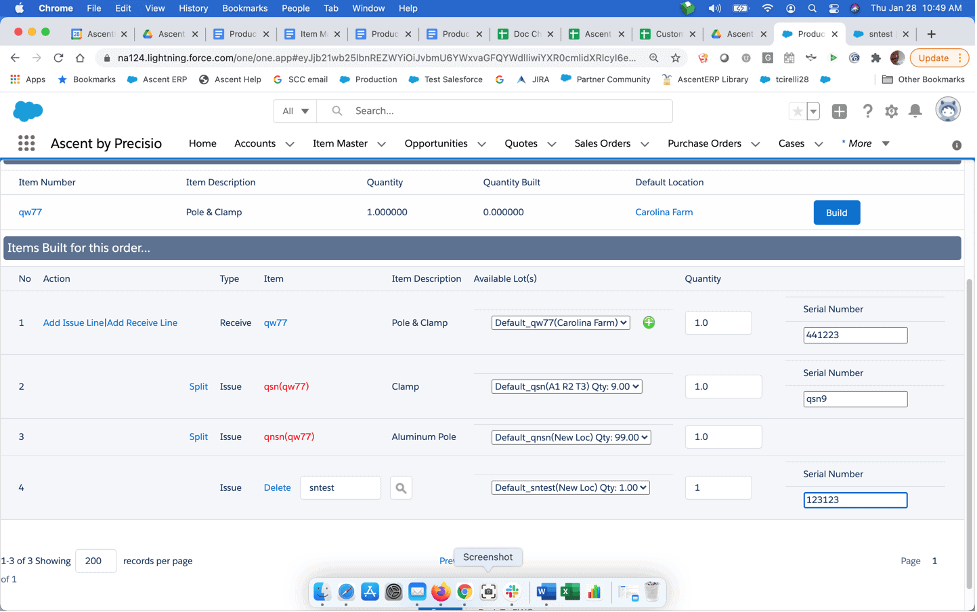
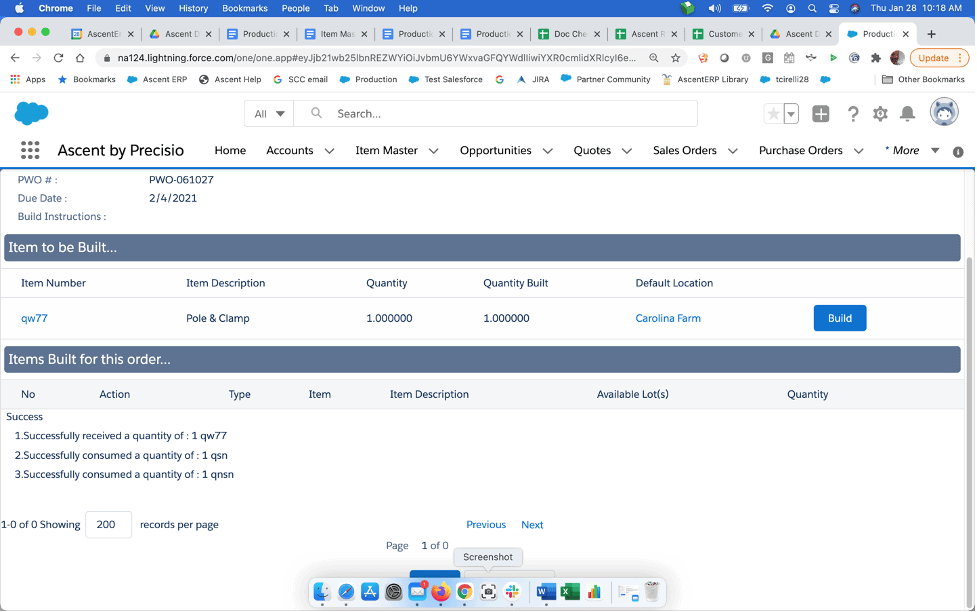
After hitting save, you will see the confirmation screen:

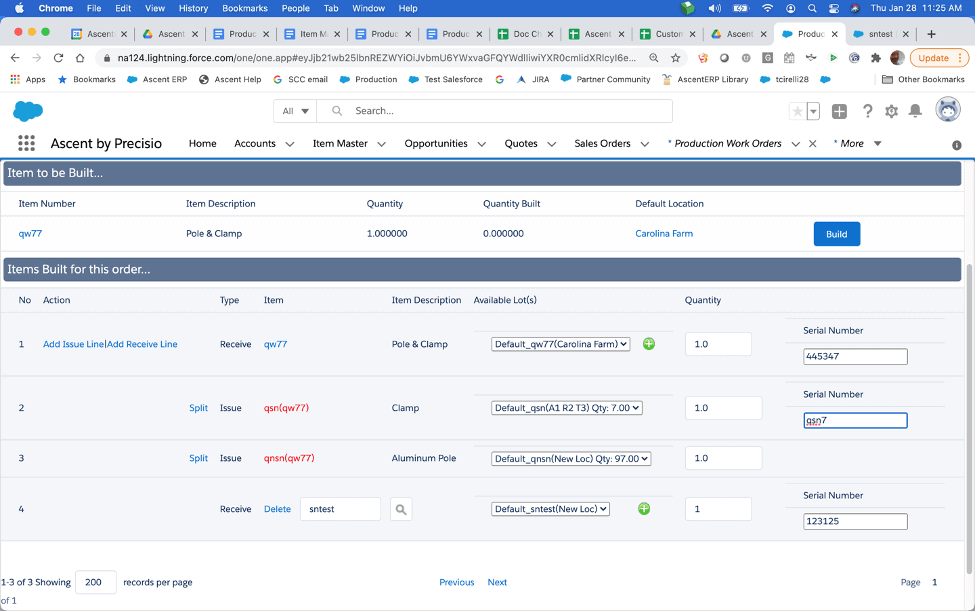
Similarly, you can add an additional receiving line to the Complete PWO, to account for a co- or by-product, which would not only put the BOM item in inventory, but the additional “Receive” item(s).
Using “Split” process on Complete PWO – Split is used when you don’t have adequate inventory in one lot/location, and must pull from multiple lot/locations. Our example PWO:
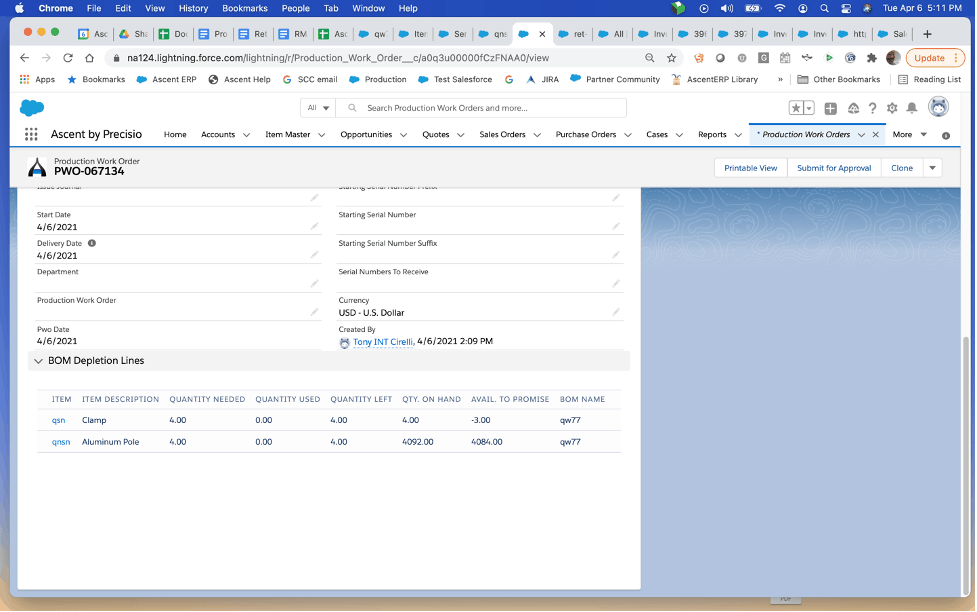
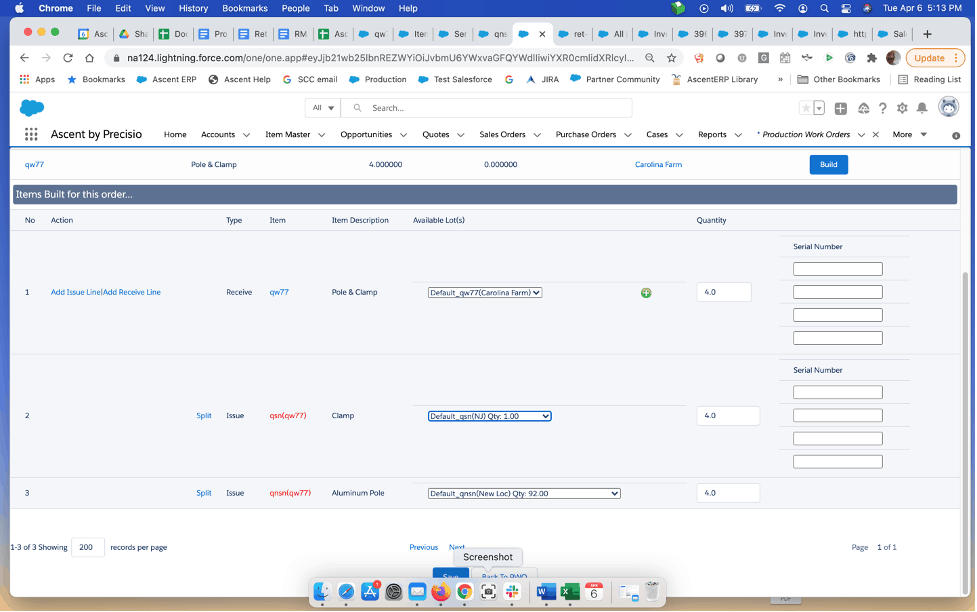
Now, let’s select Complete PWO, then Build, and see what inventory we have – 3 in loc A1 R2 R3 and 1 in NJ, which is illustrated below by selecting different Available Lot(s):
To accomplish the split, select the Split button next to item qsn Clamp:
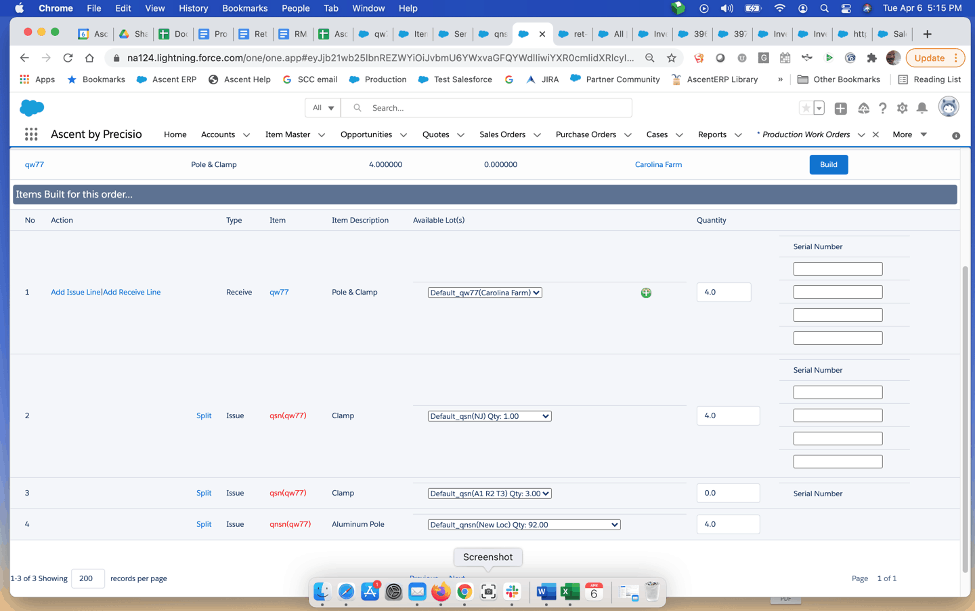
Now adjust the quantities and enter serial numbers to make everything work properly:
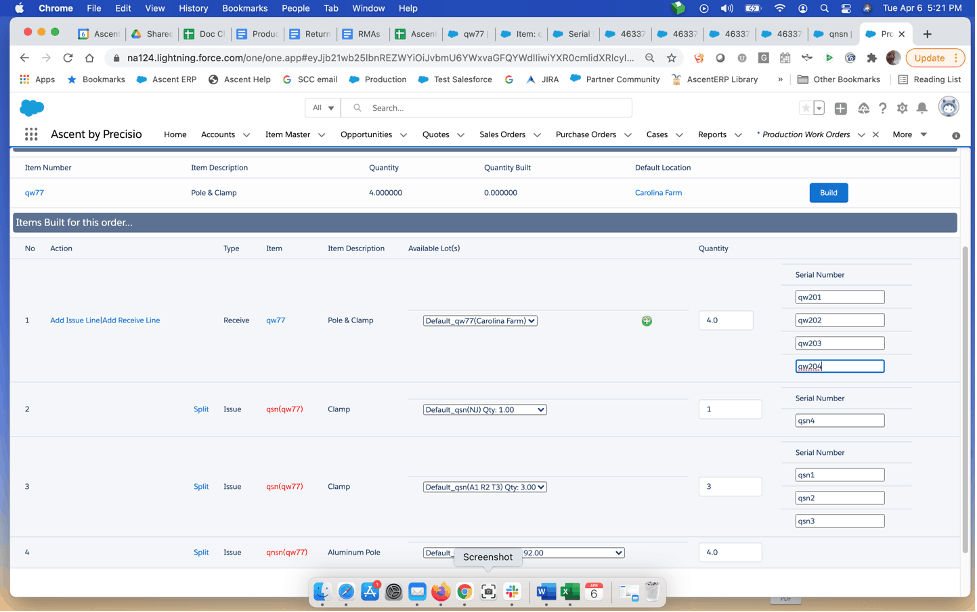
After hitting Save, inventory will be deducted from two different locations for one of the components.